Ecotorest
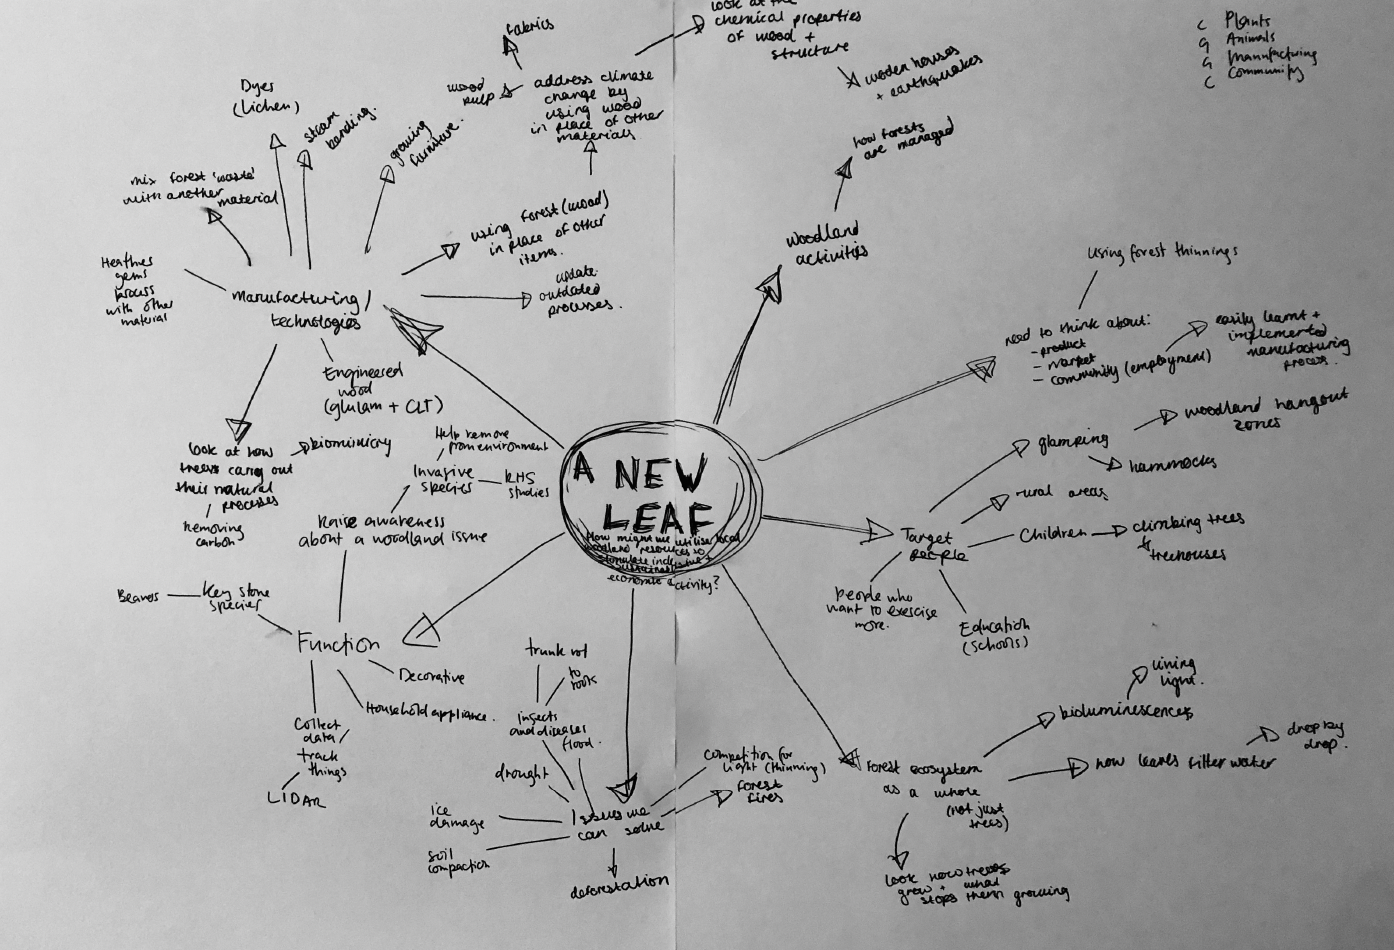
Response to the RSA brief: ‘A New Leaf - how we might utilise local woodland resources to stimulate inclusive and sustainable economic activity.’
Our solution was to design 3D printed camping pods made from timber industry waste to educate and engage people with local woodlands and emerging technology. We designed the whole system, created a business model, tested the material and built a scaled down working 3D printer prototype.
Timeline
2.5 months (January to March 2021)
Group members
Gabriella + myself
Software
SketchUp, InDesign, Photoshop, Fusion 360, Illustrator, Adobe XD, 3D printing coder?
Skills
Teamwork, rapid prototyping, coding, sustainable design, system design, electronics, CAD, 3D printing, material experimentation, UX/UI design, branding + logo design

Brief + Research

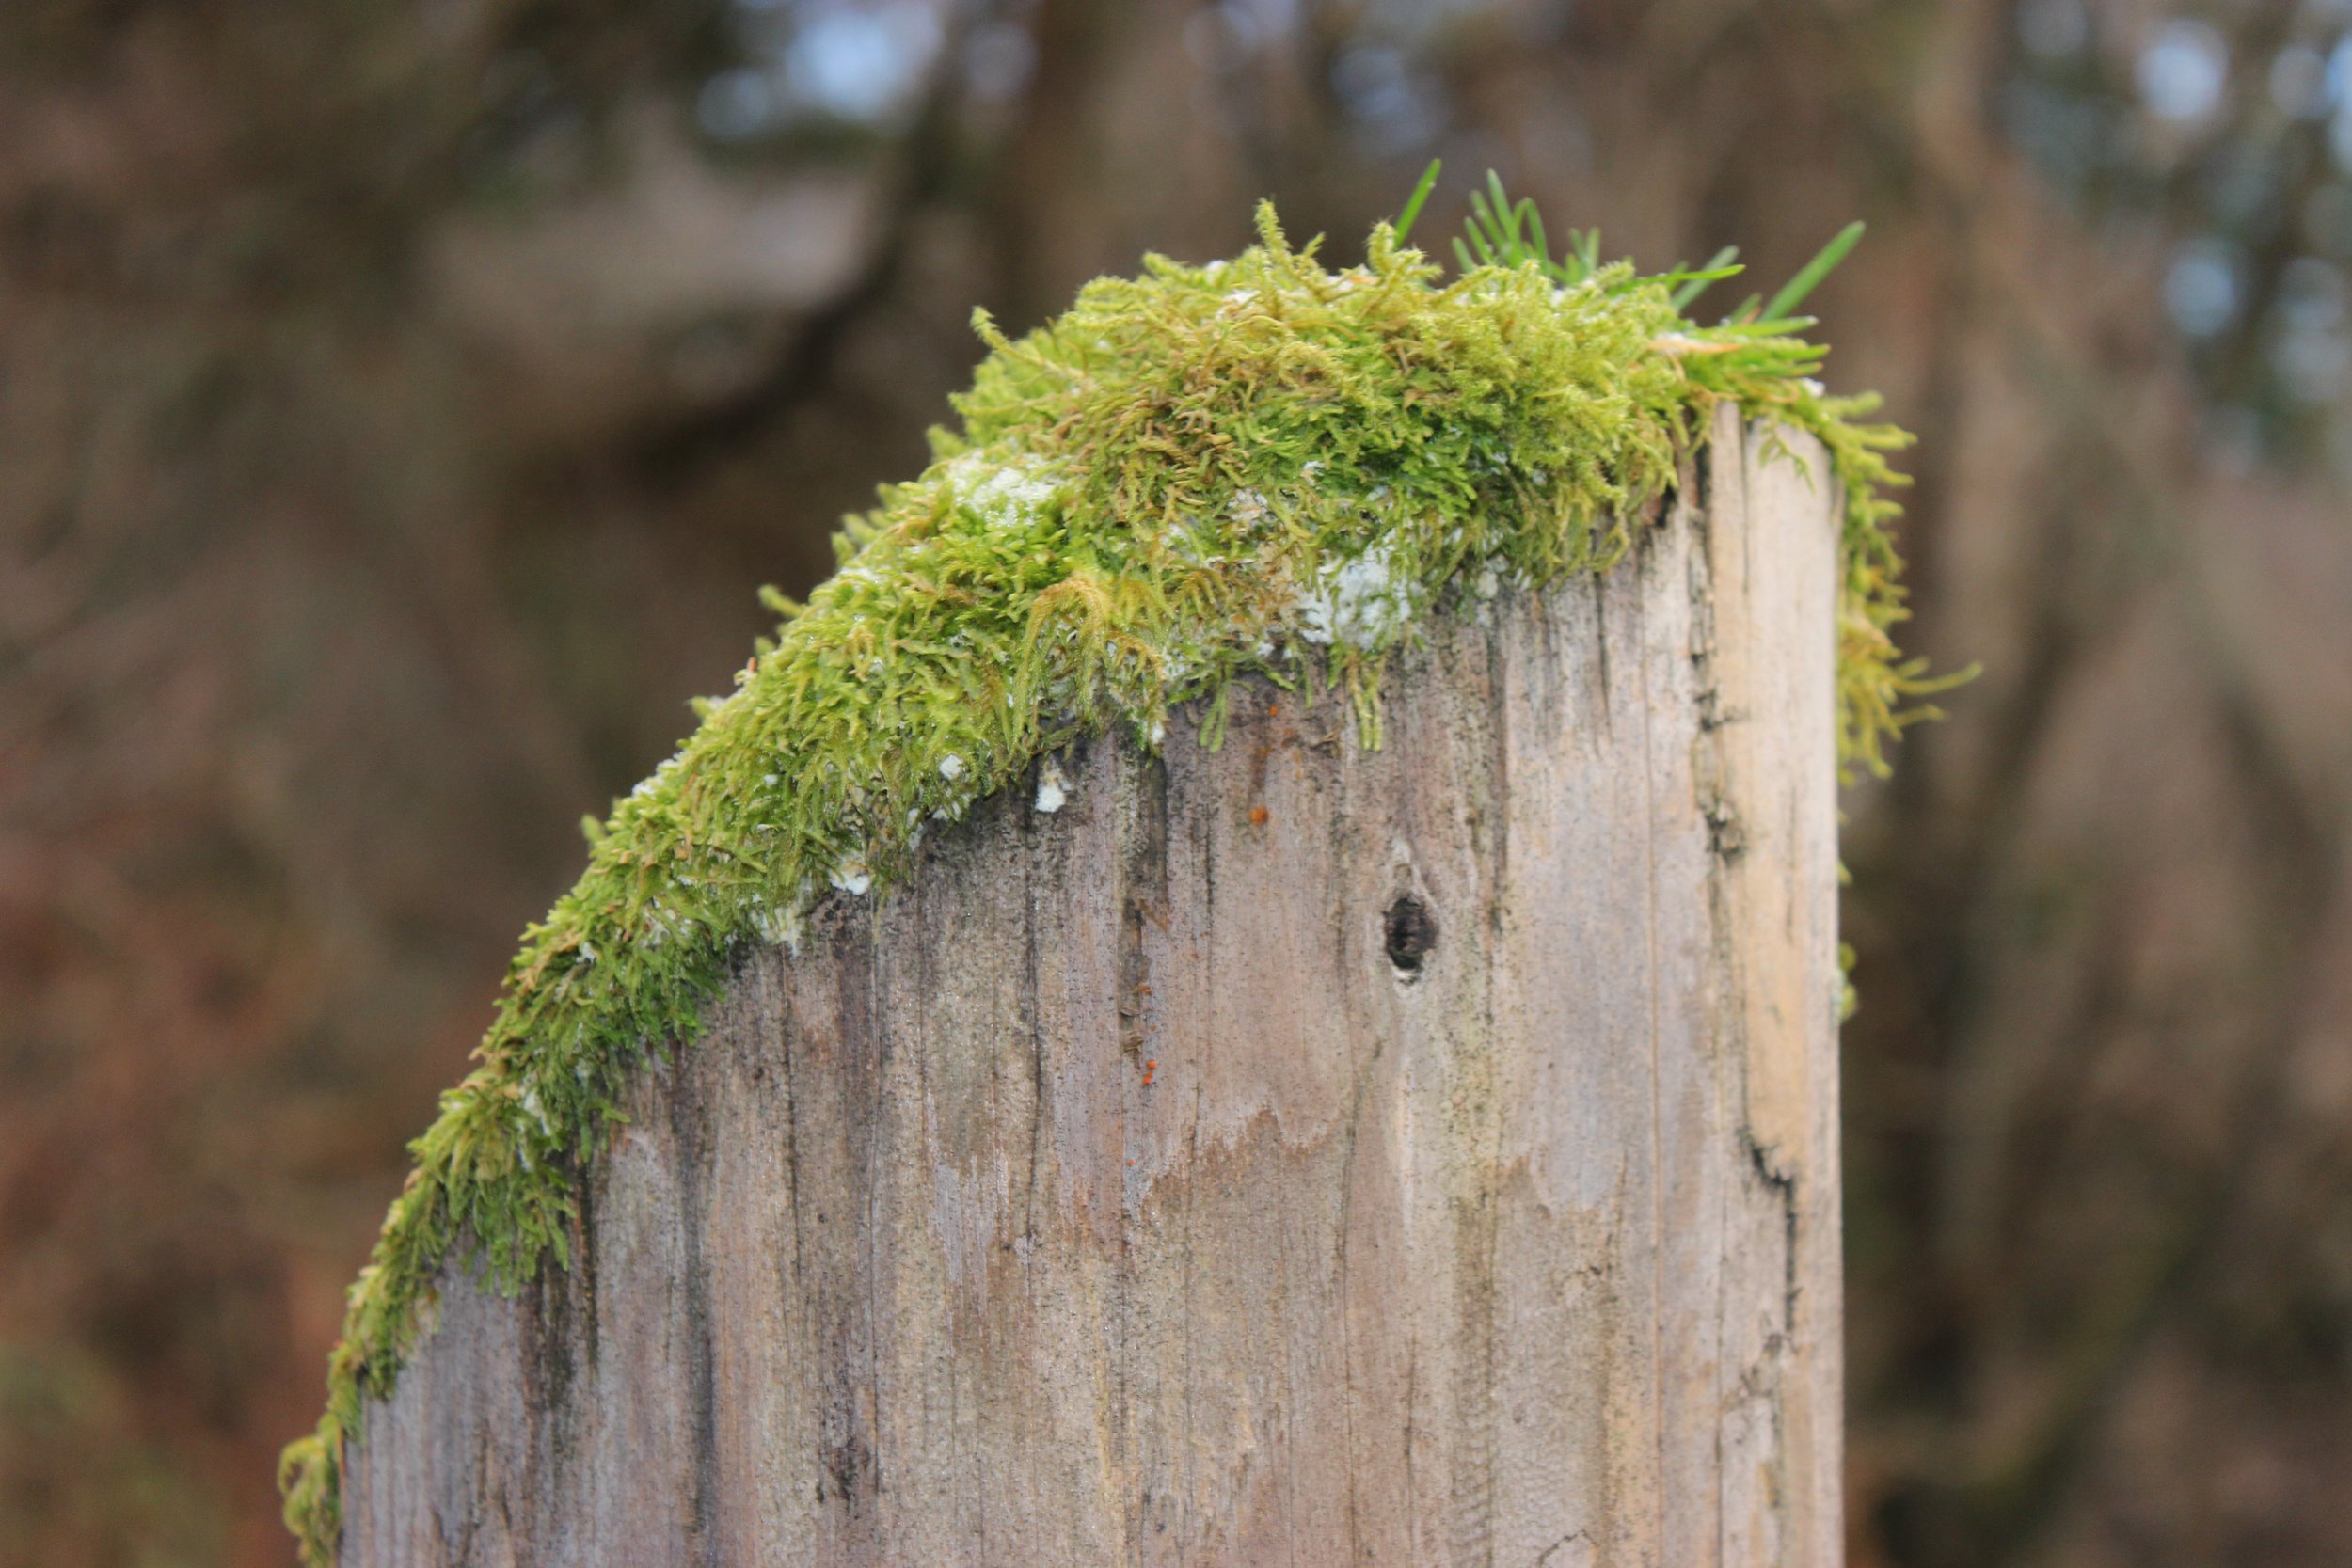
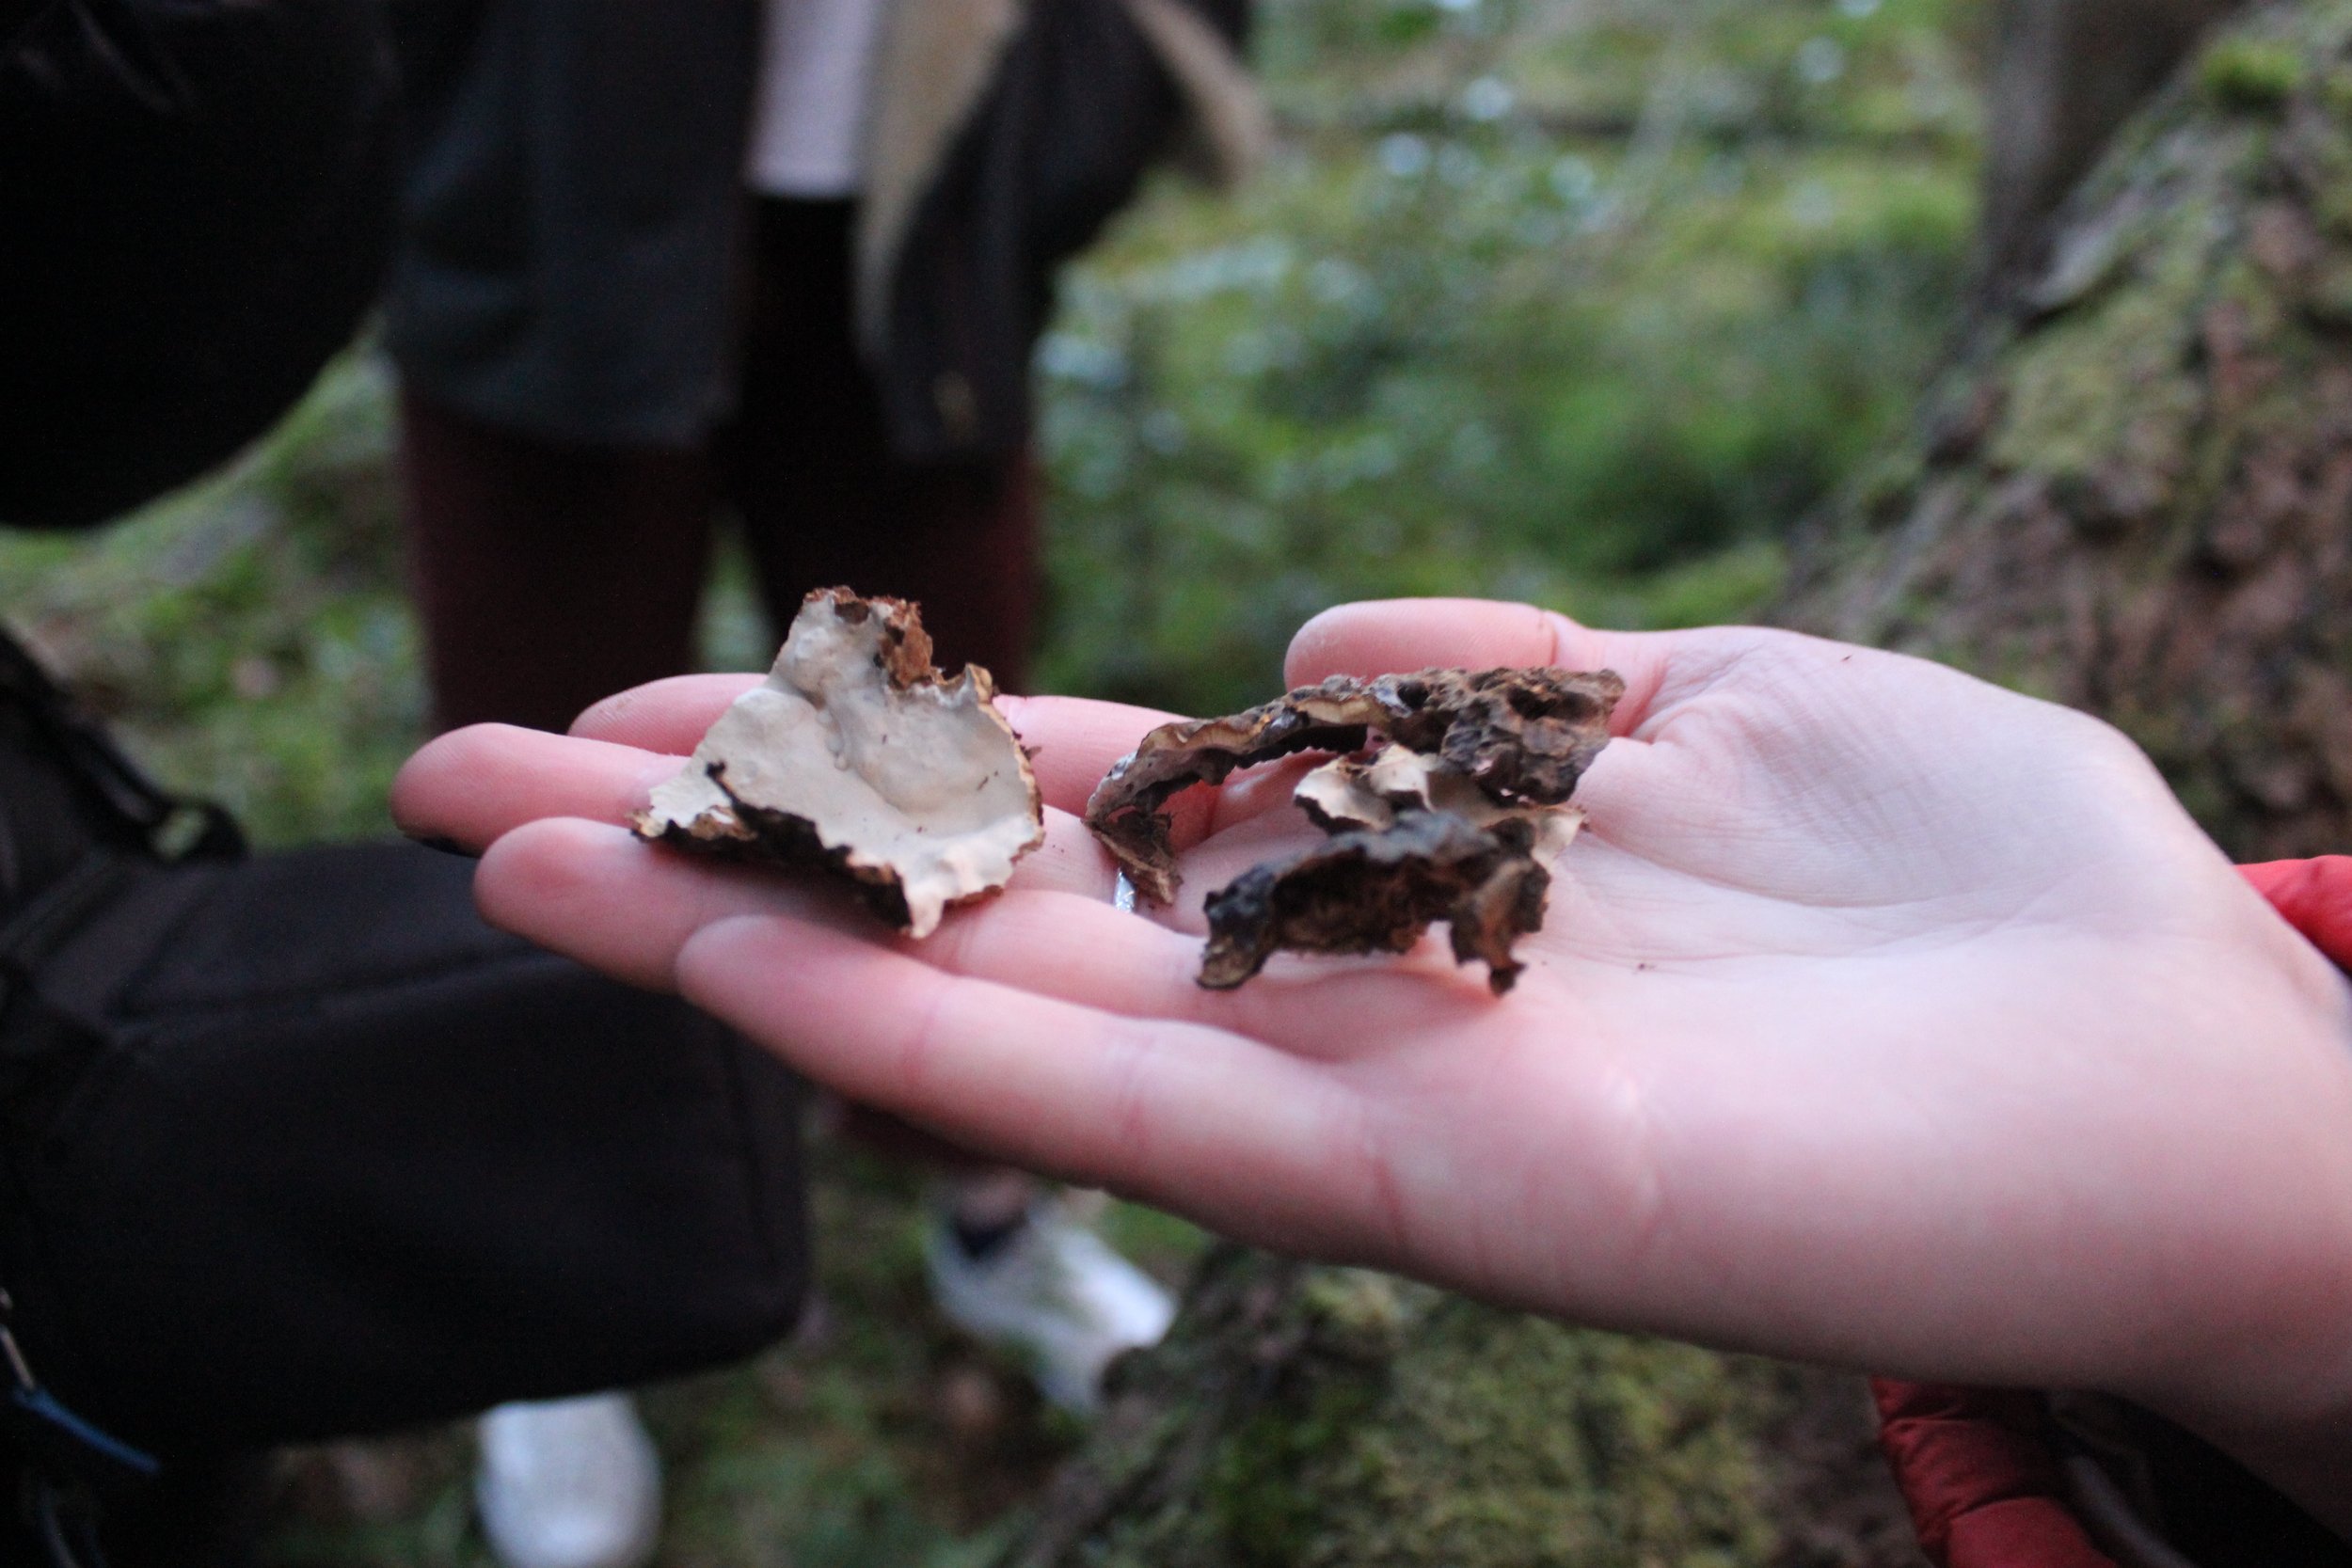
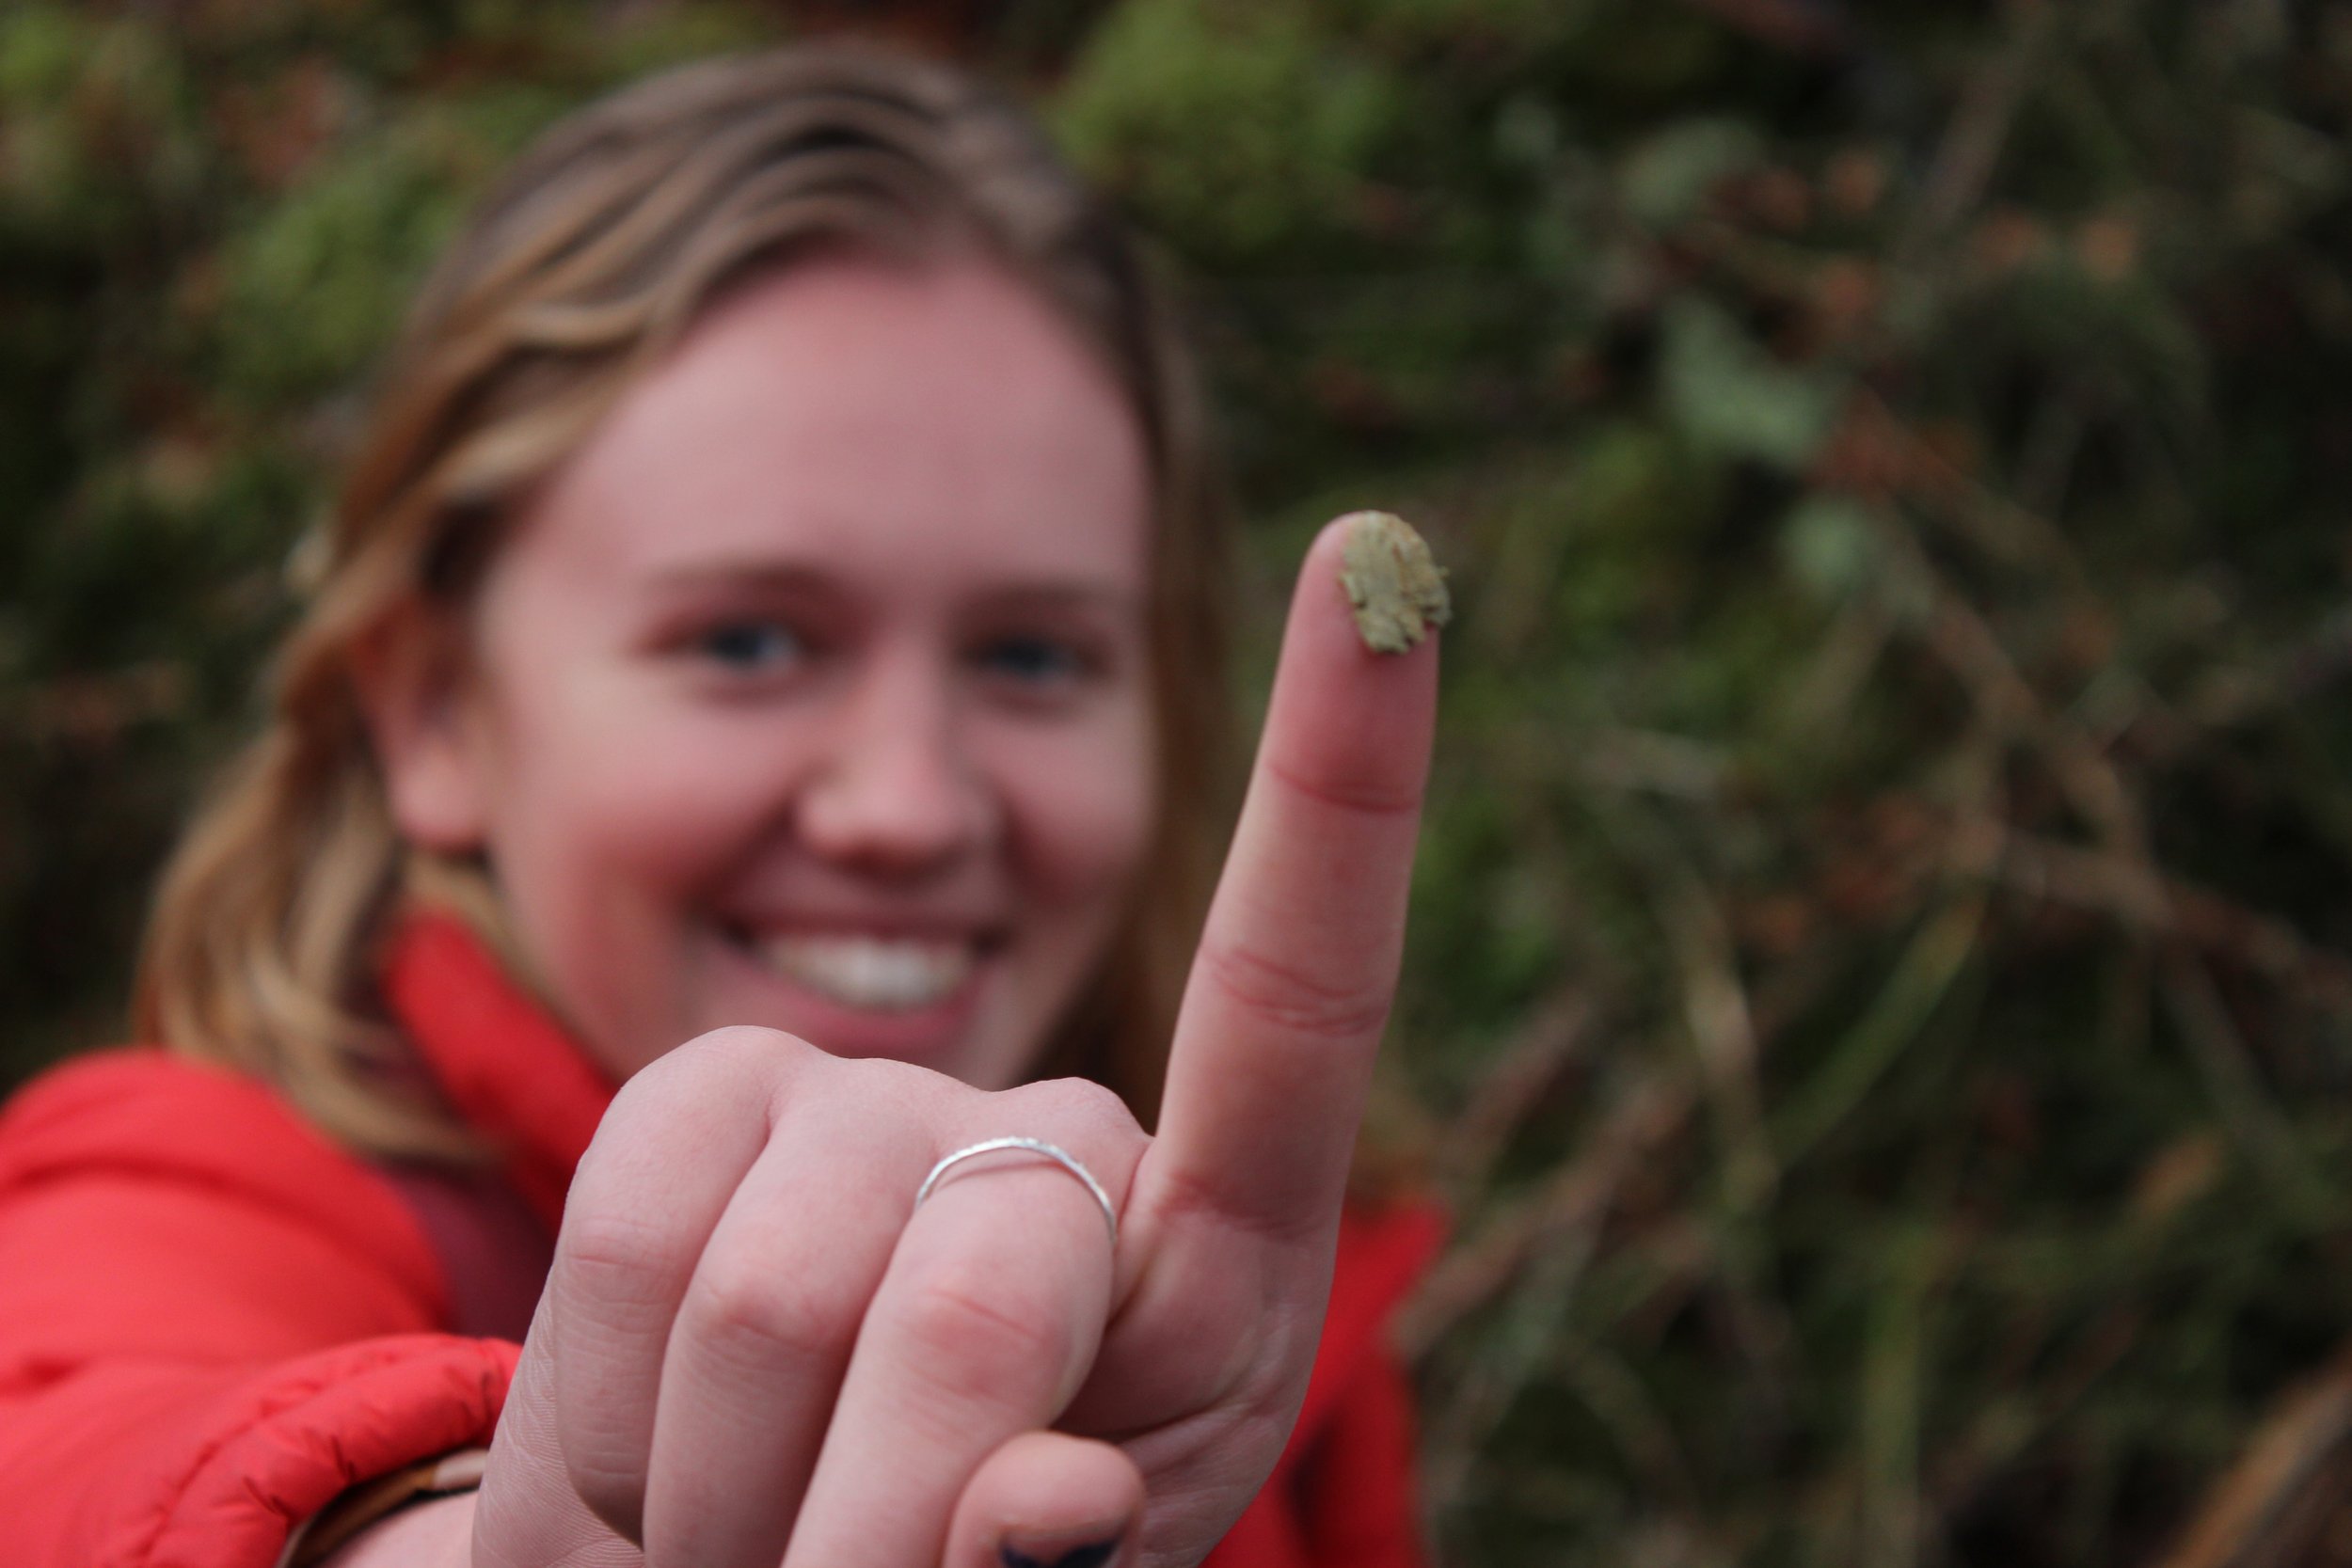
Site Visit
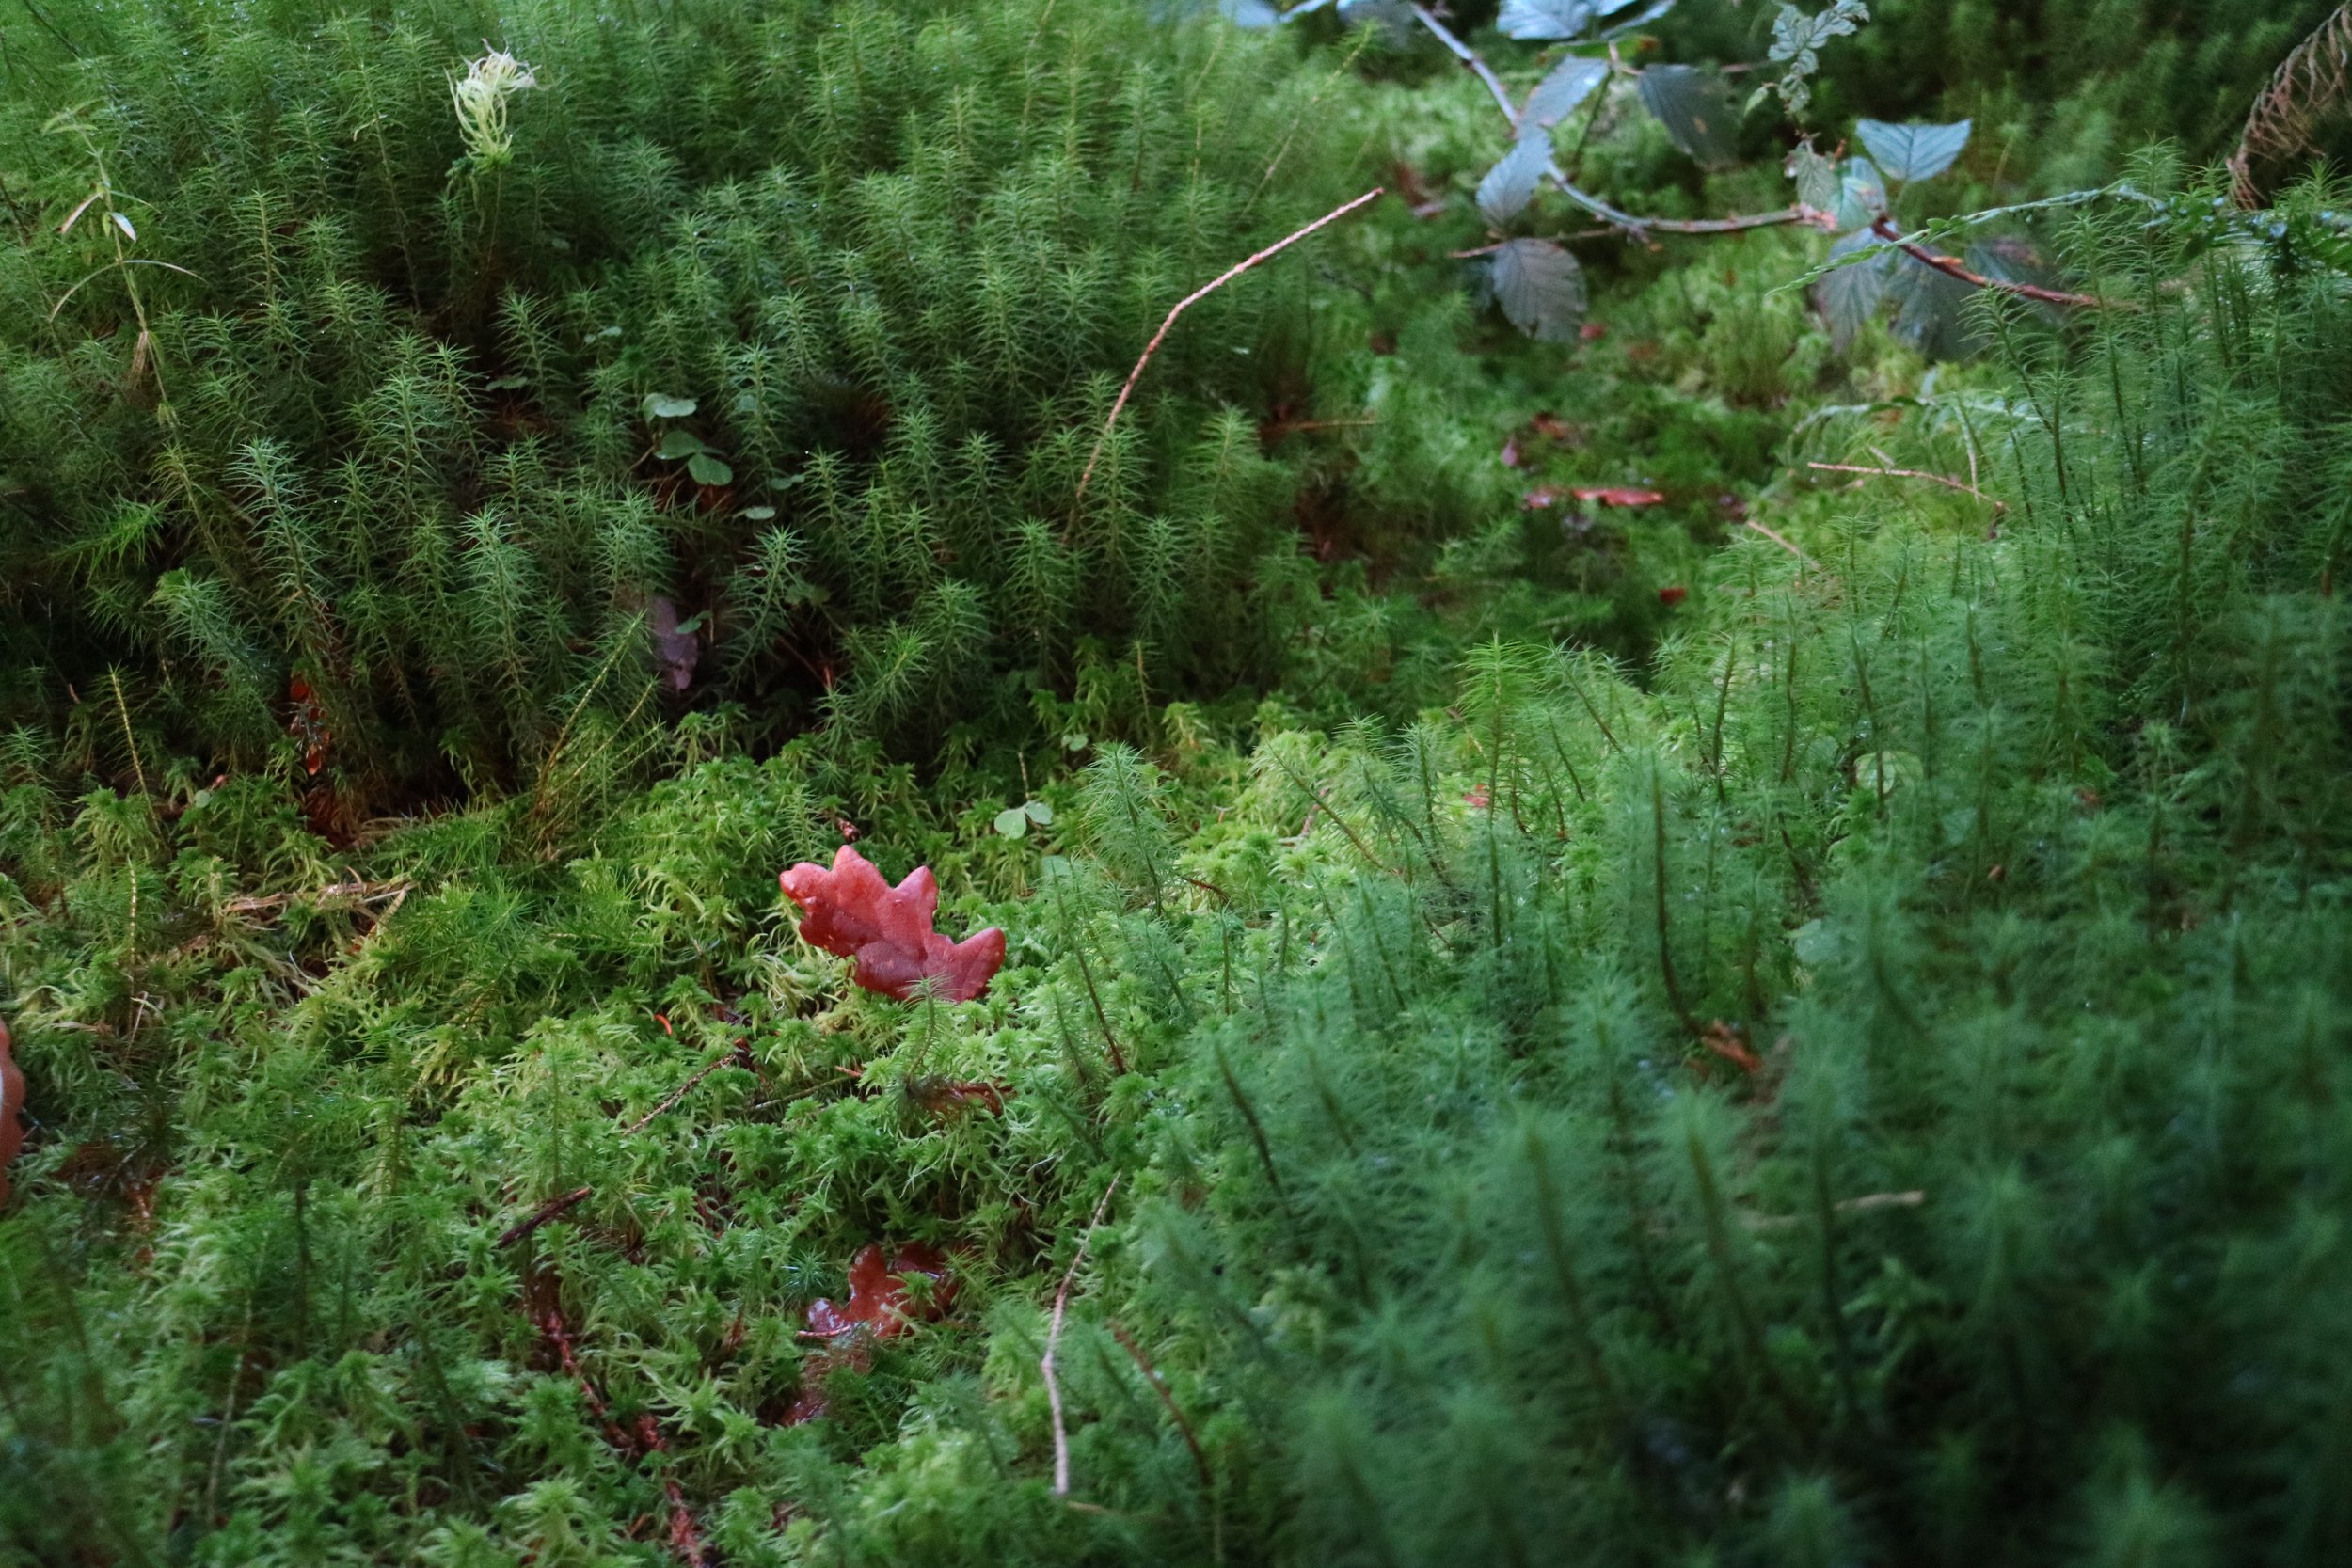
We visited our chosen site to get a feel for the flora and fauna of our chosen area as well as the issues they face.
Anlaysing the brief: main points
making use of wood thinnings
involve the community in the forest - stimulate local craft
bridge the gap between forest materials and manufacturing of them
educate people about new material oppurtunities
use the forest to displace higher energy materials
design out the need for imported timber and improve the timber industry.
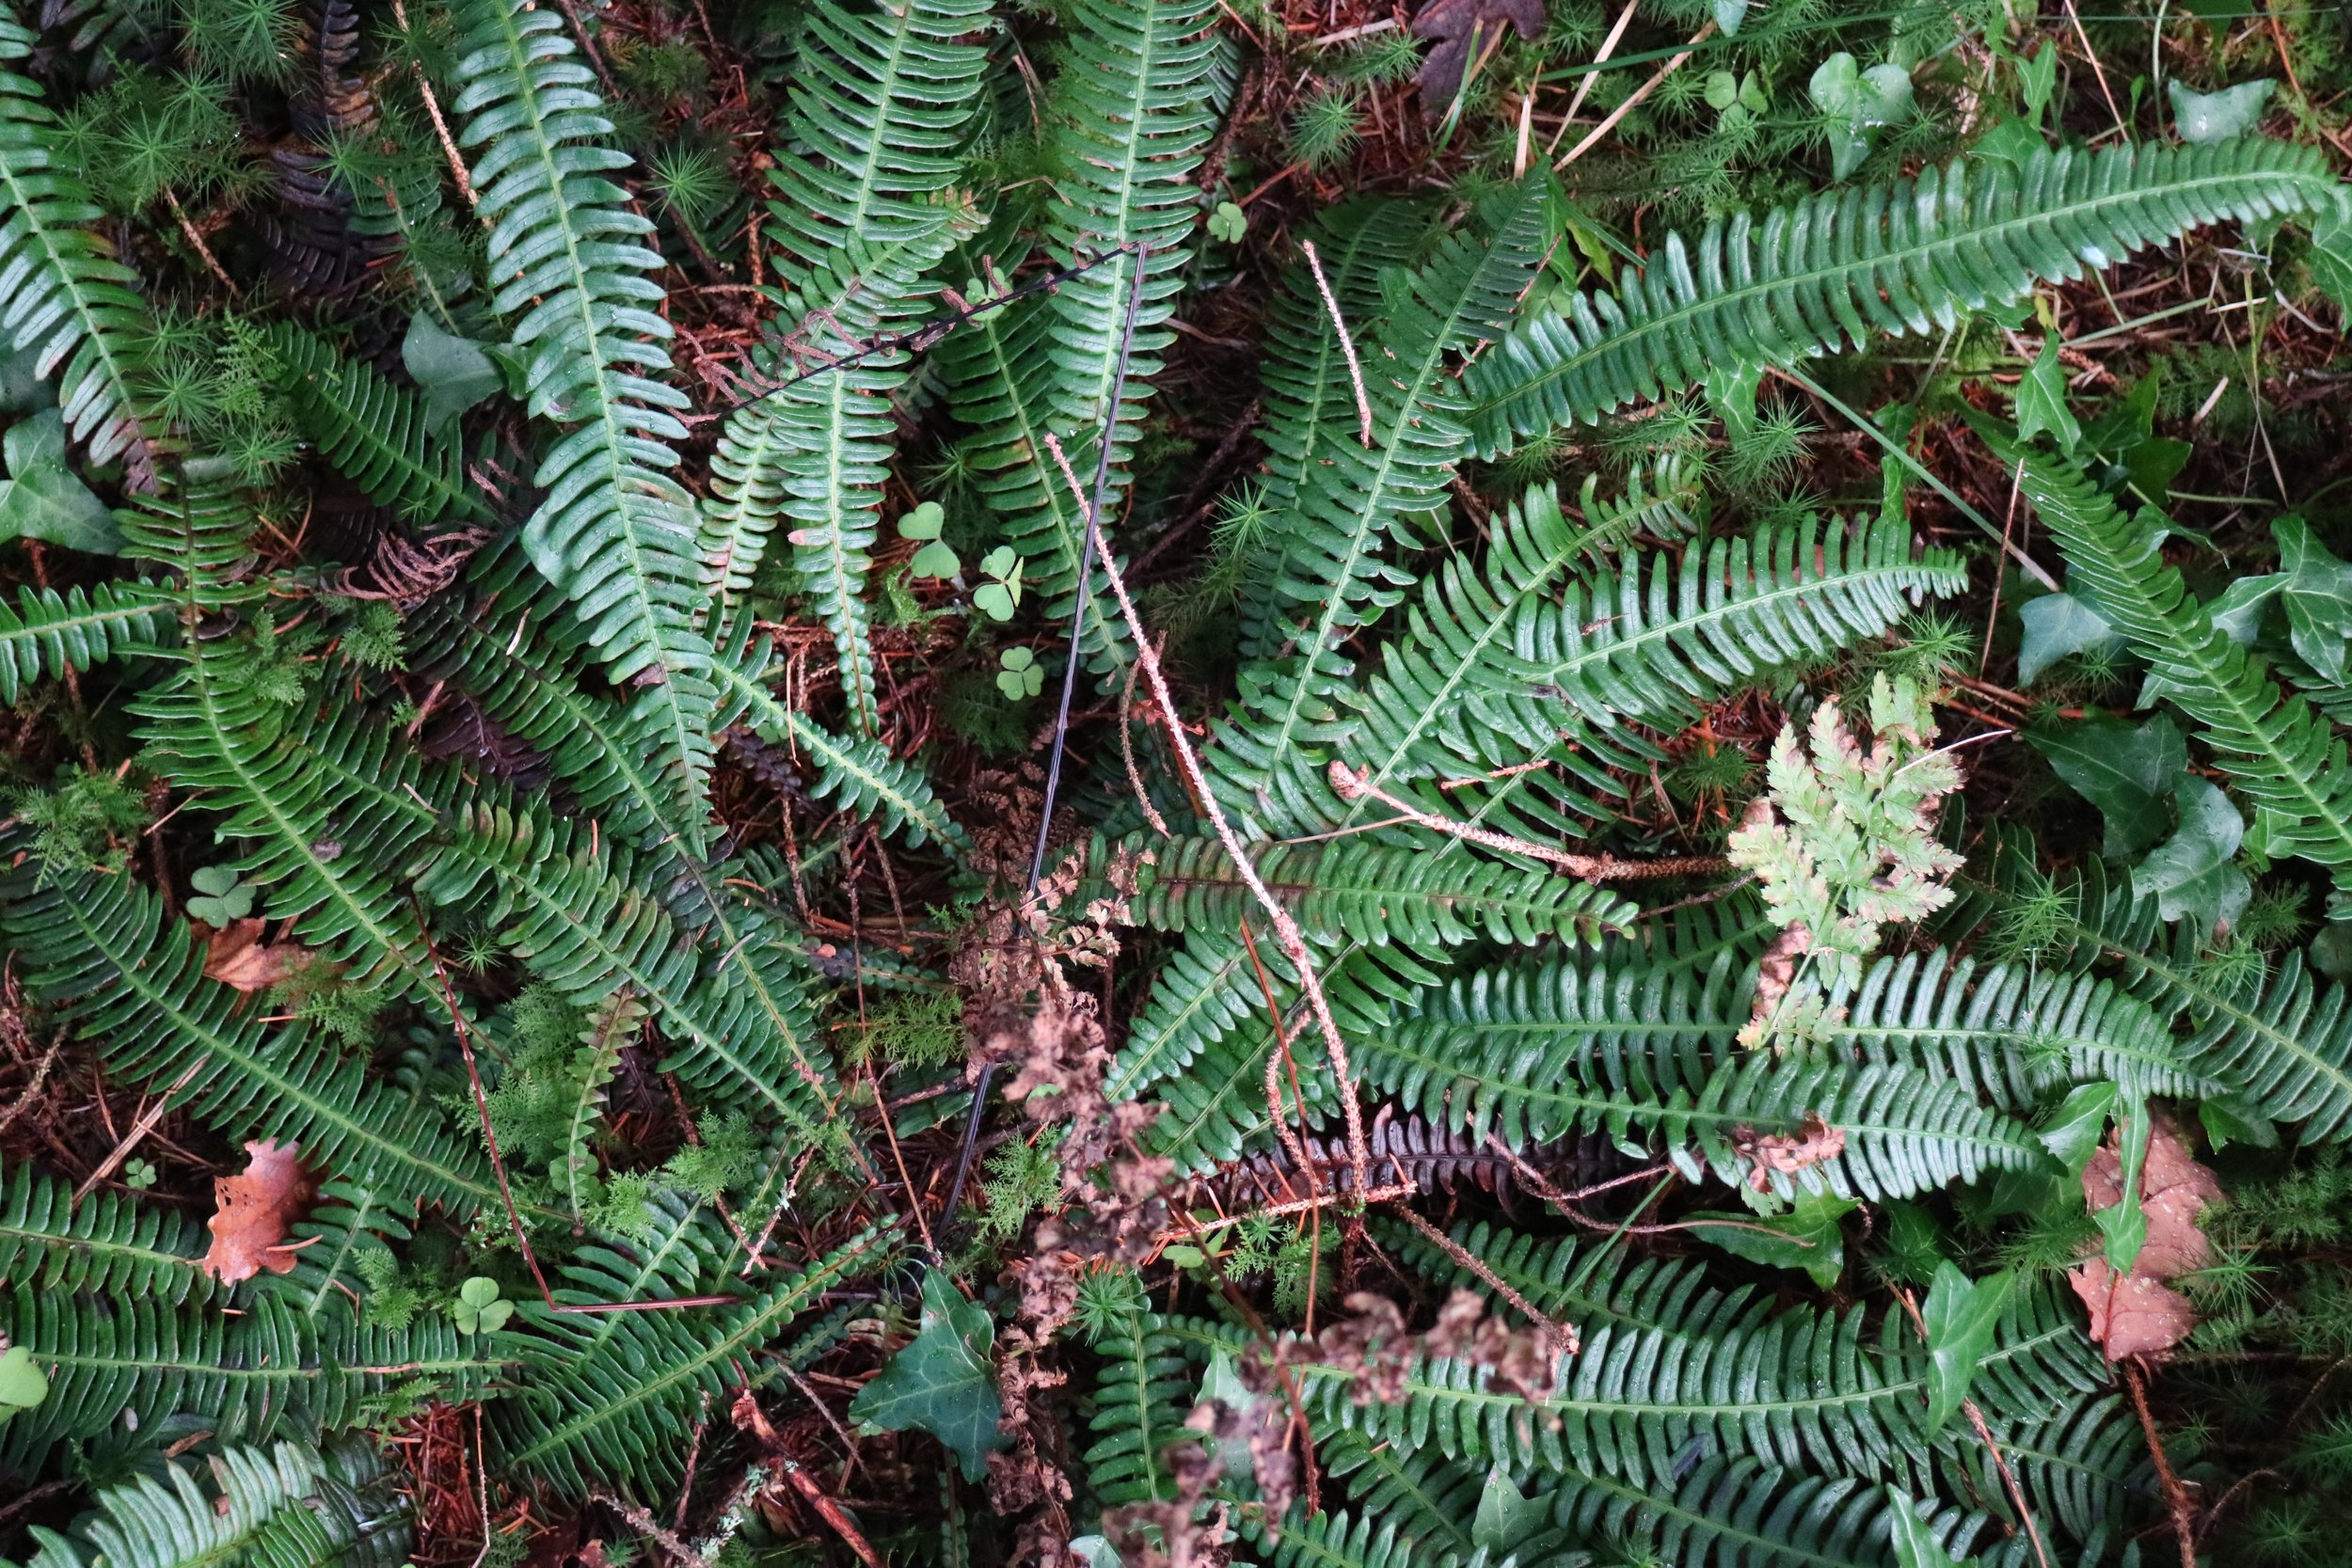
fern
fungi
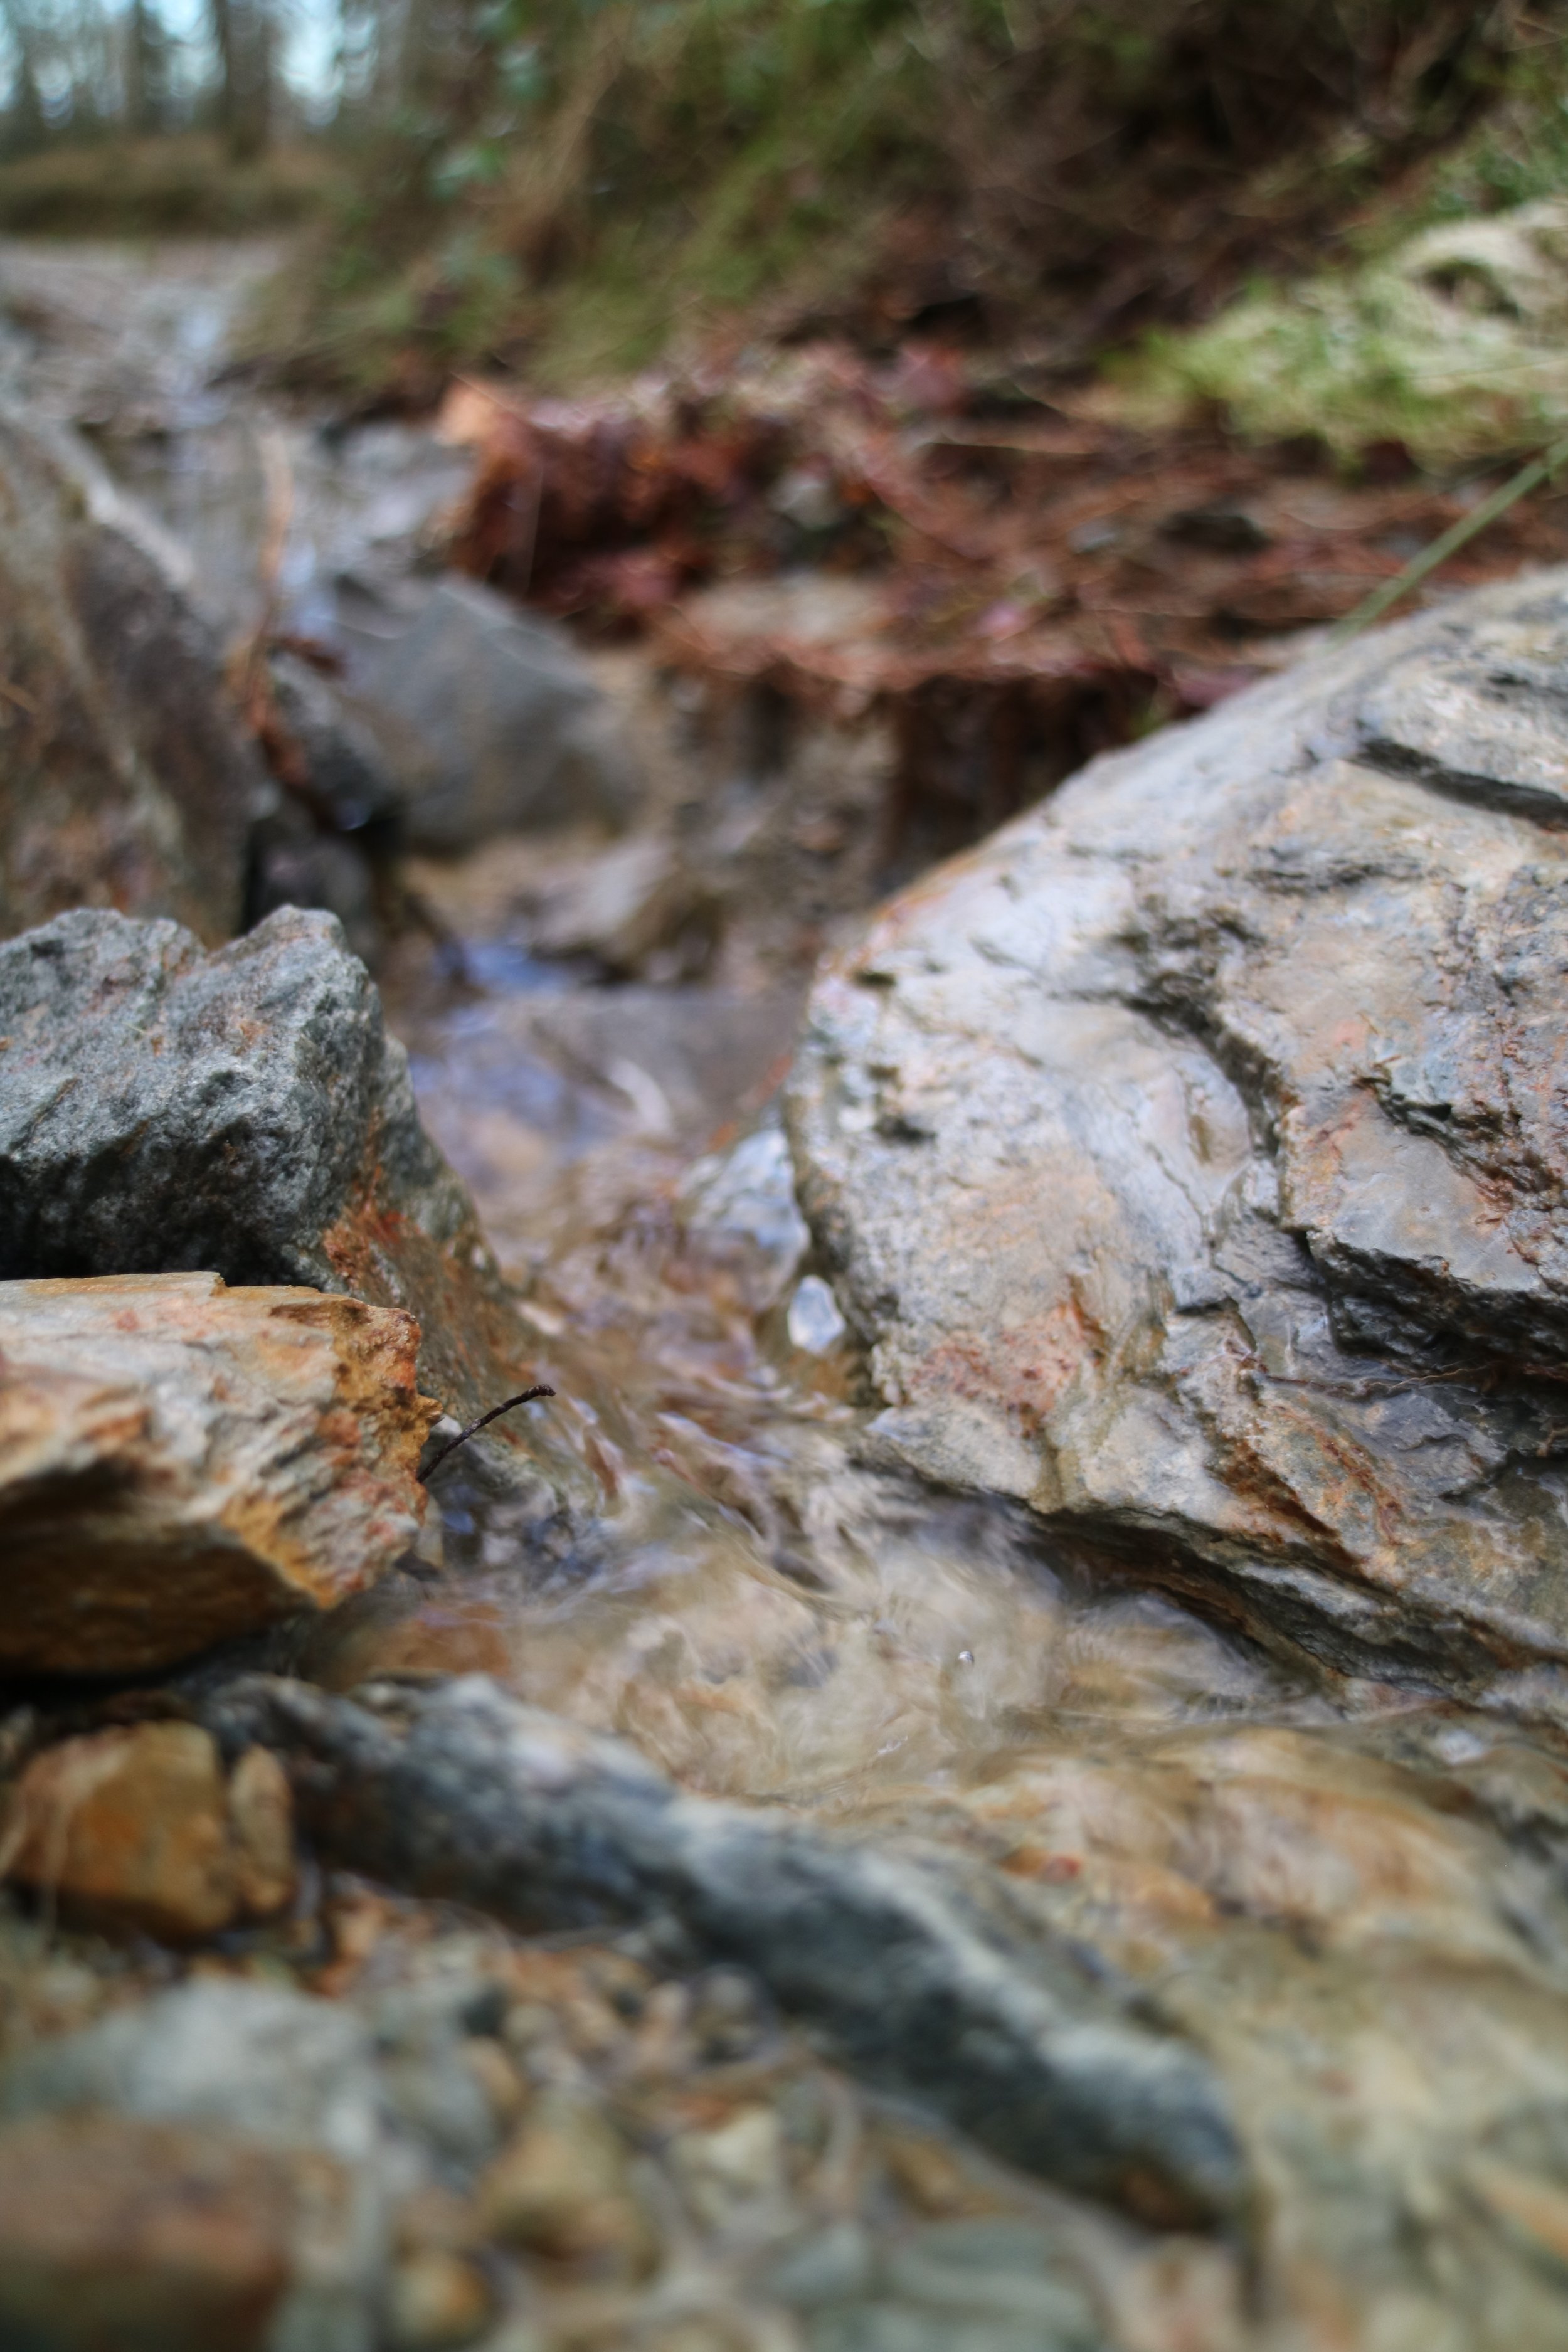
clay under water
clay from the stream bed
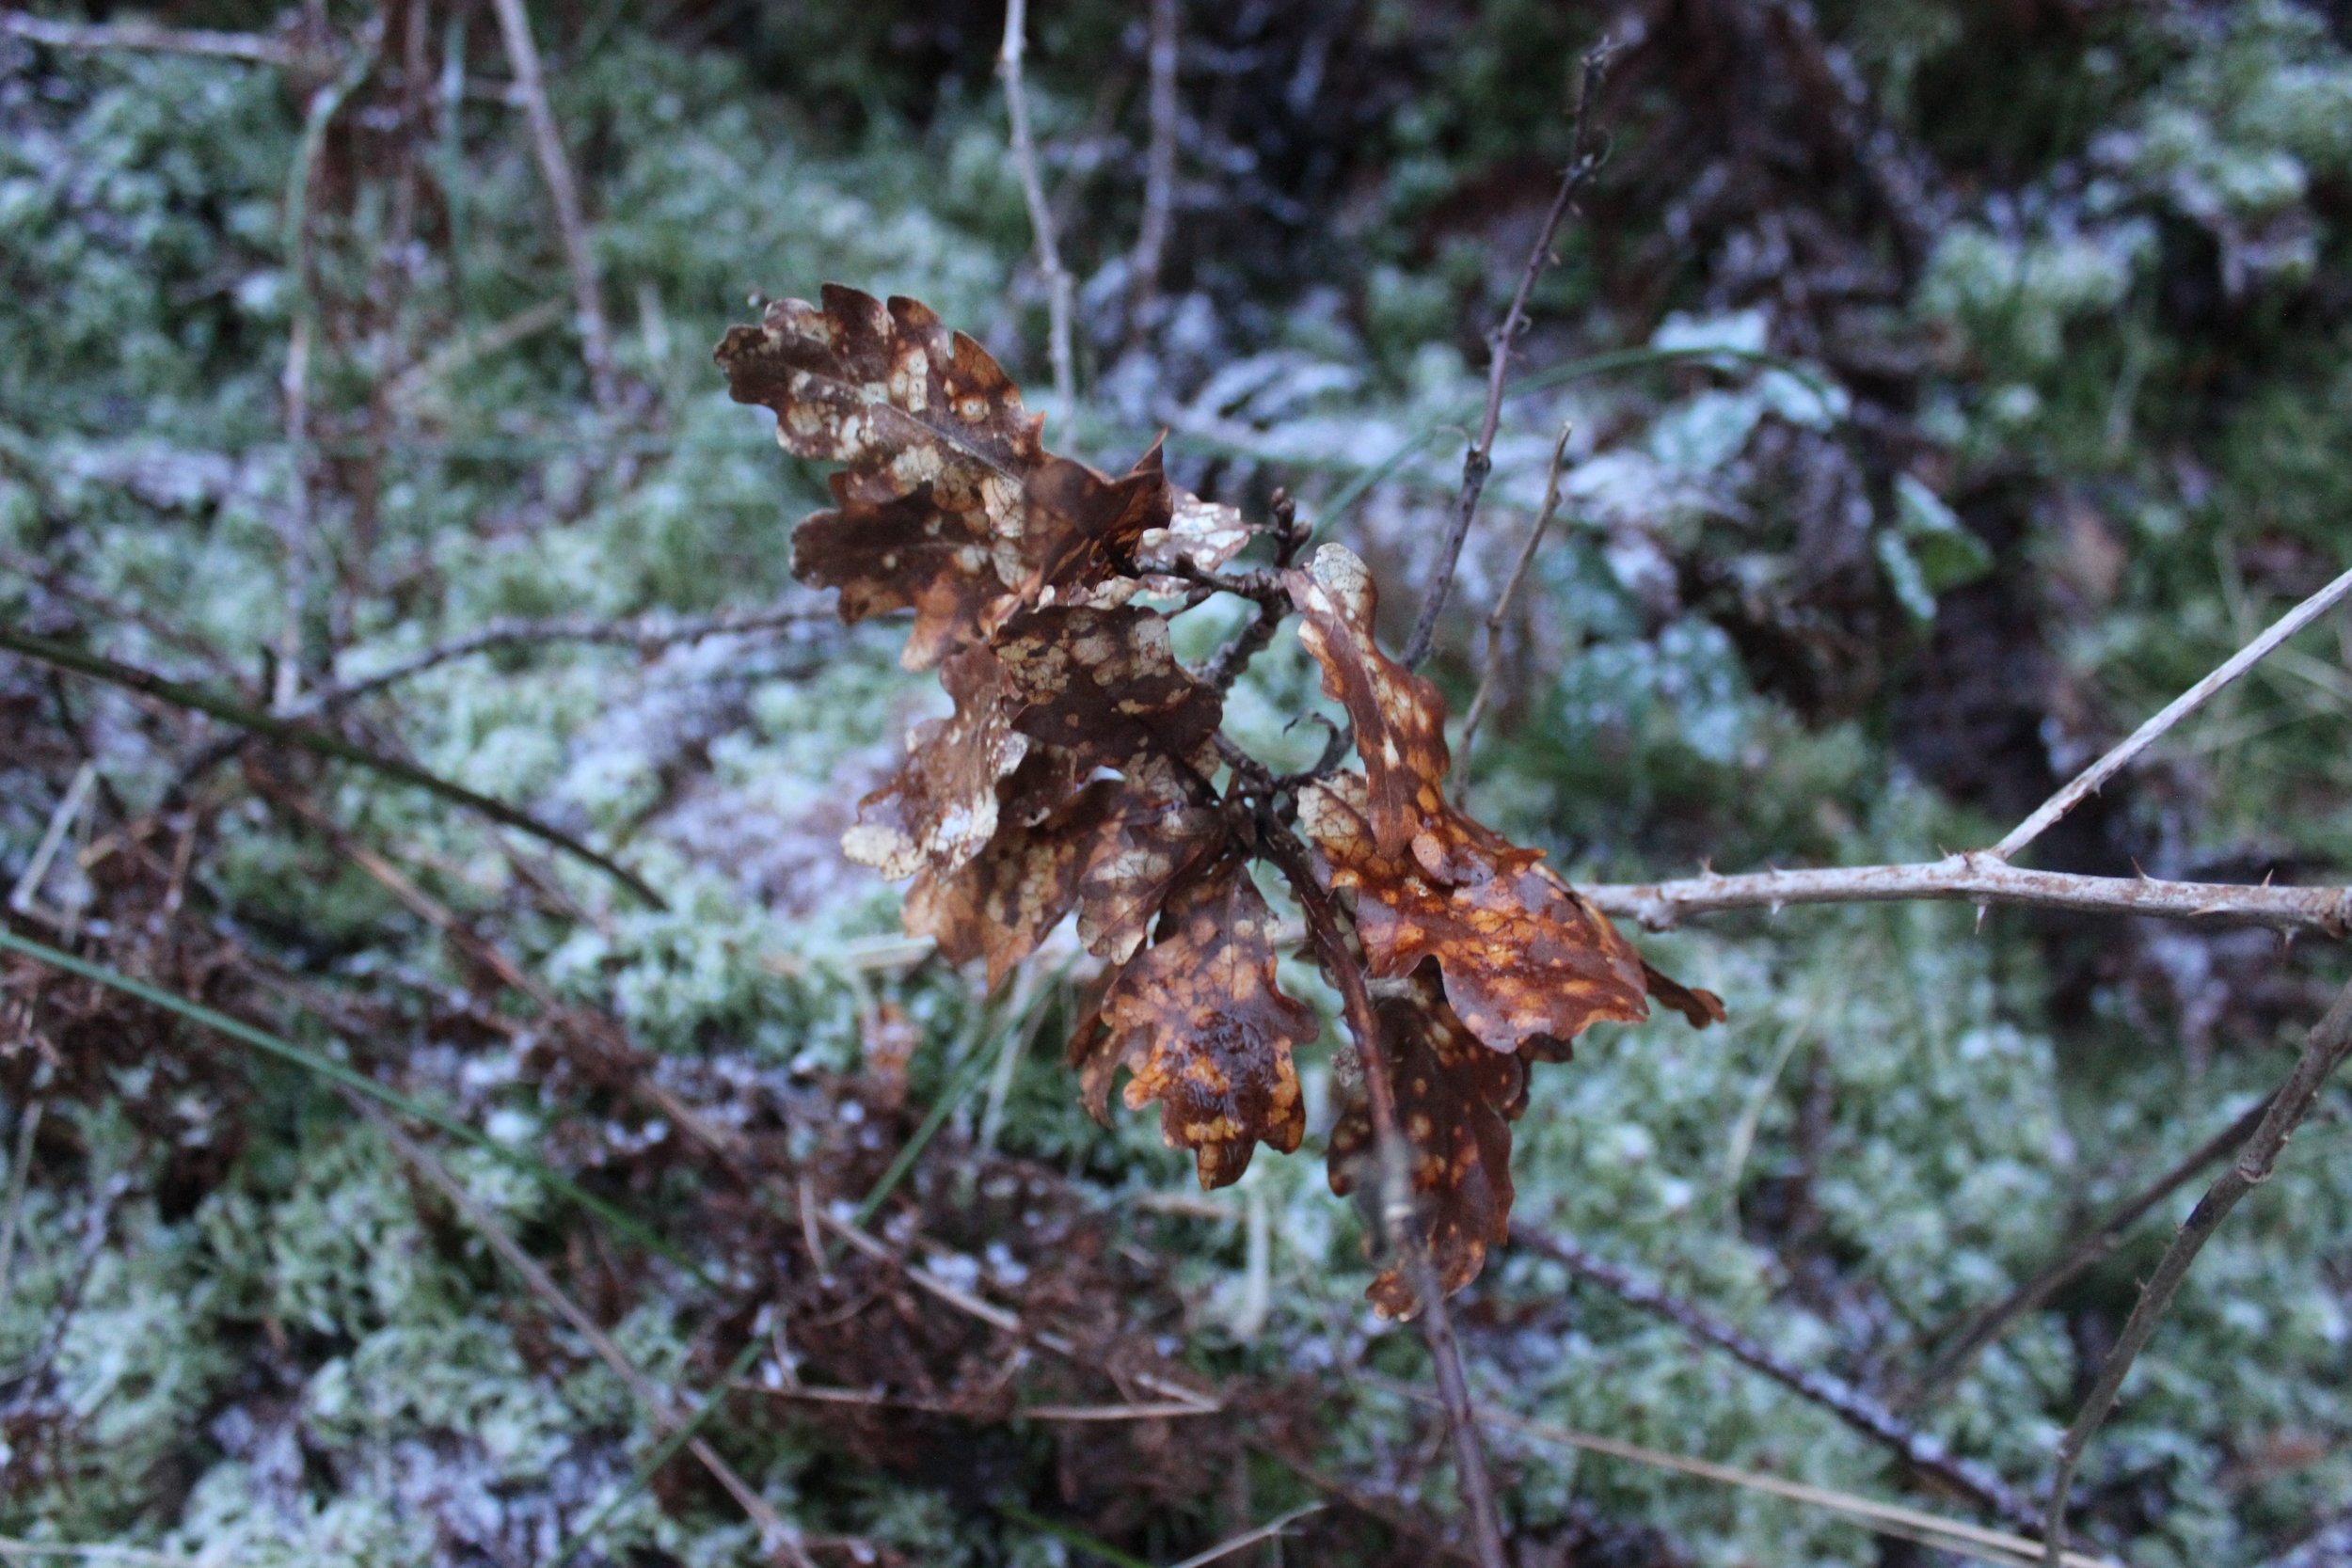
diseased oak leaf
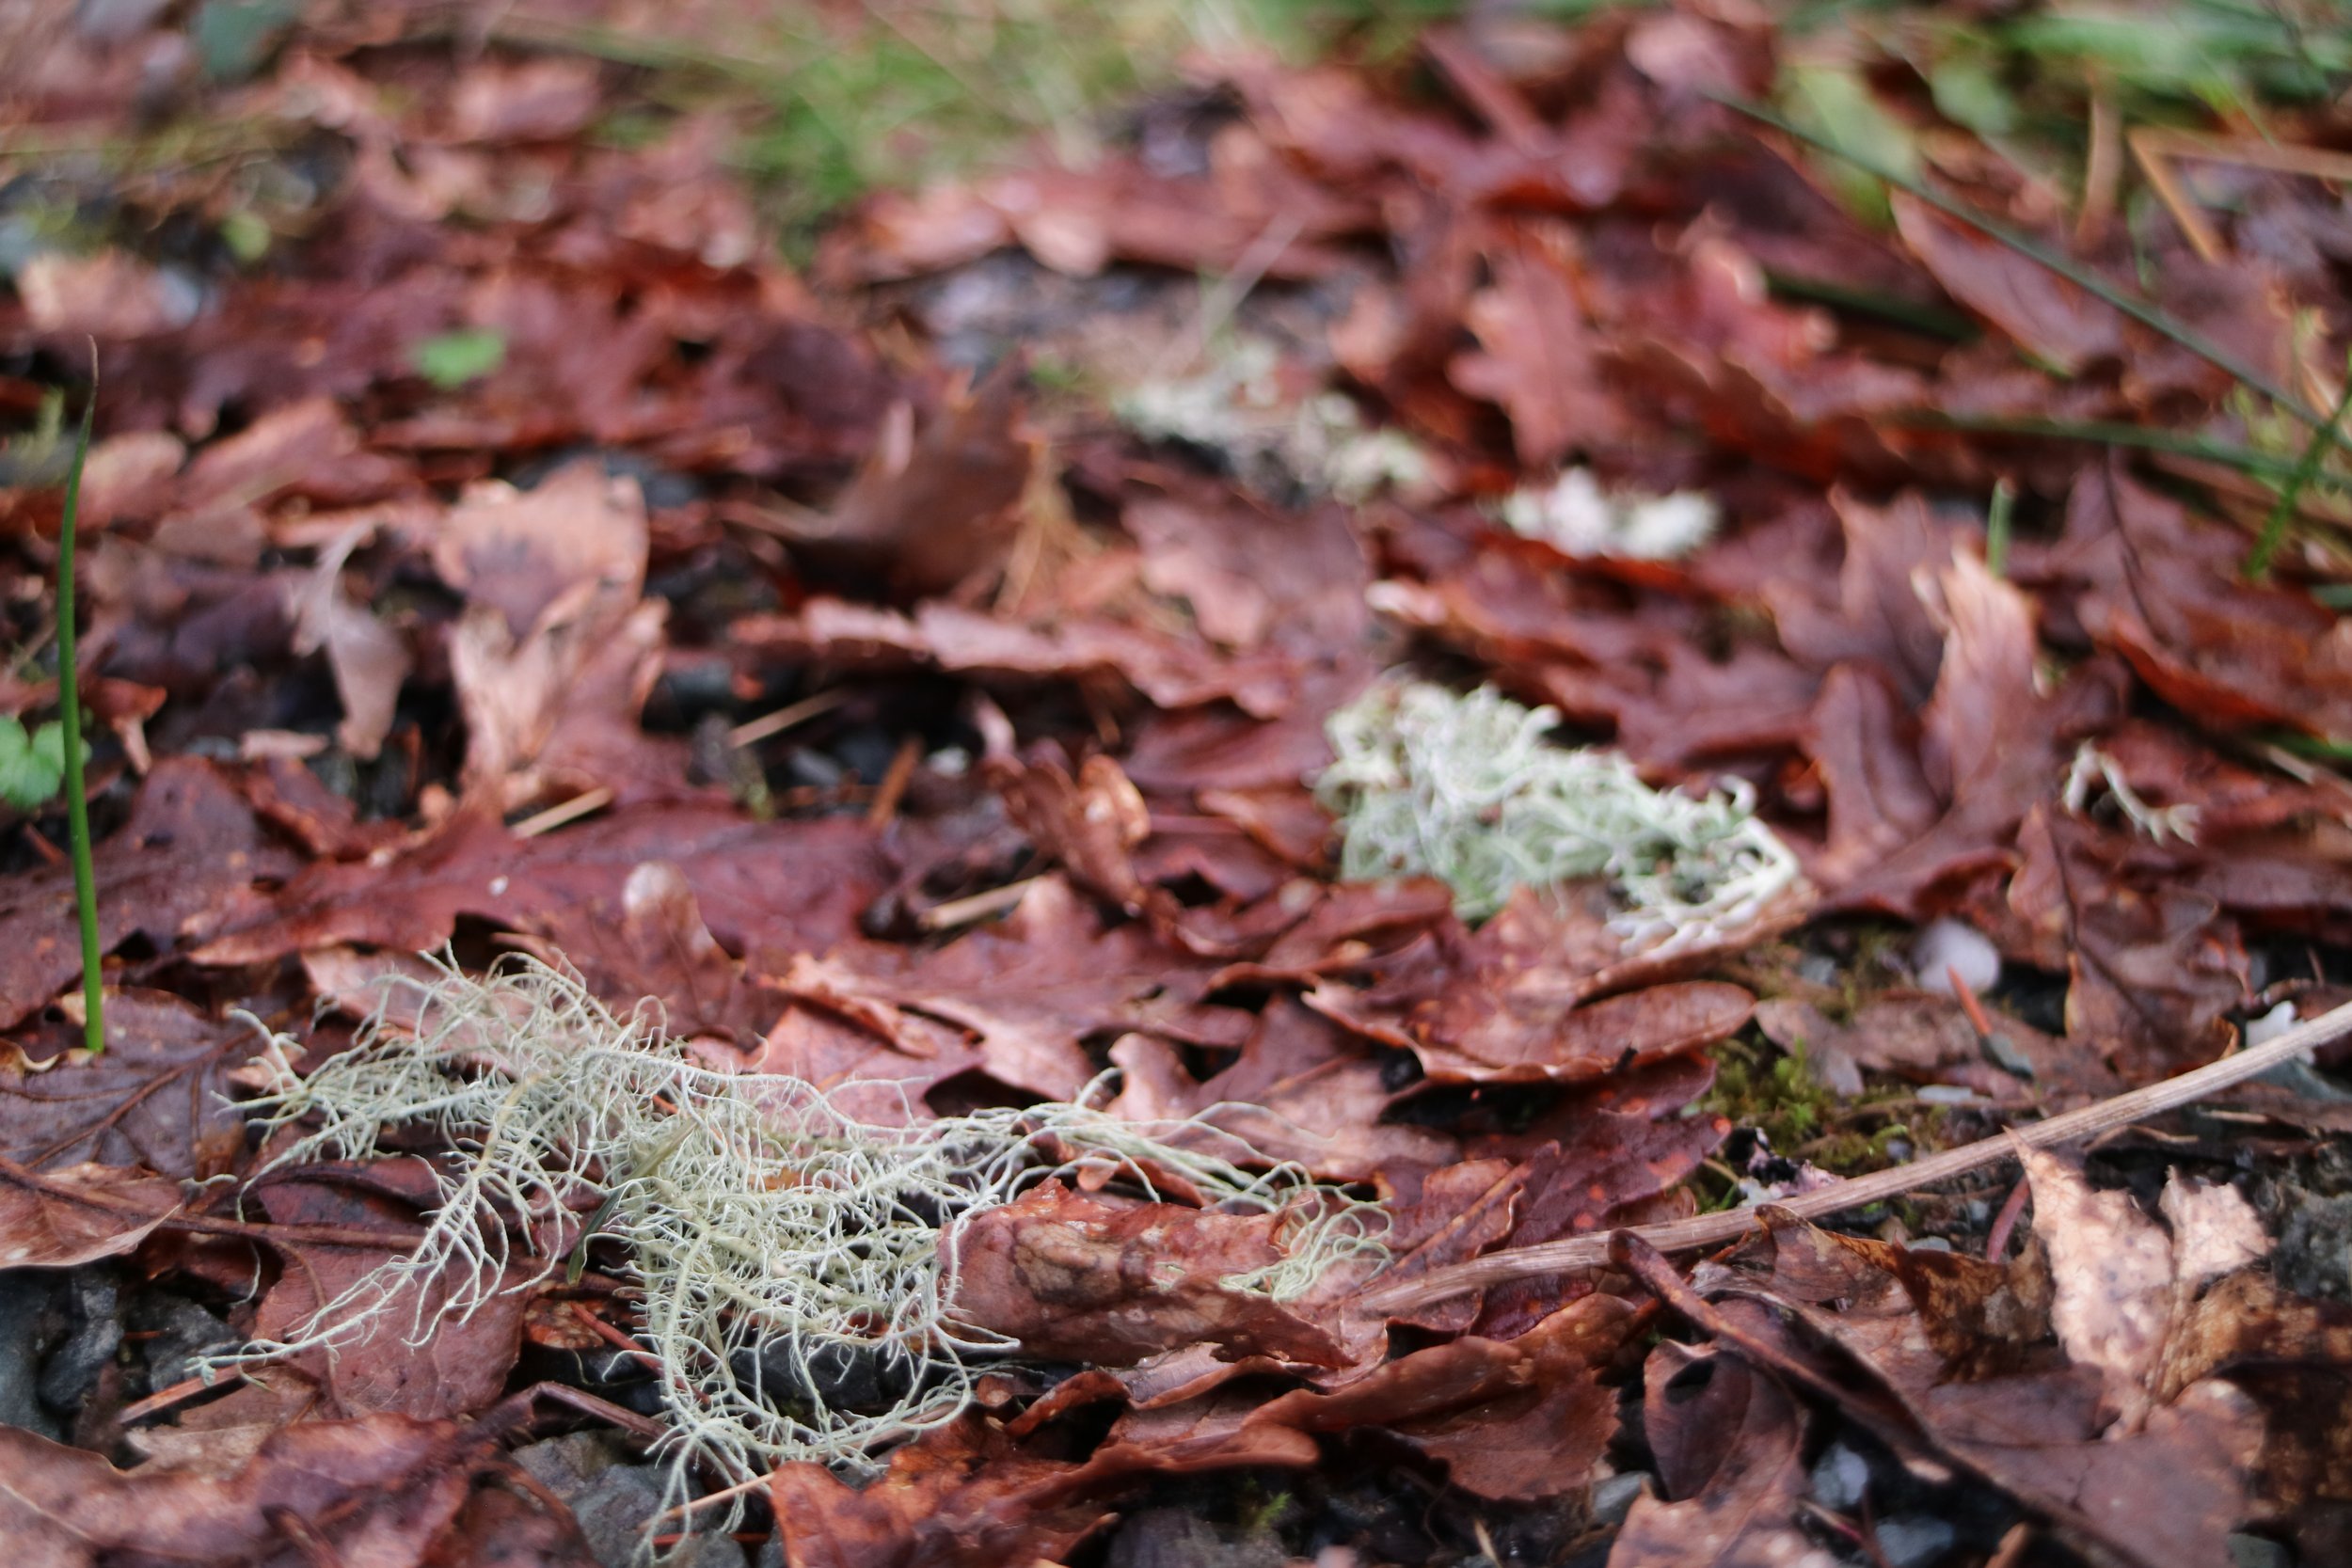
lichen

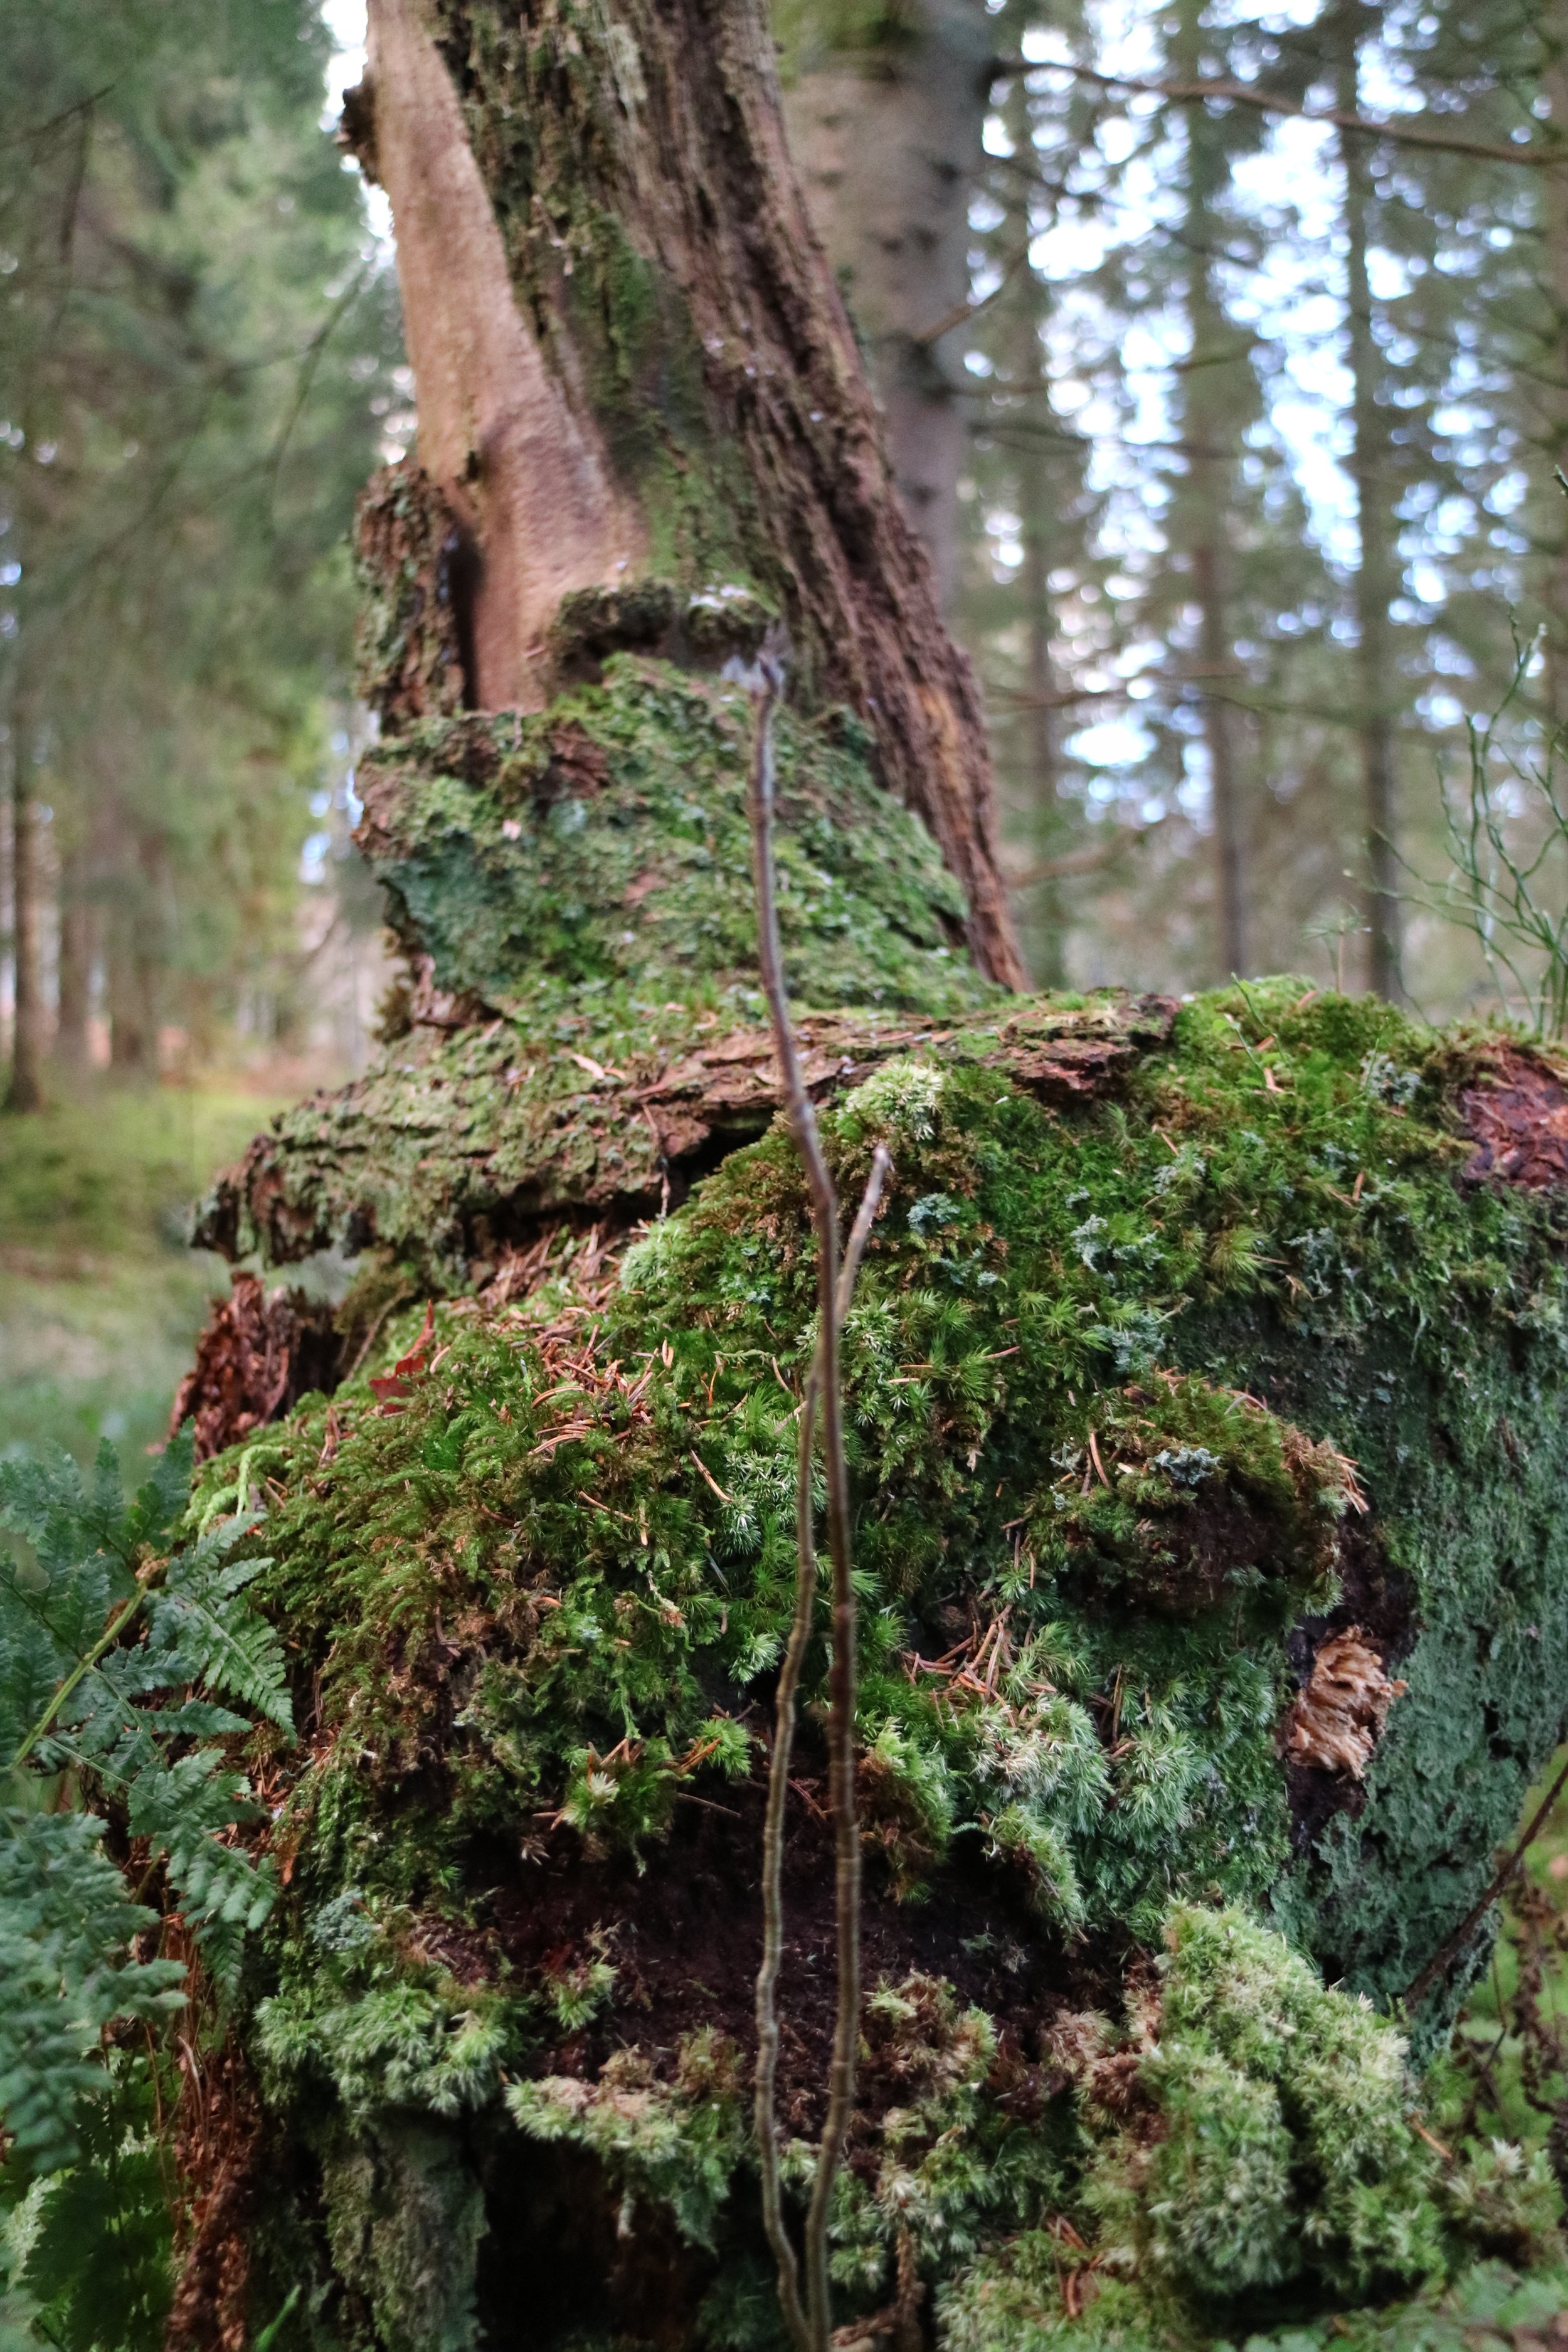
moss + lichen on tree
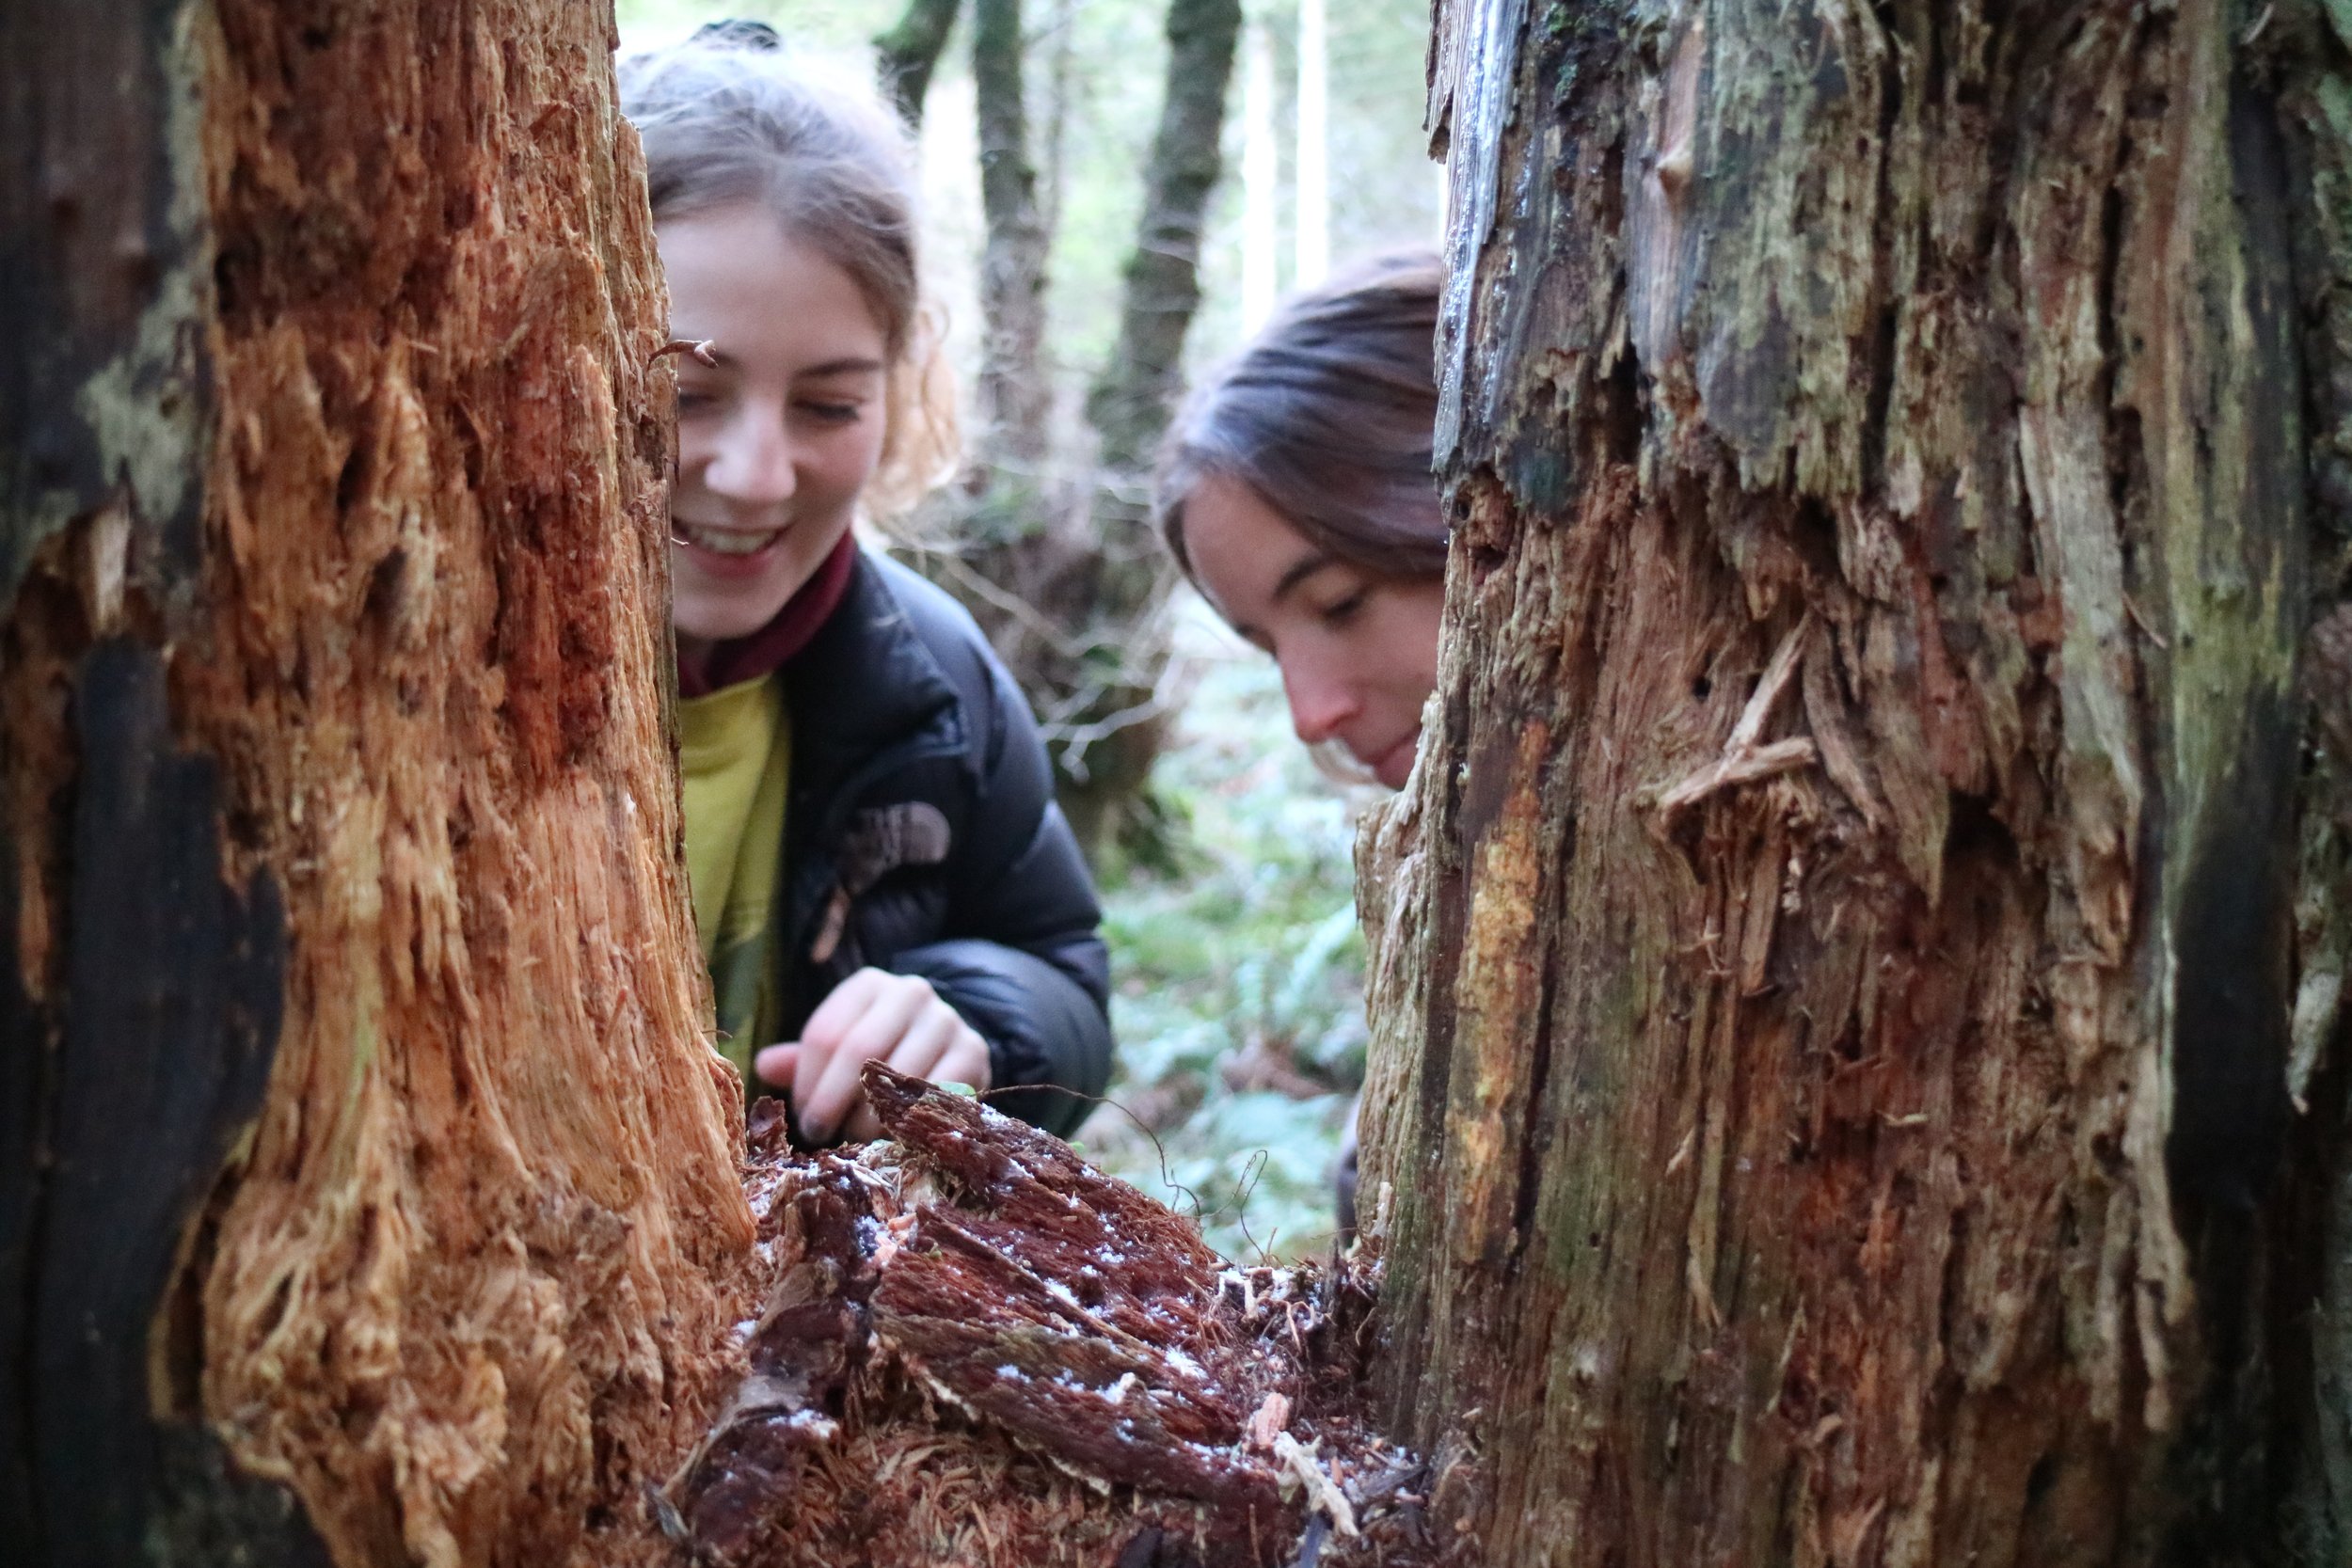
analysing tree rot
product + timber research


We researched innovative ways the forest and its waste is being used already, and the science behind them, as well as the scale of timber industry waste.
Energy production from burning wood chips is at the bottom level of the biomass value pyramid. We aimed to find a higher value use for it. Most of the waste was in the form of sawdust and shavings. Over half of this is from the construction sector, which inspired us to utilise the waste within that industry.
Main aims for the project
Utilise industry waste
We decided to create key aims for the projects so that we could focus in on the issue more effectively. To keep the communal feel and to not lose the education aspect of the brief we felt that a business/ system design was necessary. We decided that this had to be located in the forest, for business purposes and to have the impact we desired.
Alternative materials
Educate
Forest experience
3D printer build
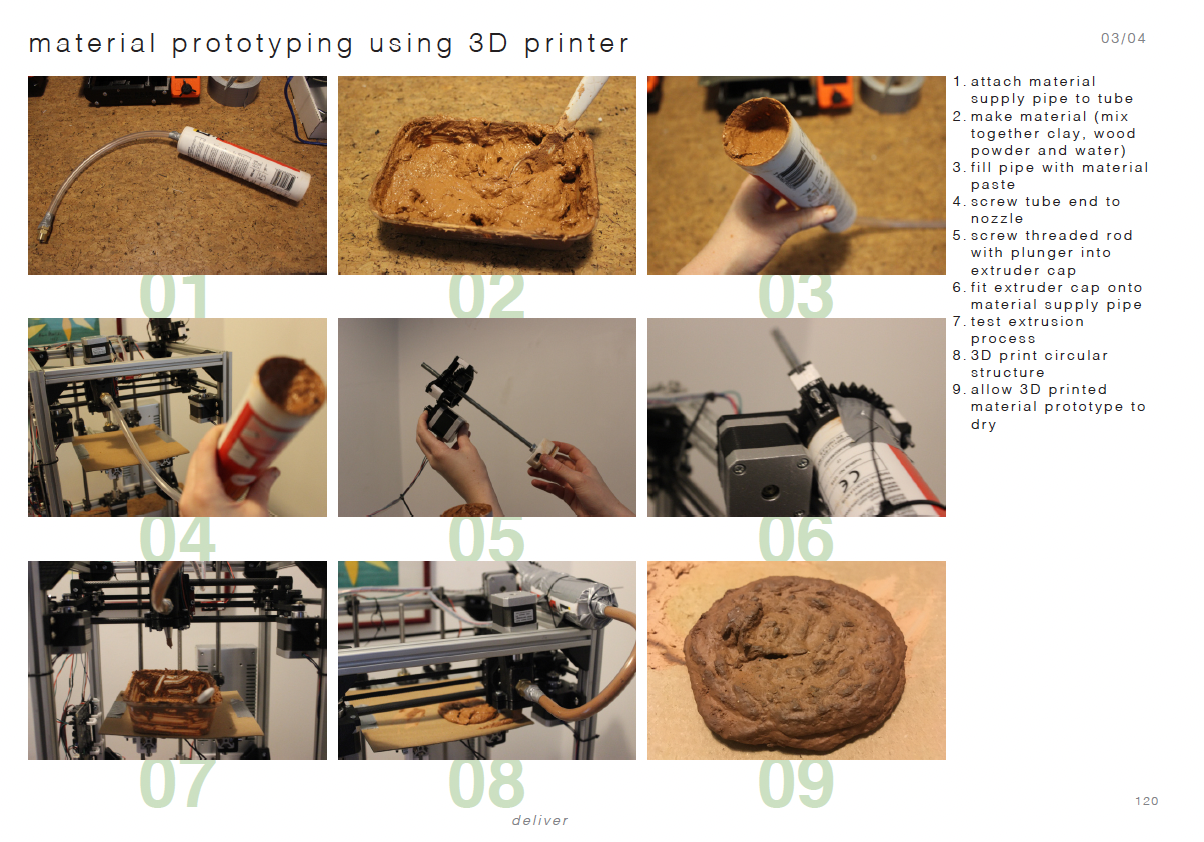
We created a printer to print in our timber waste/forest material. It was not a traditional 3D printer with heating elements, but the design was similar, it needed to be able to ‘print’ in a soft clay-like material rather than a hard plastic. We adapted the design of an existing printer and improvised how to make the clay extruder - settling on reusing a silicone gun tube and a pipe.


Detail of making process
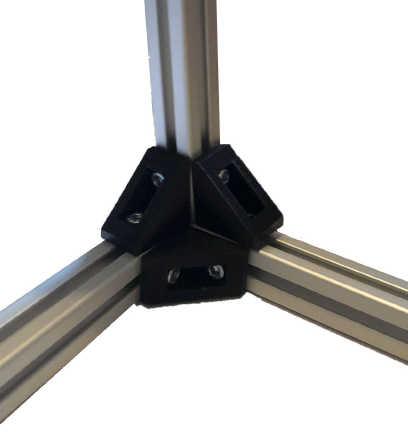
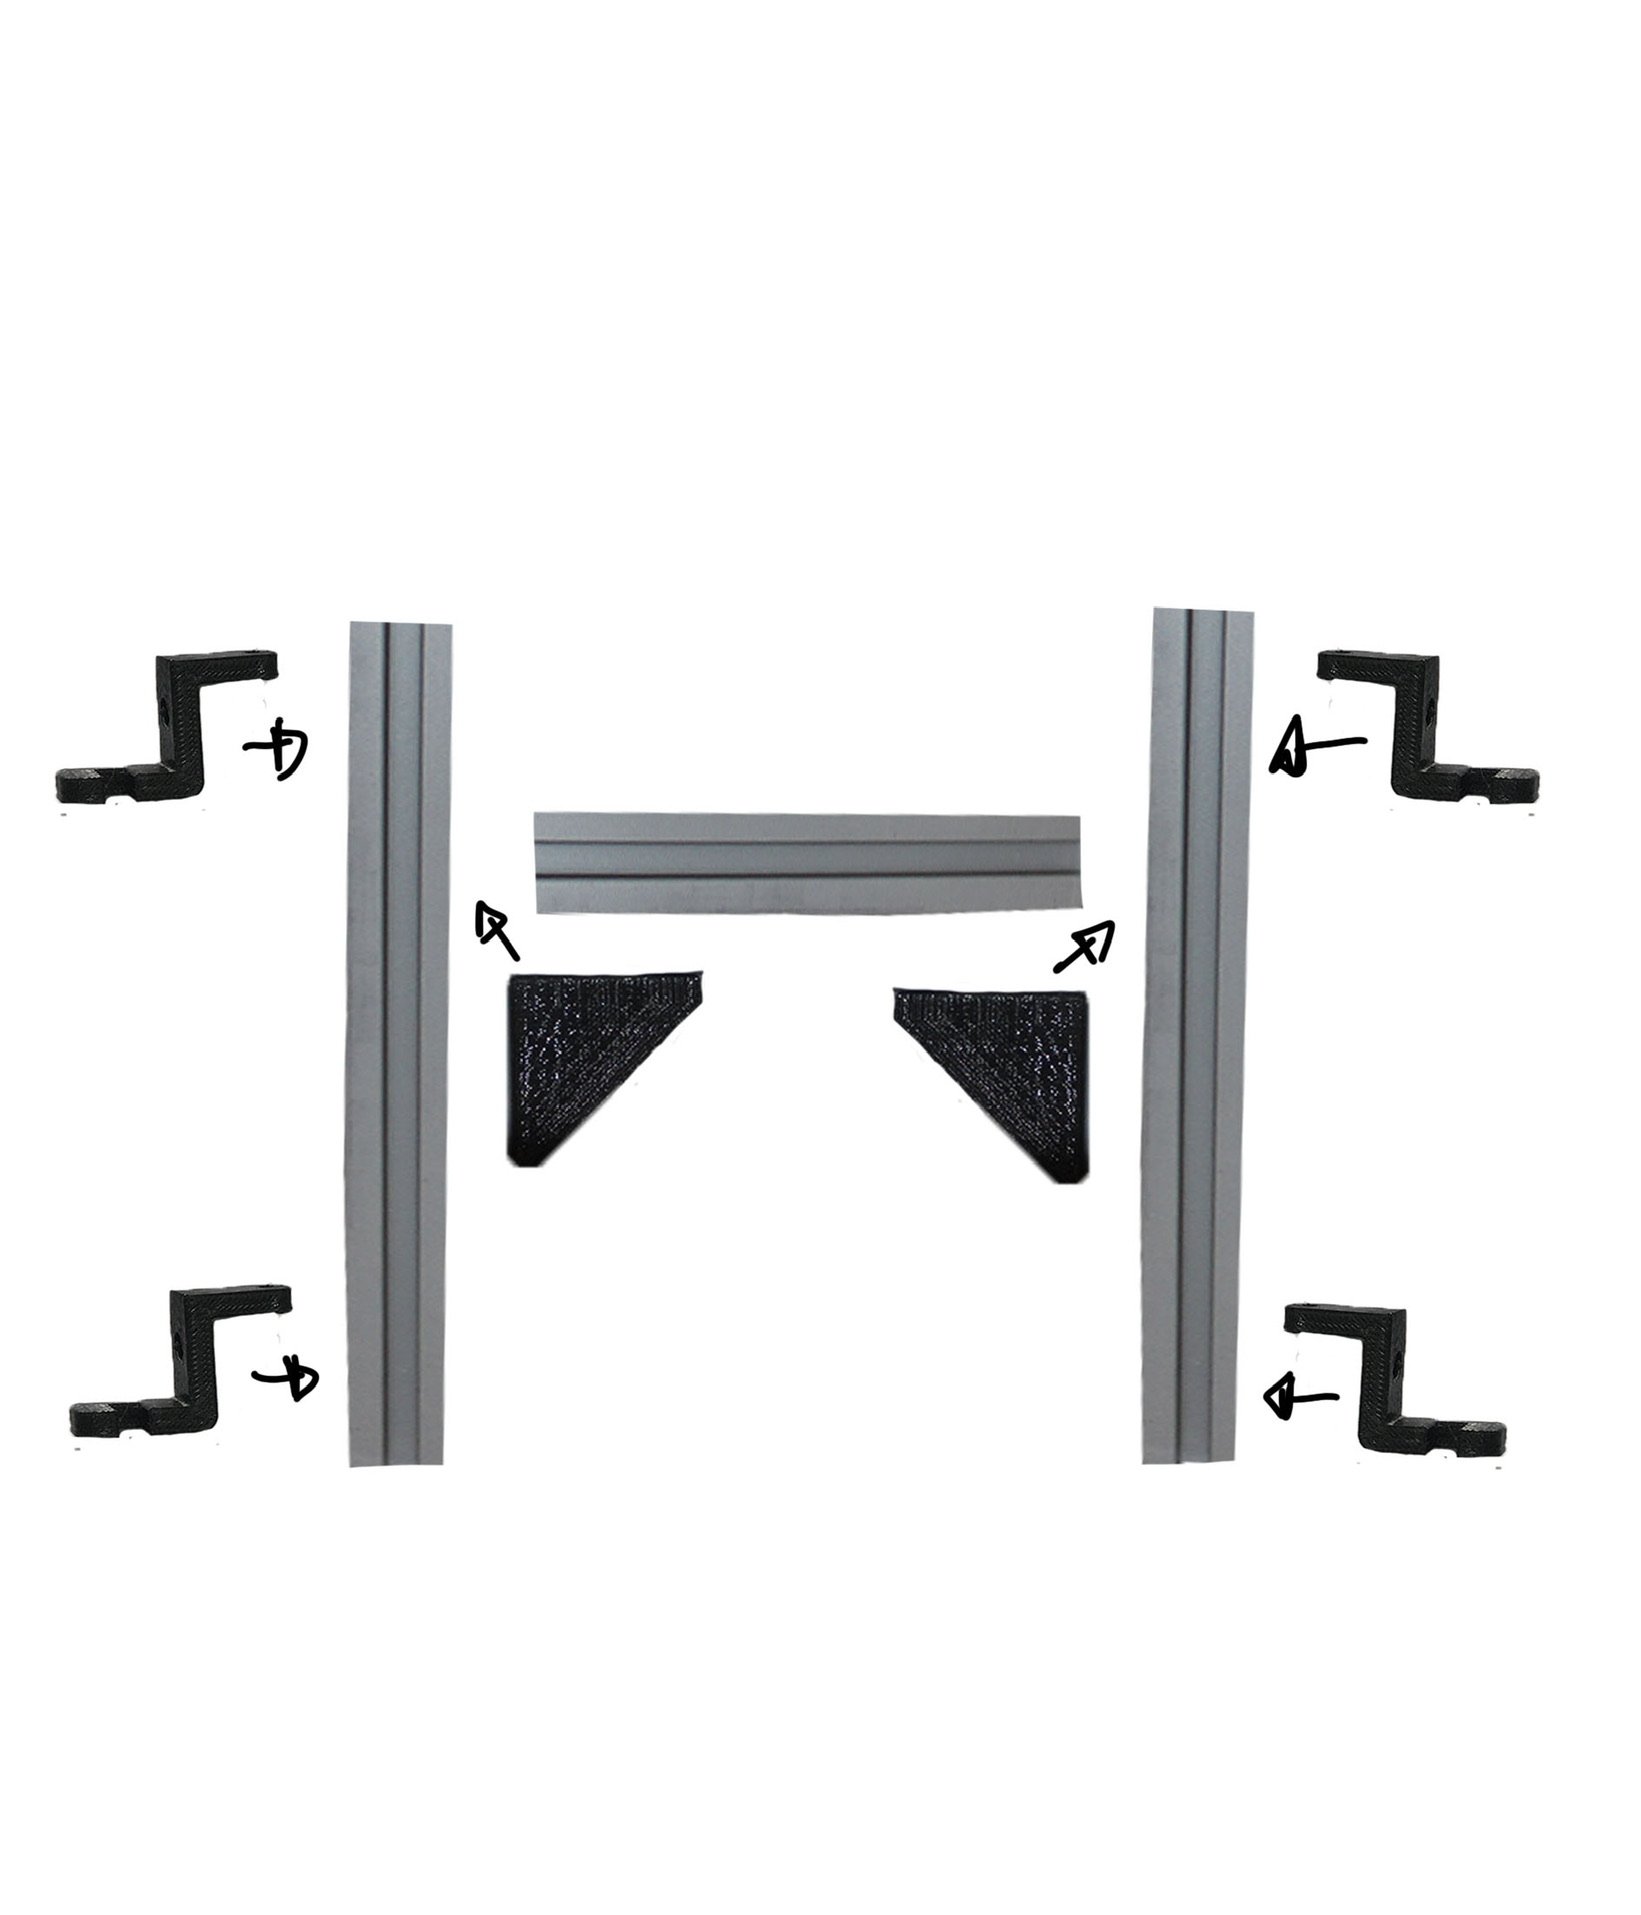
Frame construction - the aluminium extrusion was cut to the correct length then joined using triangular corner brackets. The axis attachments were also inserted here.
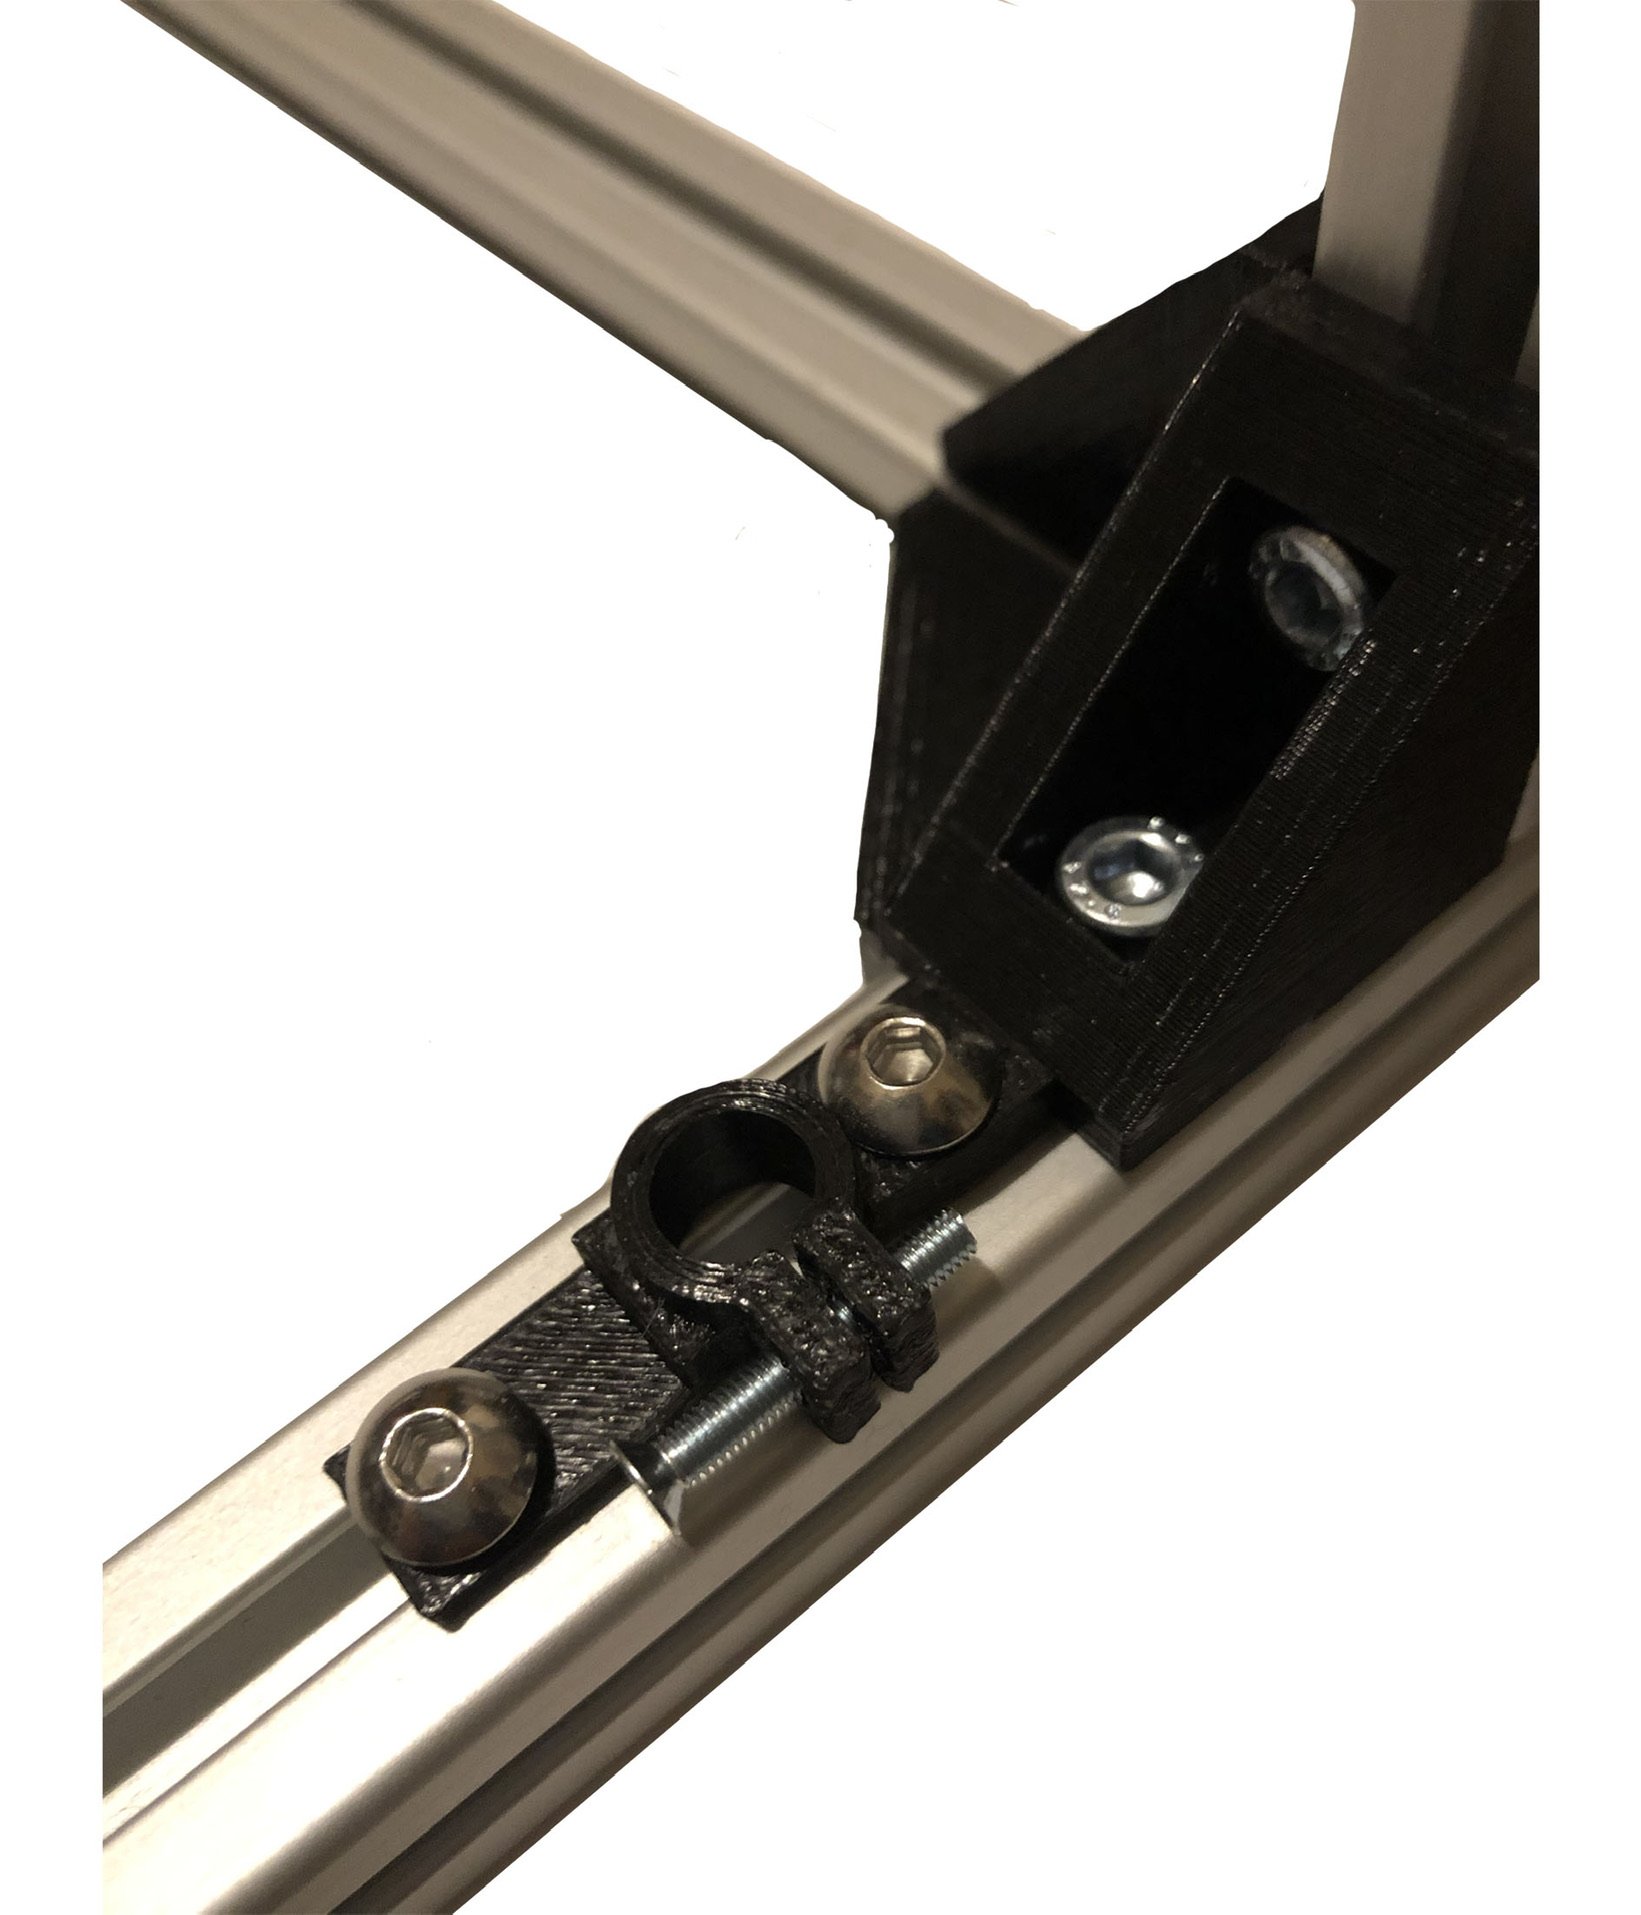
Y axis clamps - the y axis steel rods are inserted into the frame using clamps, held on by m5 screws and are tightened by bolts, this had to be inserted before the frame was completed.

The final frame - structure needed to be rigid to make sure to withstand the vibrations of the printing process.
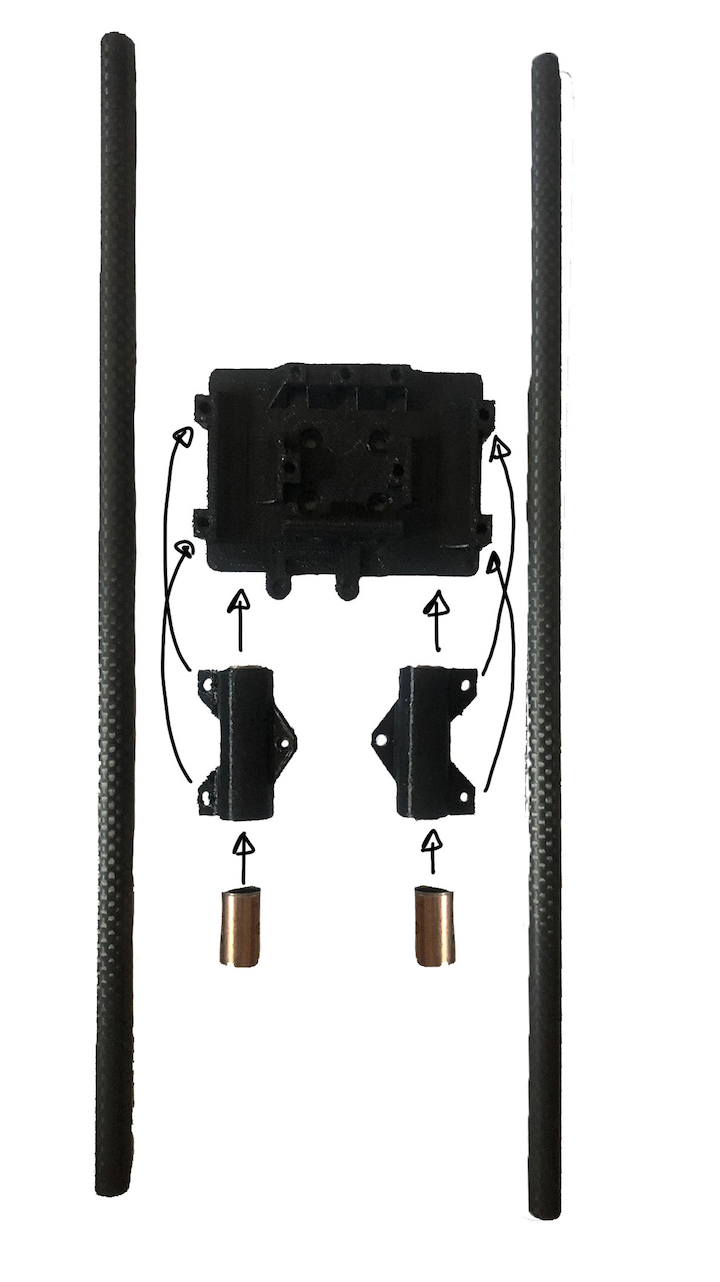
X axis - This carries the extruder along the carbon fibre extrusion. To ensure smooth movement along the tubing it had to be sanded until the bearing could slide down smoothly.
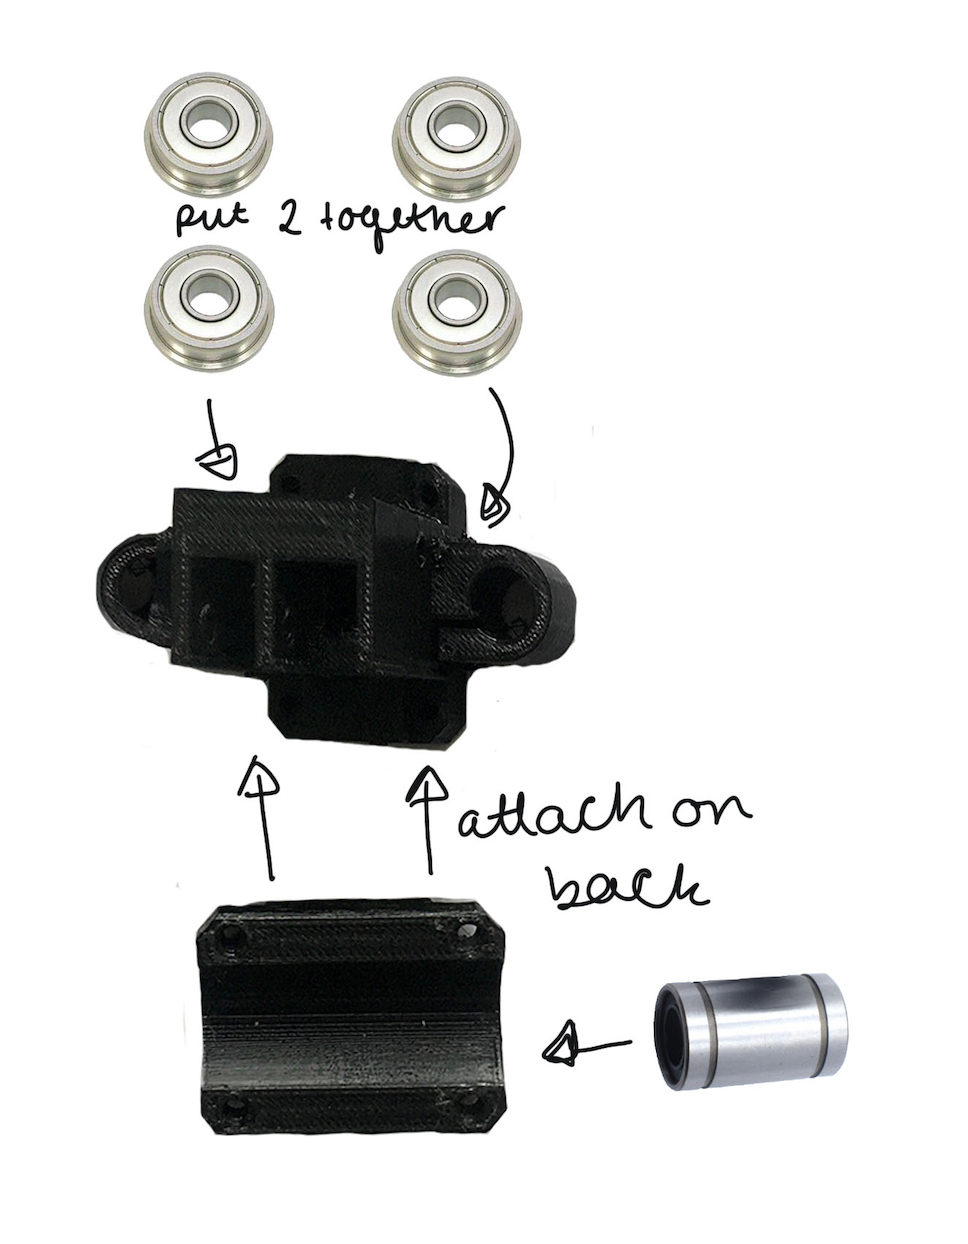
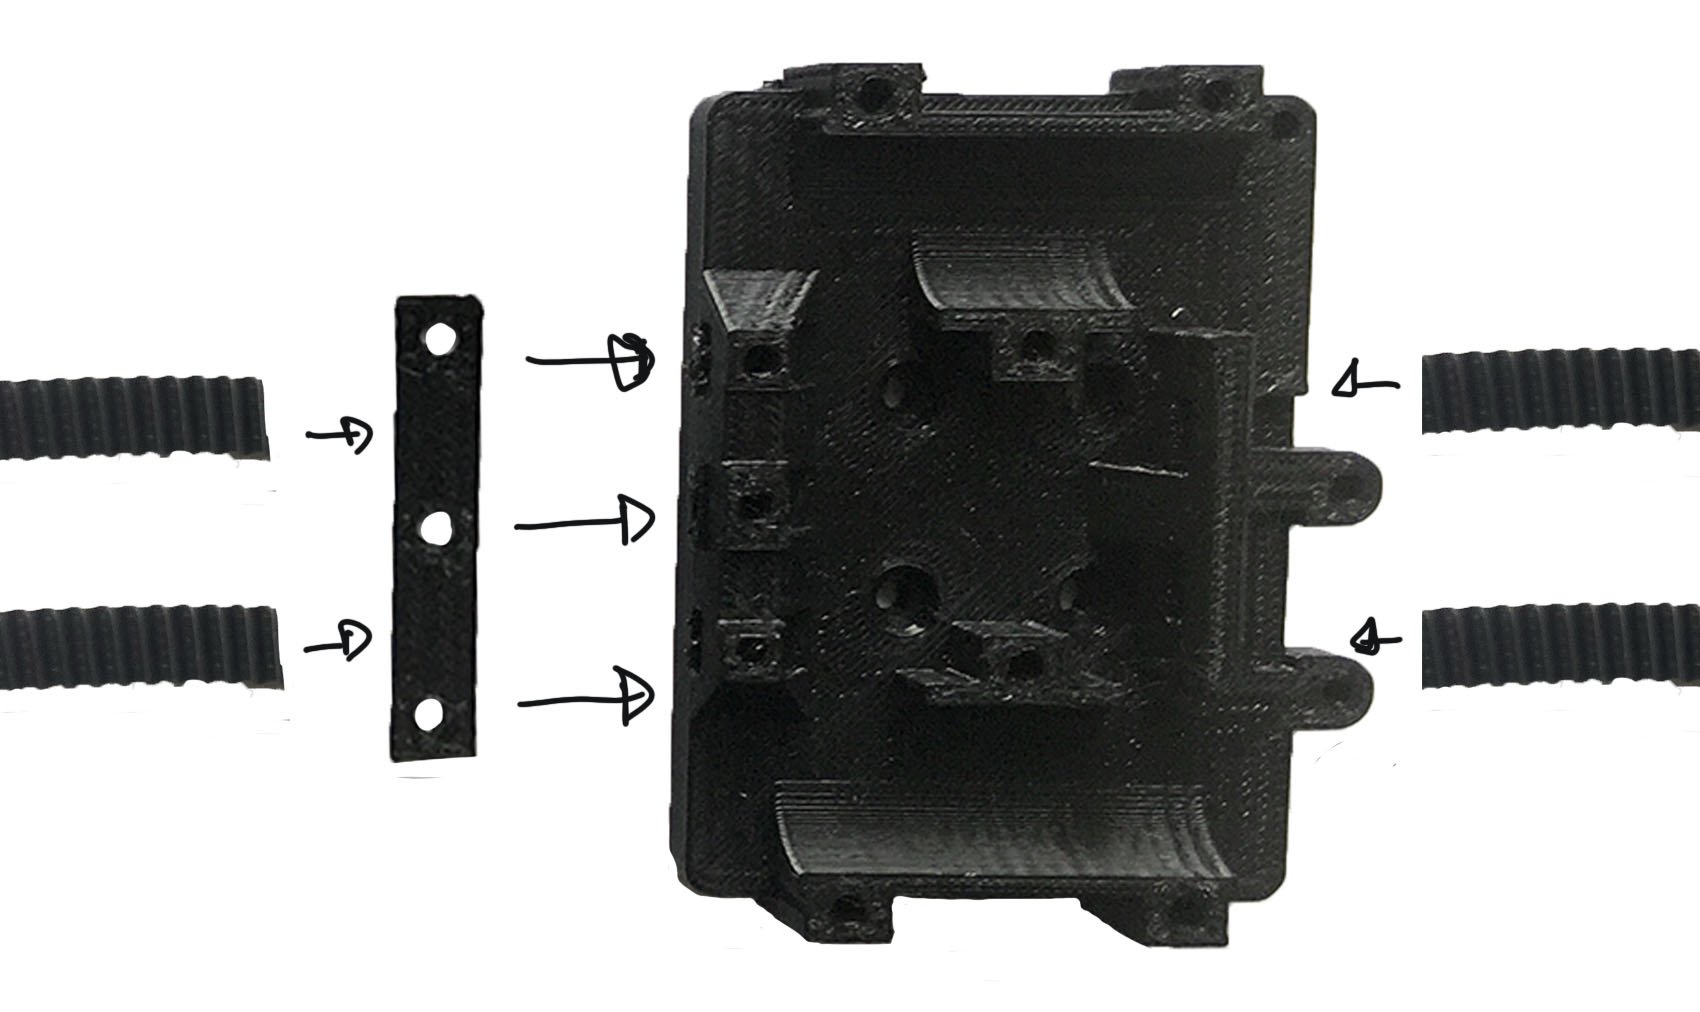
XY joiners - put together by attaching the bearings and clamps with m3 bolts.

X axis full assembly - Joiners, carrier and rods attached together.
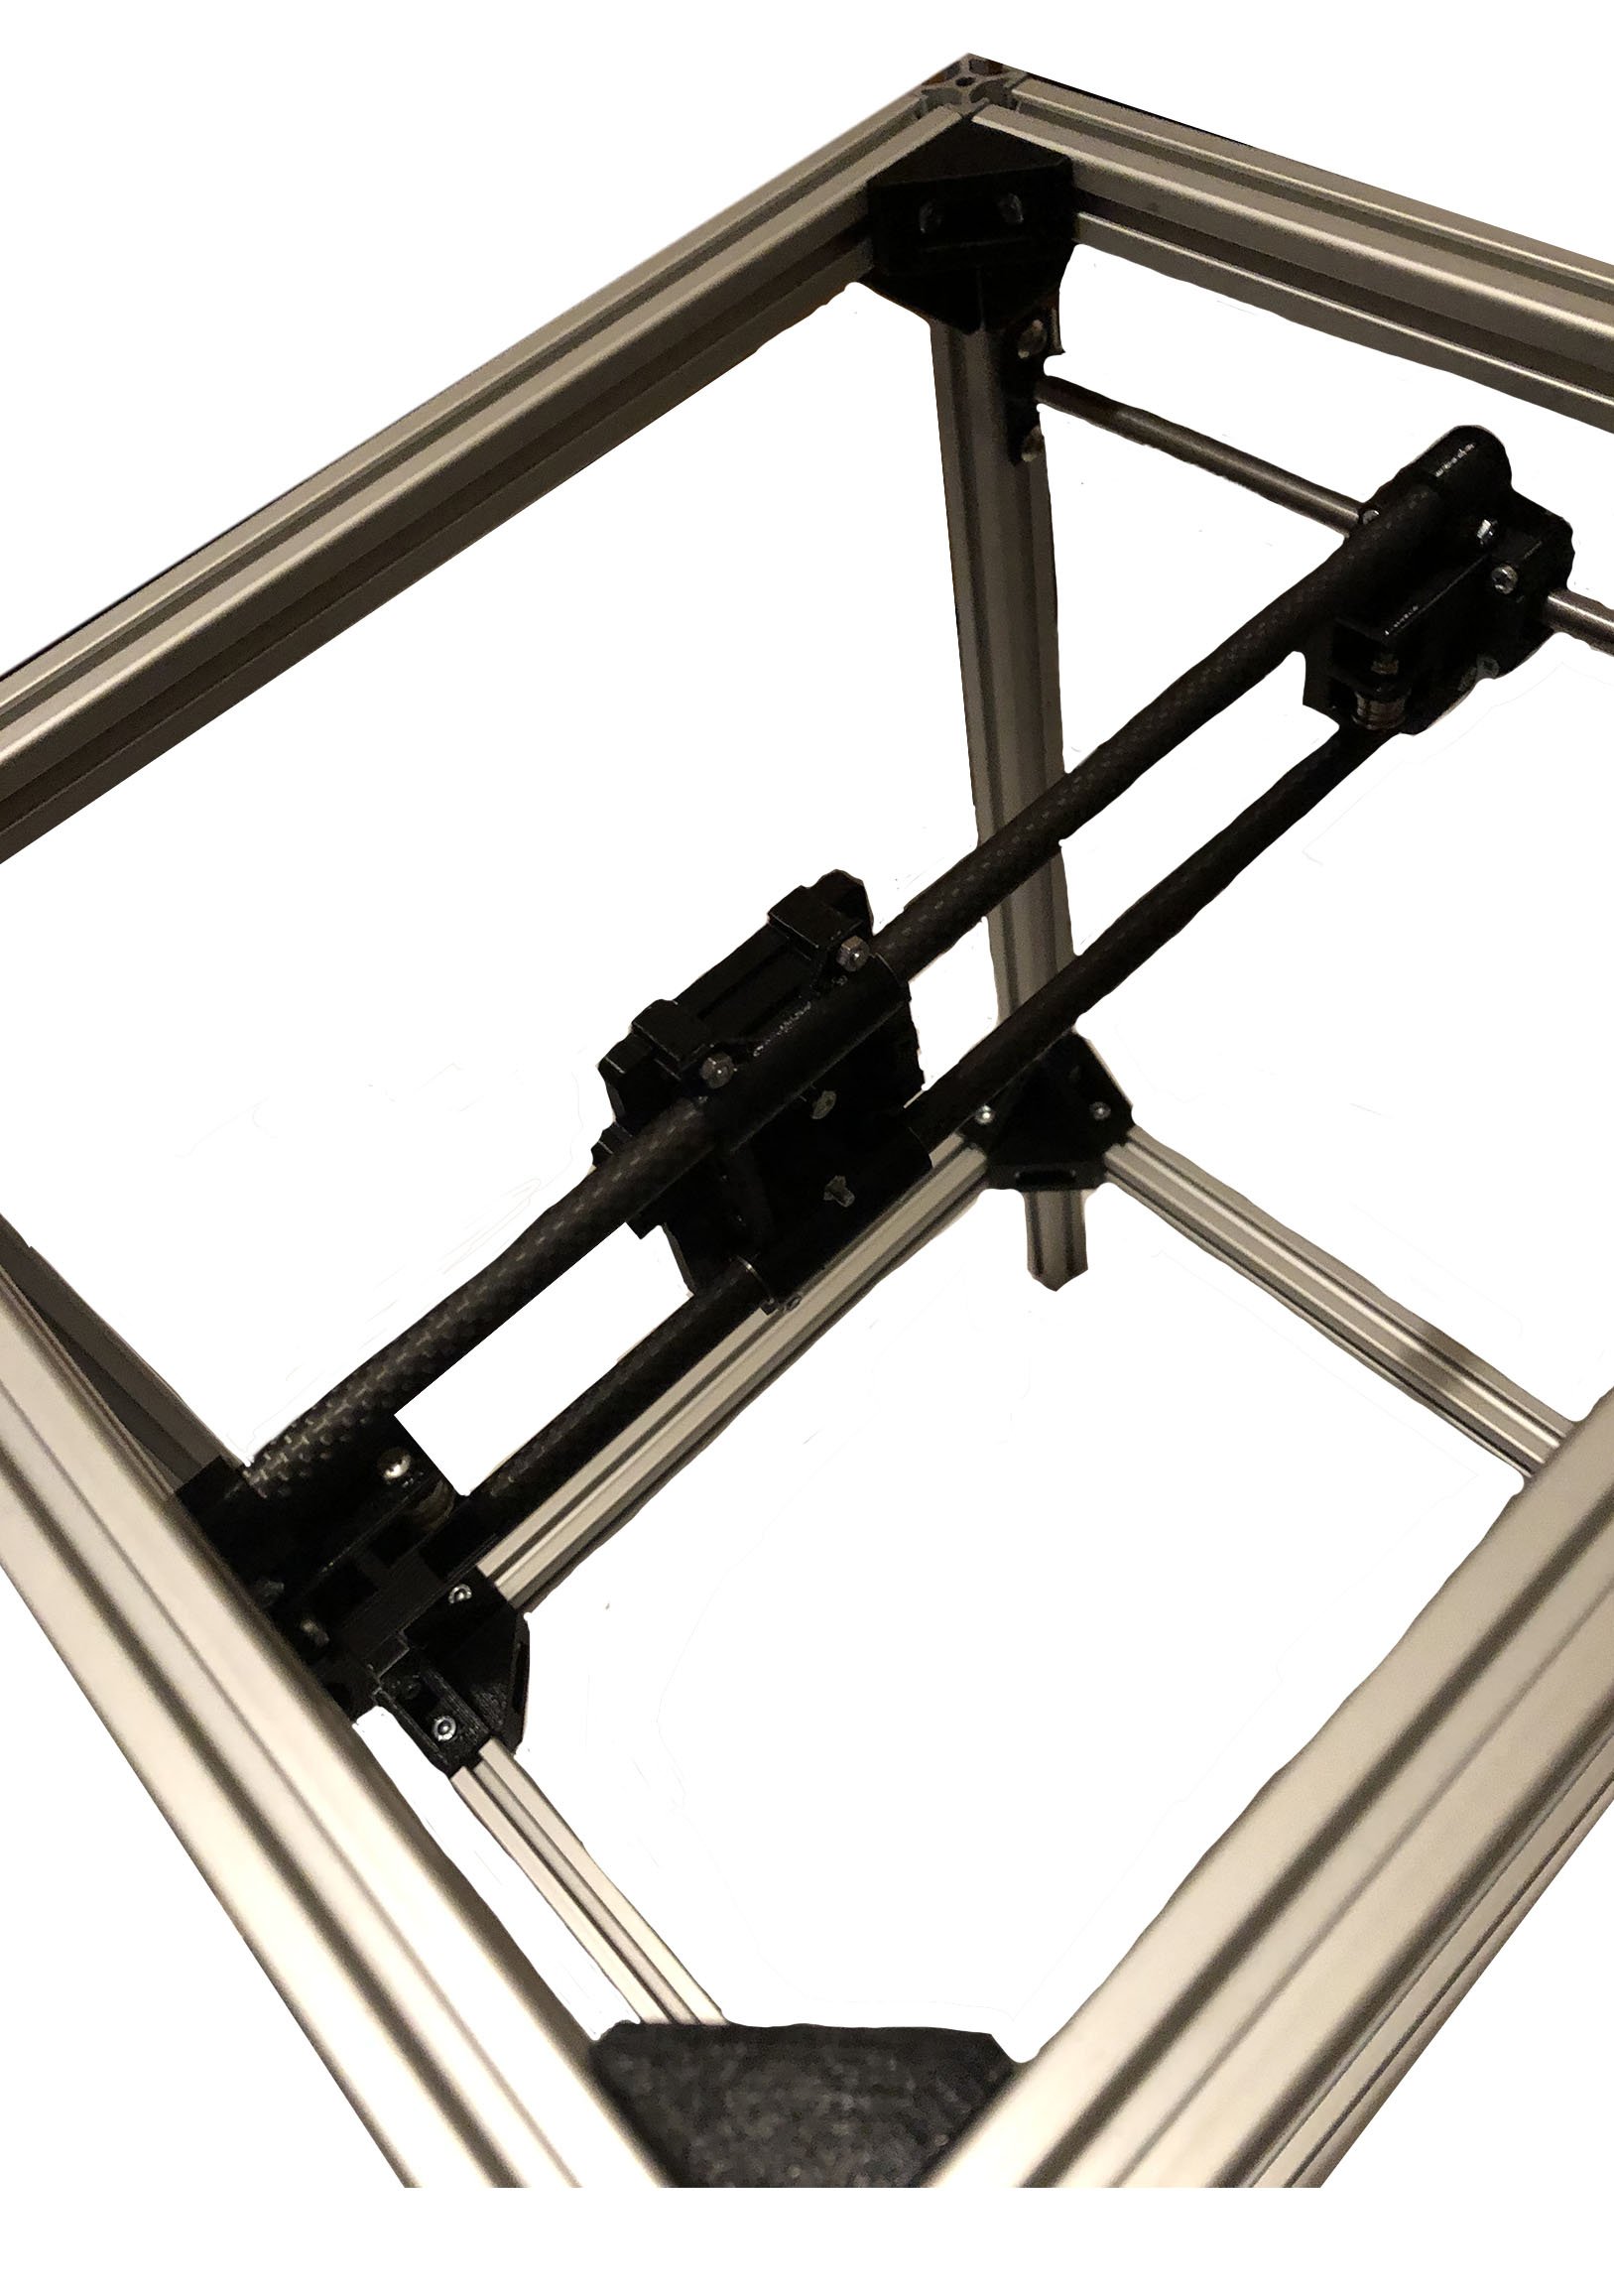
Final X axis assembly - the joiners and thus the x axis are suspended between the two rods. The left side has an indent as the left side motor has to sit higher than the right to allow the belts to run in parallel without hitting each other.

Idlers - the idlers were then screwed to the frame. This is to allow the belts to turn 90 degrees smoothly.
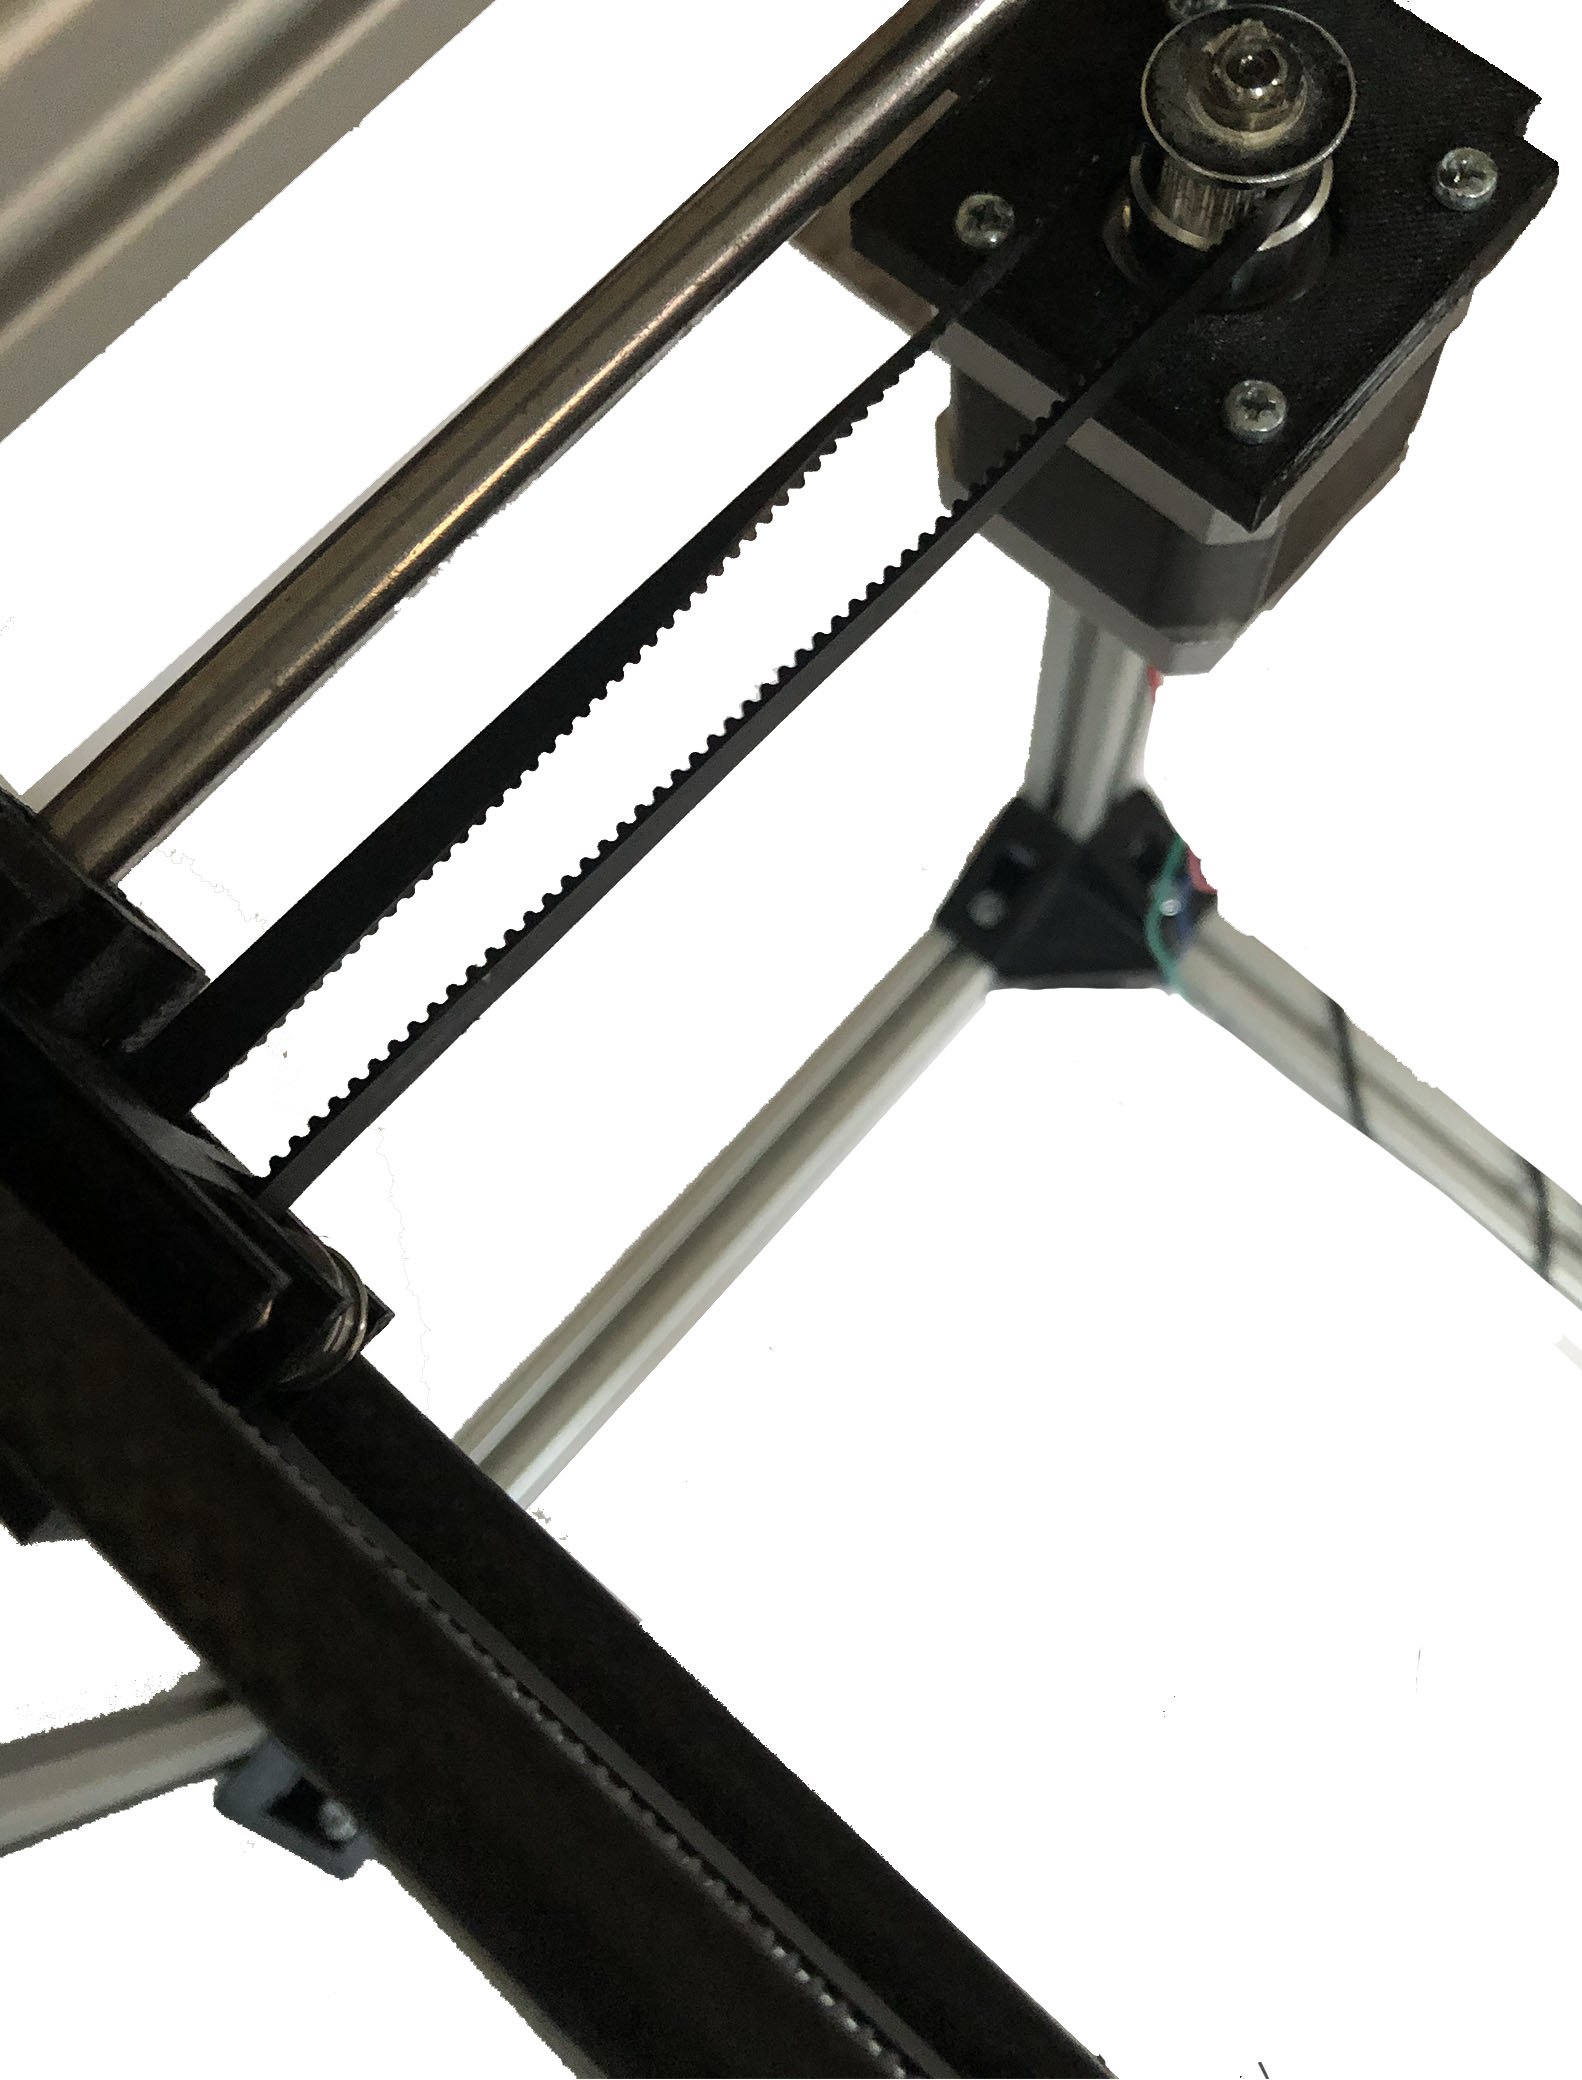
Smooth running - there had to be a twist in the belt to allow the teeth to contact the teeth on the motor and the smooth side to contact the smooth bearing on the idler.
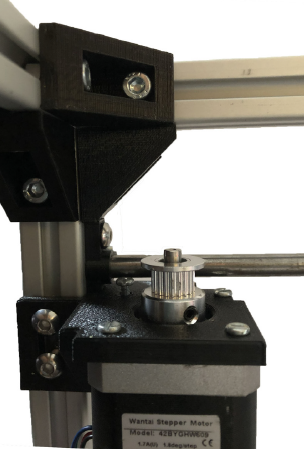
Motor mounting - the motor brackets were attached to the frame. The left being mounted higher above the rod bracket screw, so the belts are able to run parallel instead of crossing over. The motors themselves were then screwed into the bracket.
Attaching the belt - tension has to be exact to allow the nozzle carriage to move smoothly. This belt clamp allowed the tension to be adjusted easily by letting the screws in and out.

Z axis construction - the steel rods were connected to the z frame using 4 brackets to clamp the rods. It is very important that they are straight to keep the print bed level.
Making the print bed - as with the frame the bed was constructed by putting the extrusion together with the triangular brackets. The bed brackets were then attached to the side of the extrusion.
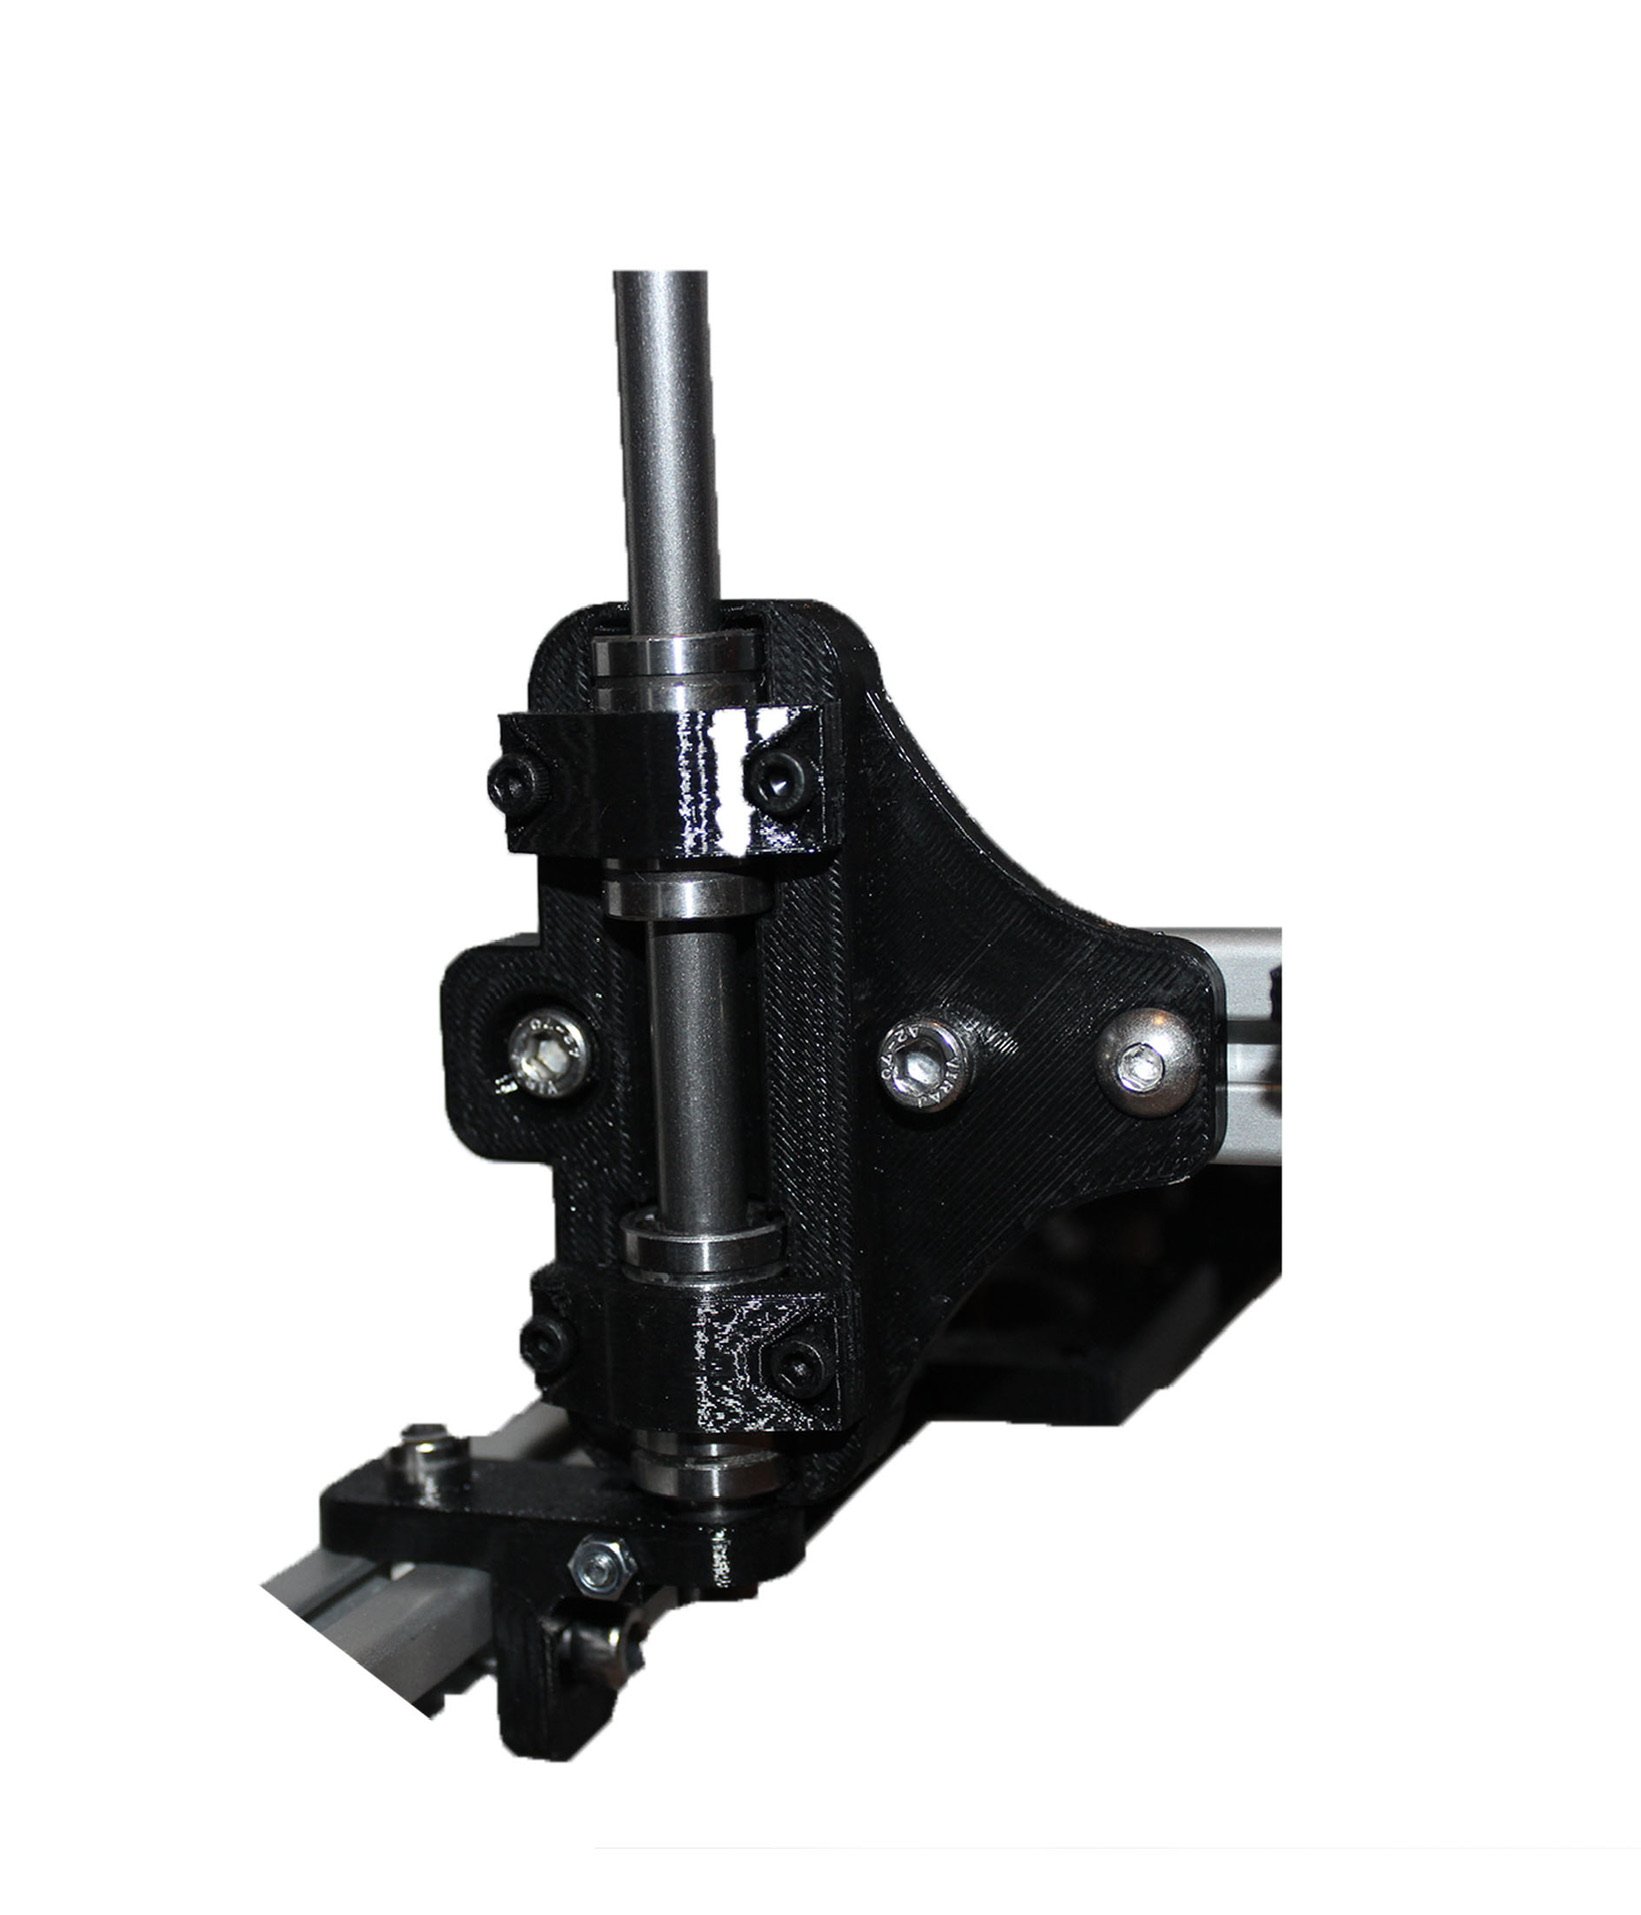
Making the z carriage - two bearings are clamped in the z carriage. The carriage was redesigned to allow three screws to attach to the print bed to increase the stability of it.
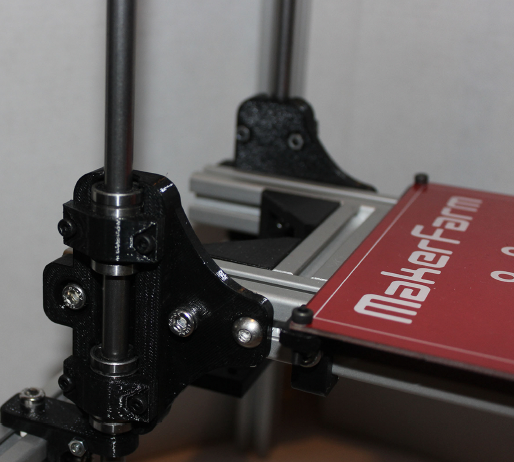
Bed attachment - the bed was then screwed to the brackets and z carriage to the extrusion, with the motor attached between the two.
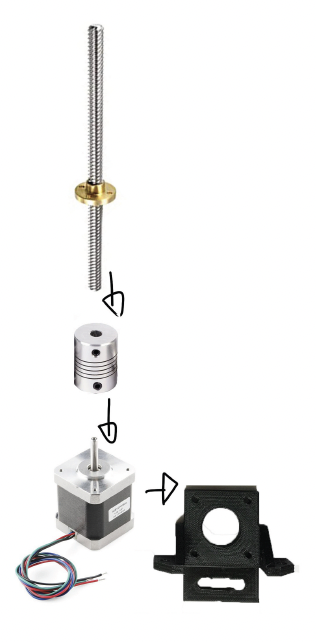
Z axis - to move the printer bed a lead screw travels up the z axis. The lead screw is attached to the z motor using a flexible coupler and the bed attached to this using a t nut.
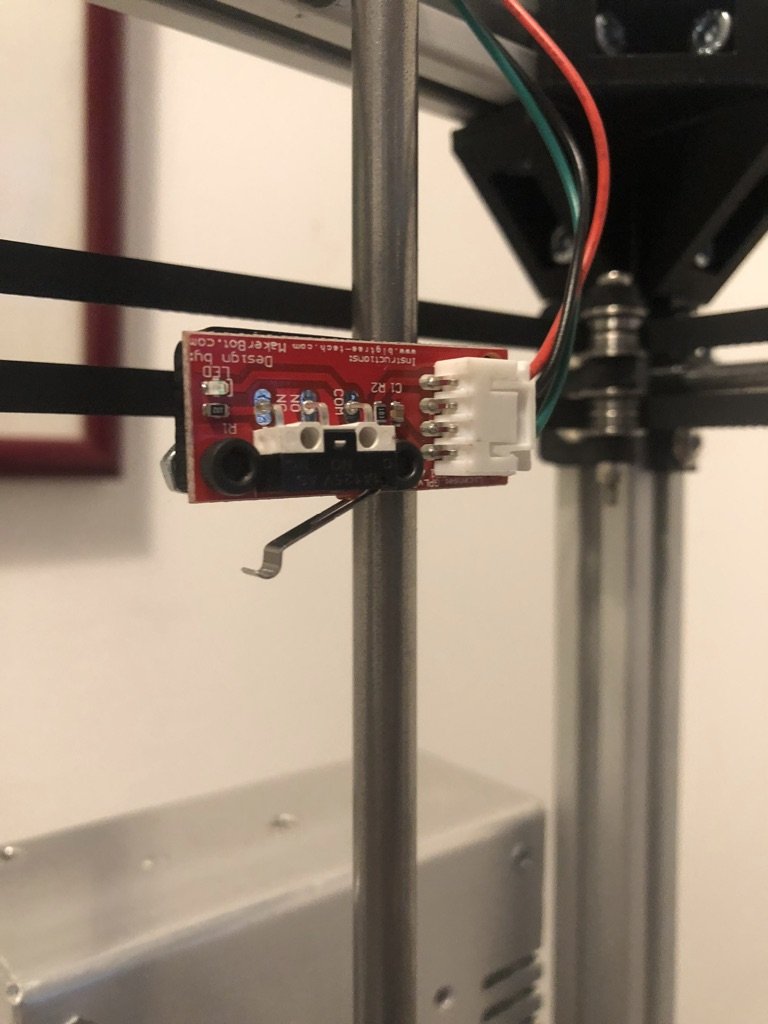
End stops - attached to each axis. They are used to trigger the code to stop the printer so it doesn’t go too far on one axis.
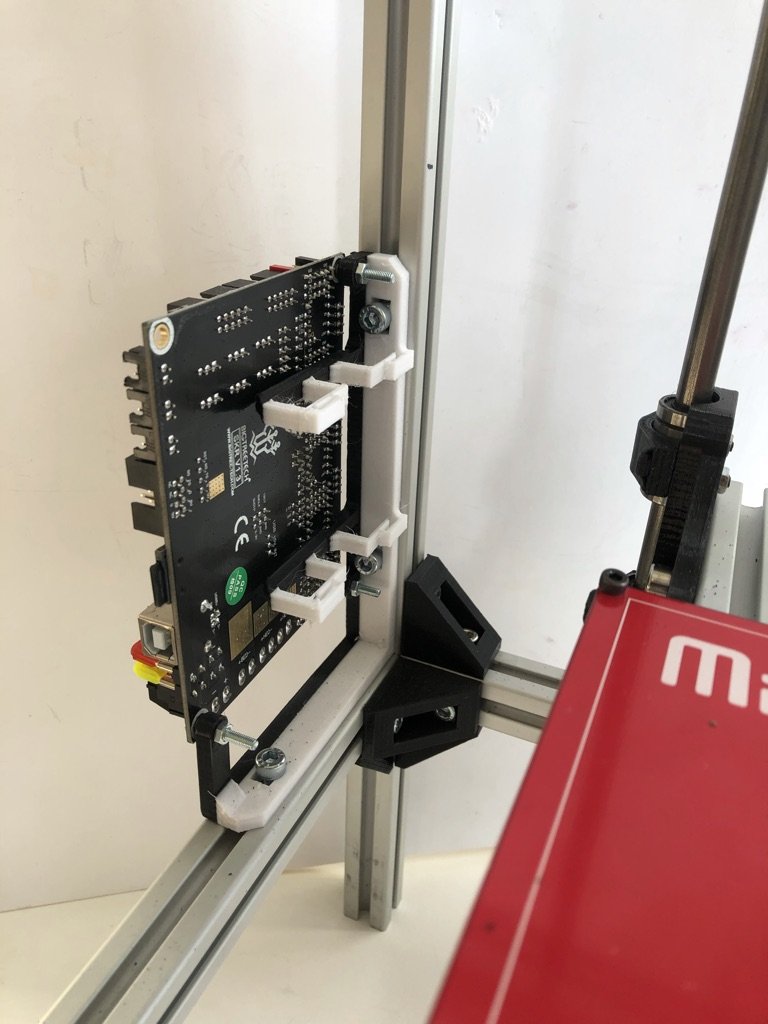
Control board mount
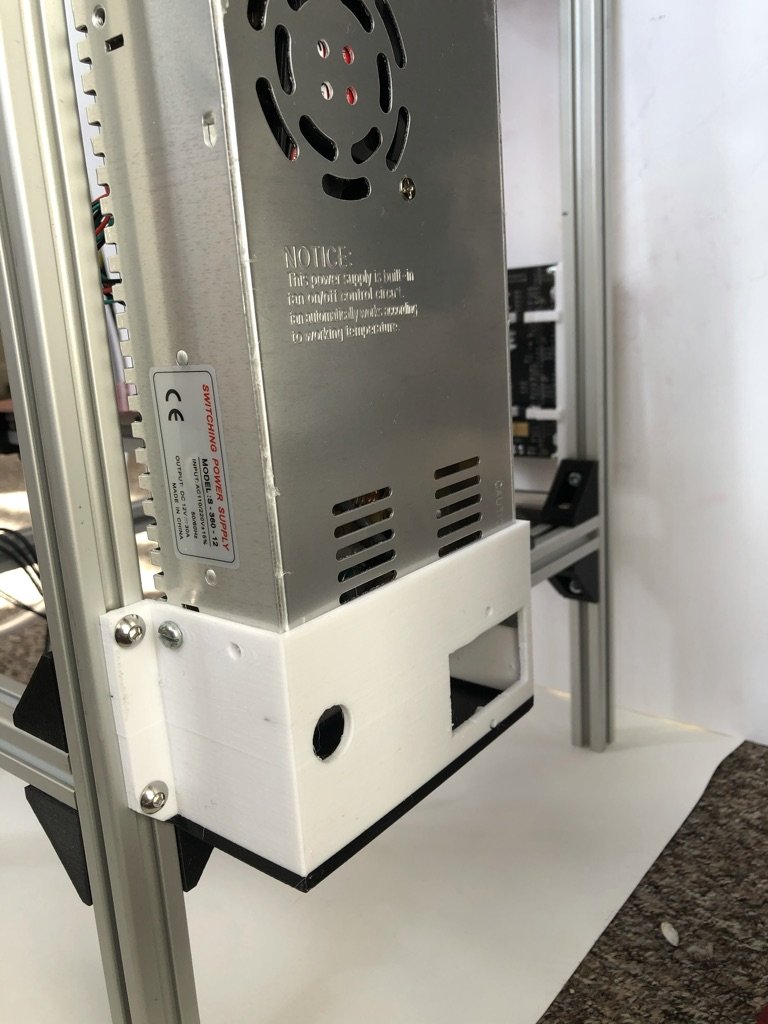
Power supply mount
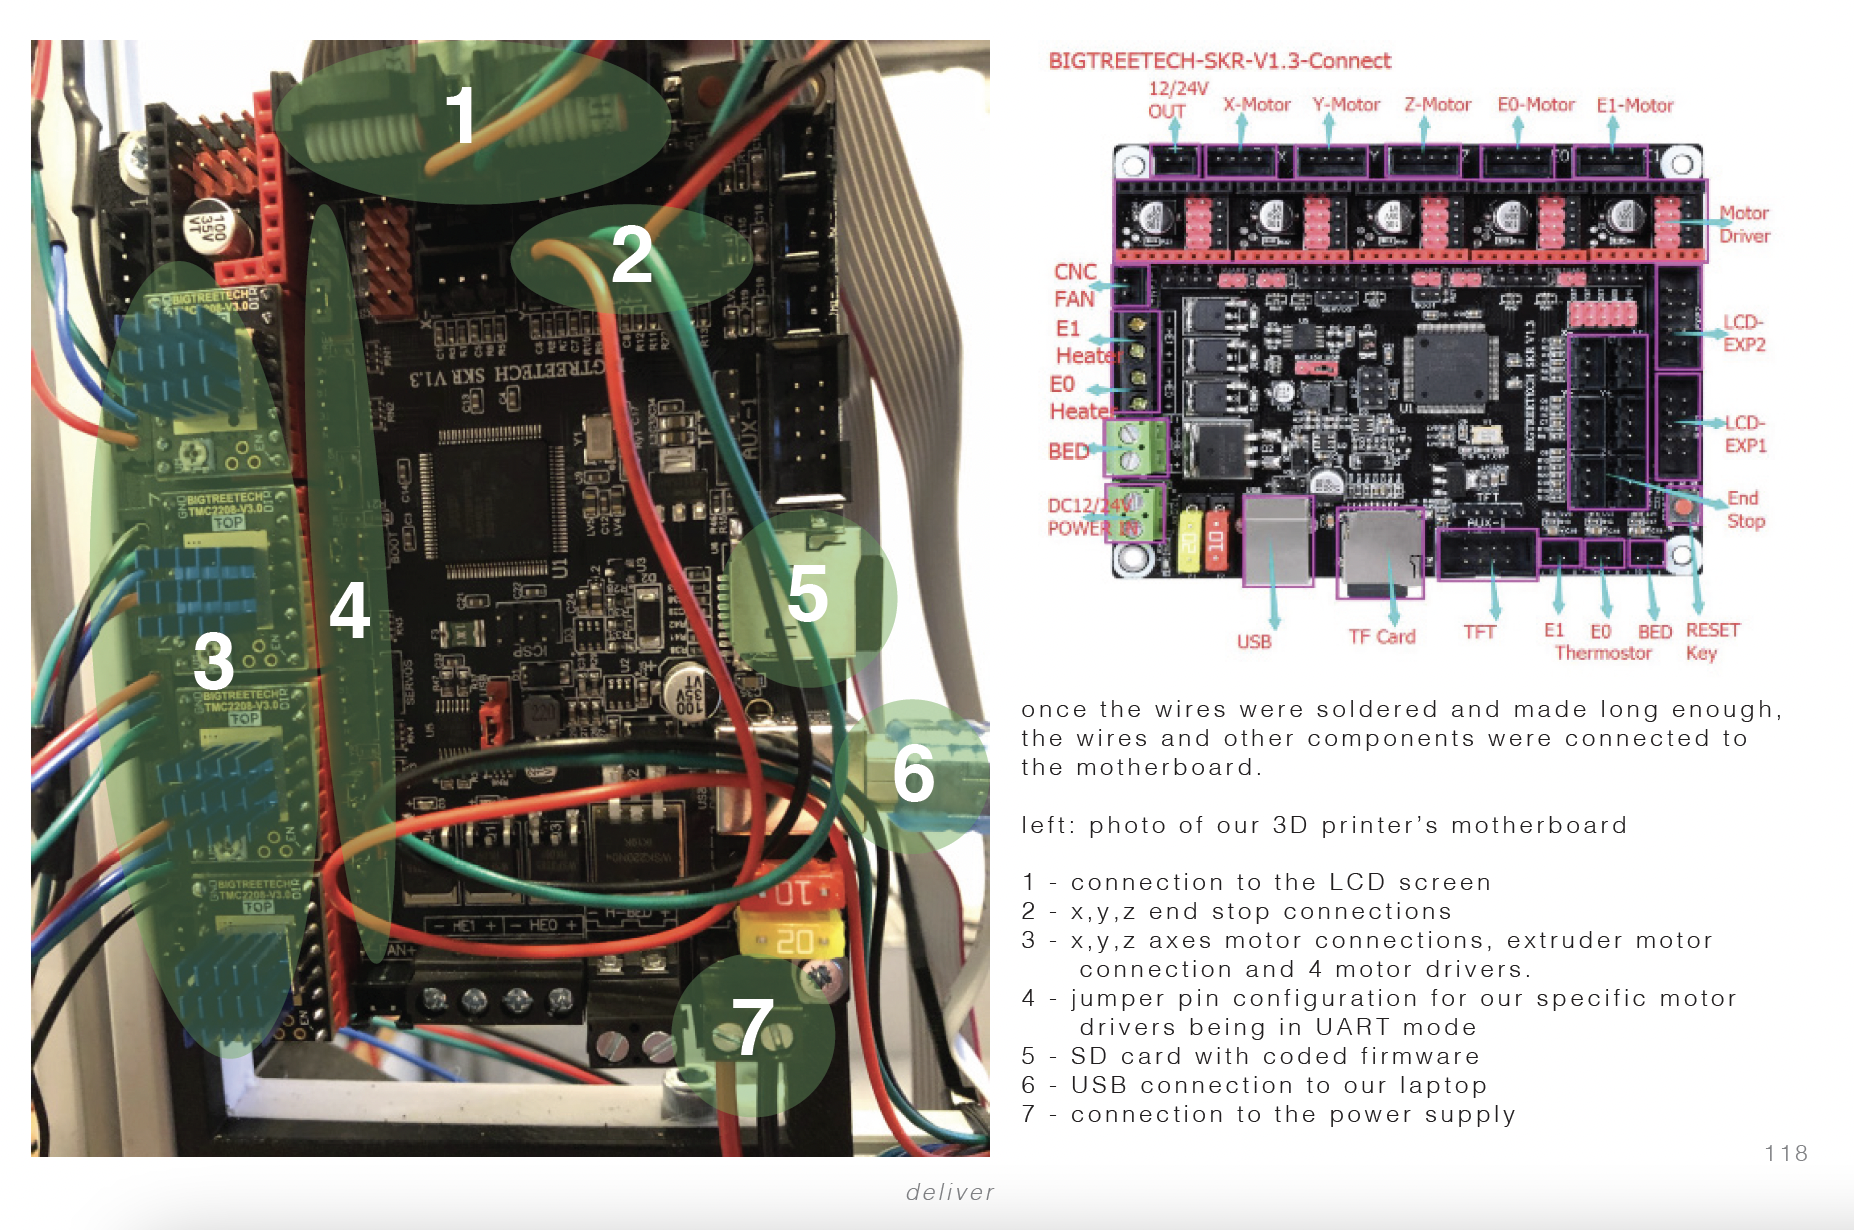
Wiring up on he control board
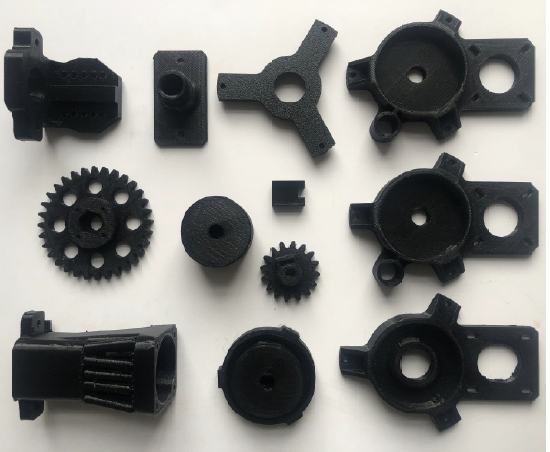
Parts for the nozzle and extruder
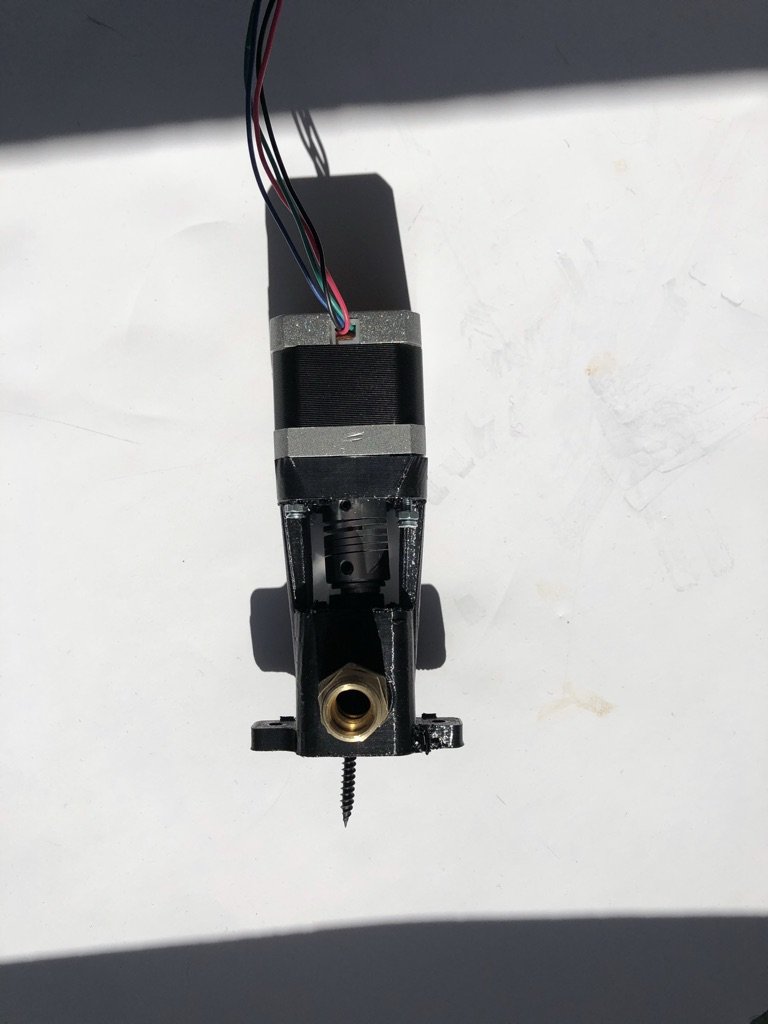
Completed extruder and motor
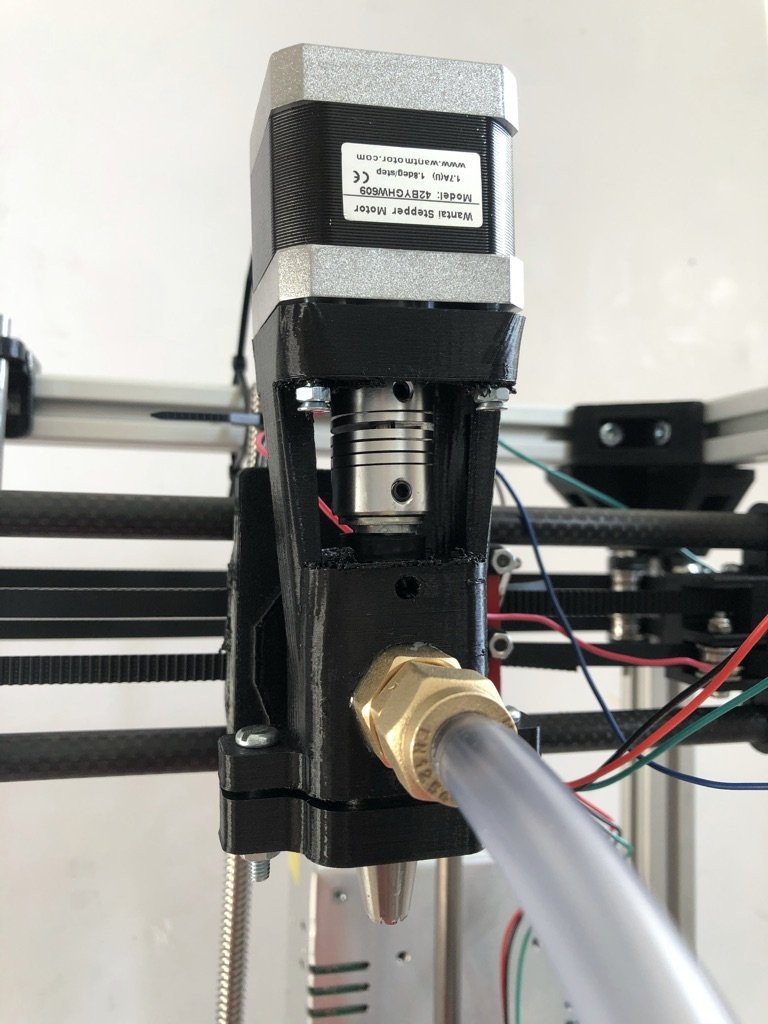
Extruder attached to hose (material supply) and the X axis of the printer.
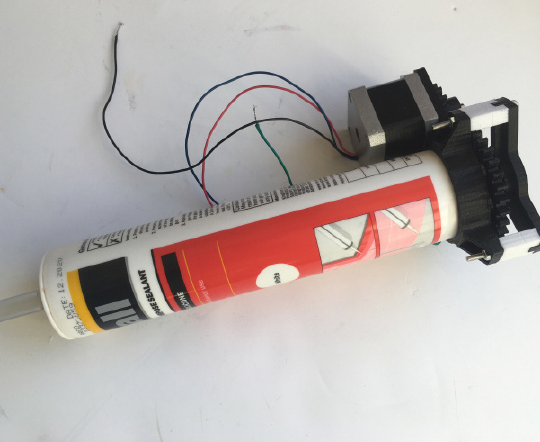
Completed material supply with motor attached
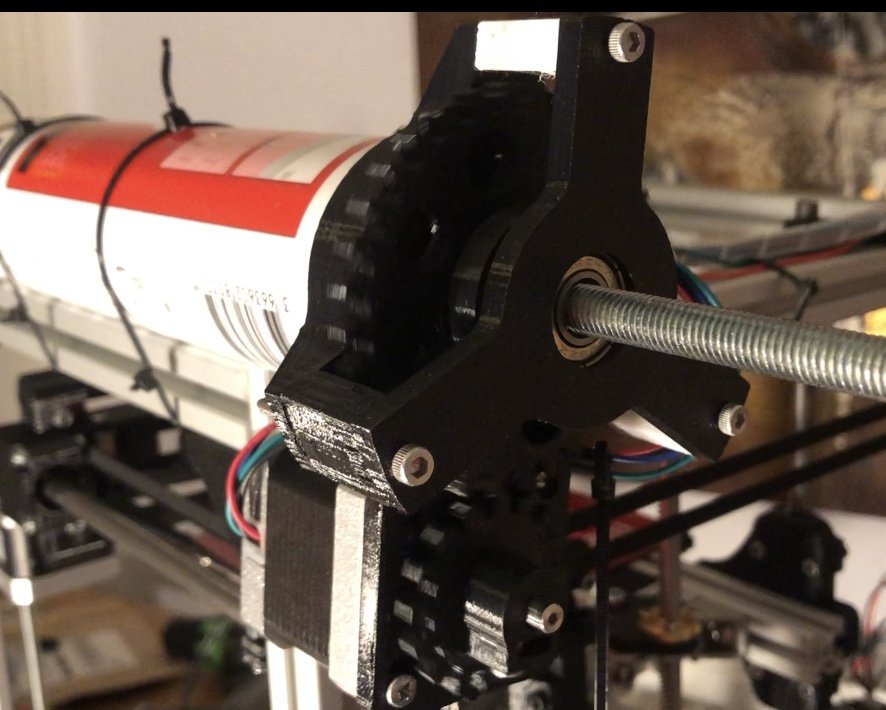
Material supply extrusion mechanism
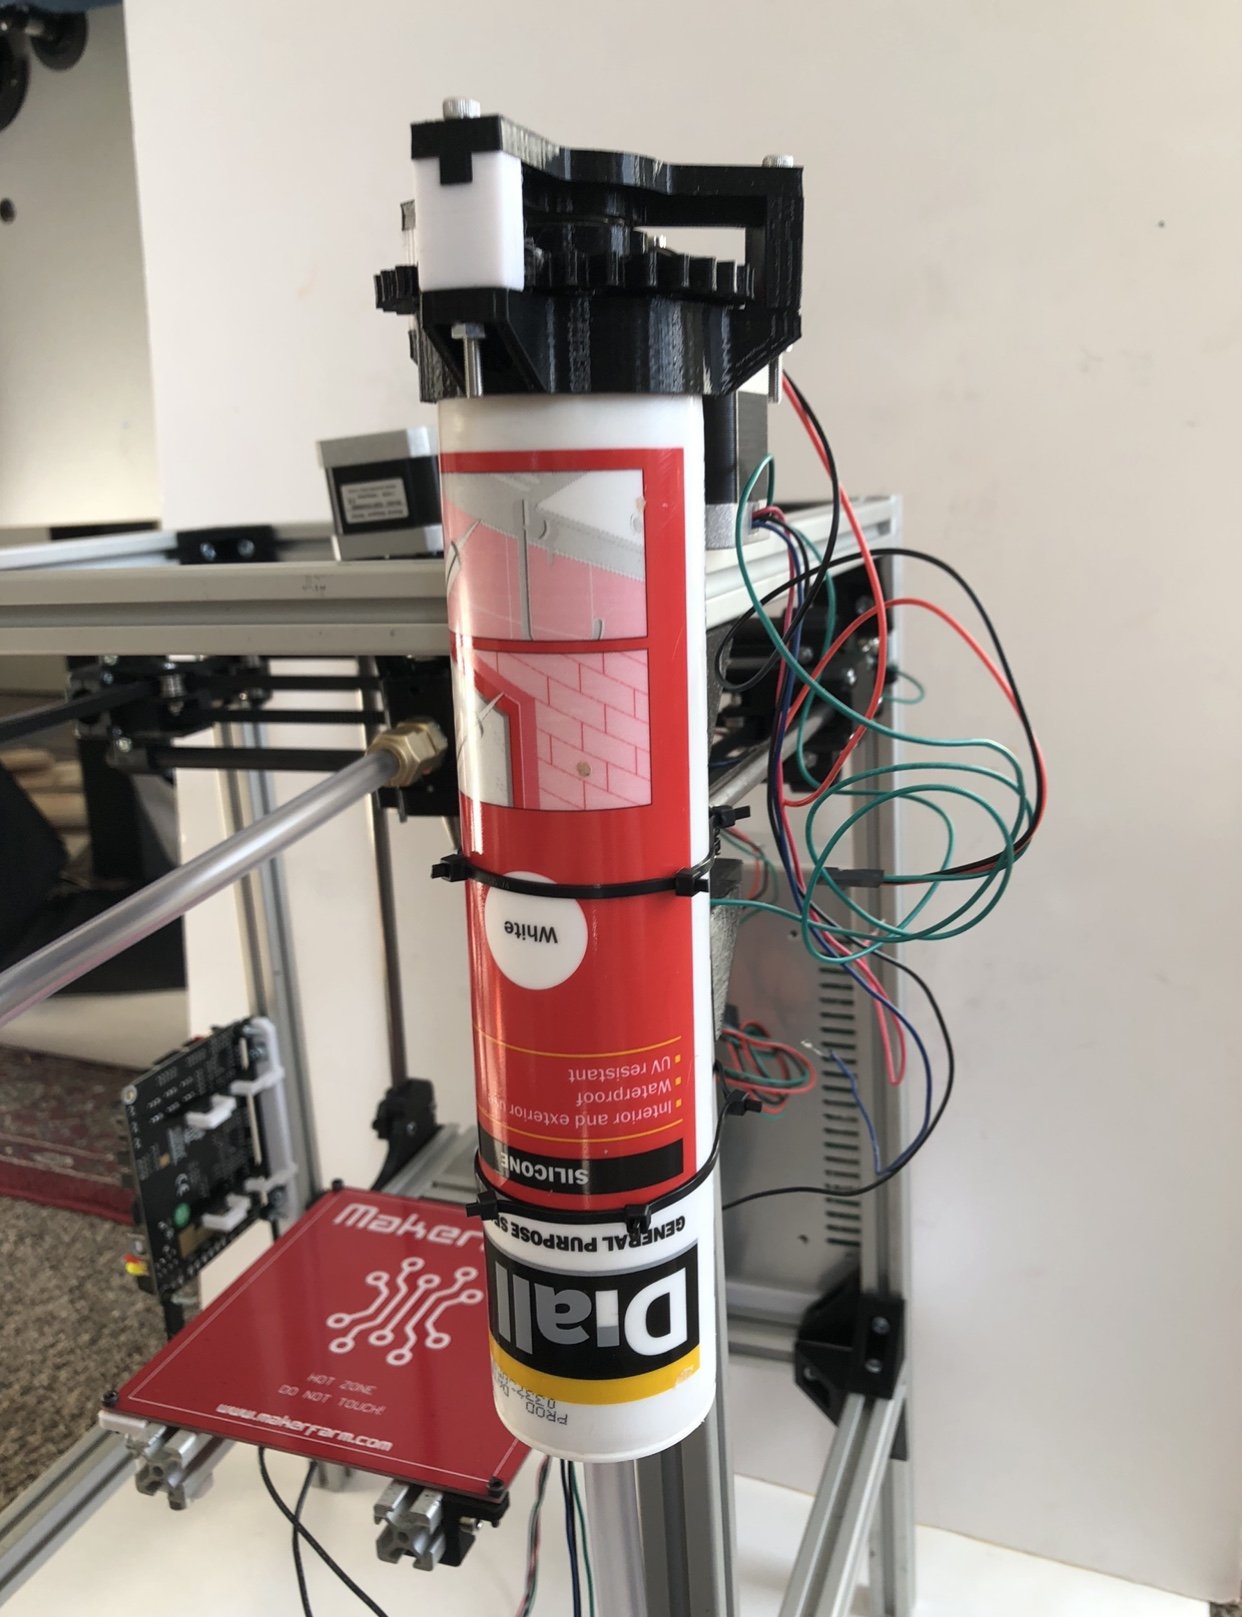
Material supply attached to the printer

Coding
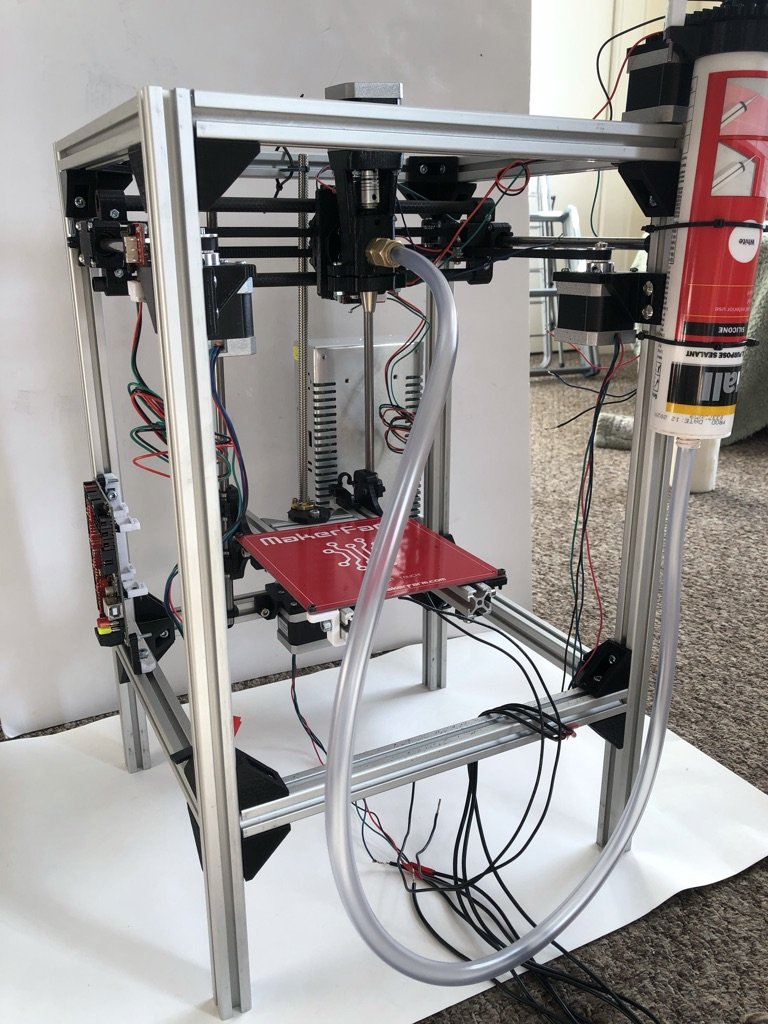
Finished printer
Printer applications


Decision: 3D printed liveable camping pods
Material experiments
To create the waste material to print in we conducted some experiments with different base materials, including: decaying leaves, waste paper pulp (paper clay), natural glues (casein glue + cornstarch), tree resins (pine pitch + birch bark), natural clay and sawdust.

Decaying leaf paper - turned out quite brittle but was able to be mixed with another substance.
Final material mixture


Resin experiments - mixed with wood thinnings and sawdust. Made a very resistant structure but would be quite hard to print in as it was quite runny before setting.


Paper pulp experiments - made with paper and hot water. Mixed with the ratio of 1 part flour, 4 parts pulp and a pinch of salt. Left overnight and blended in the morning. Worked very well but didn’t dry solidly enough to use as shelter.
Easy to obtain from the river and can make an effective structure.
Final material making process
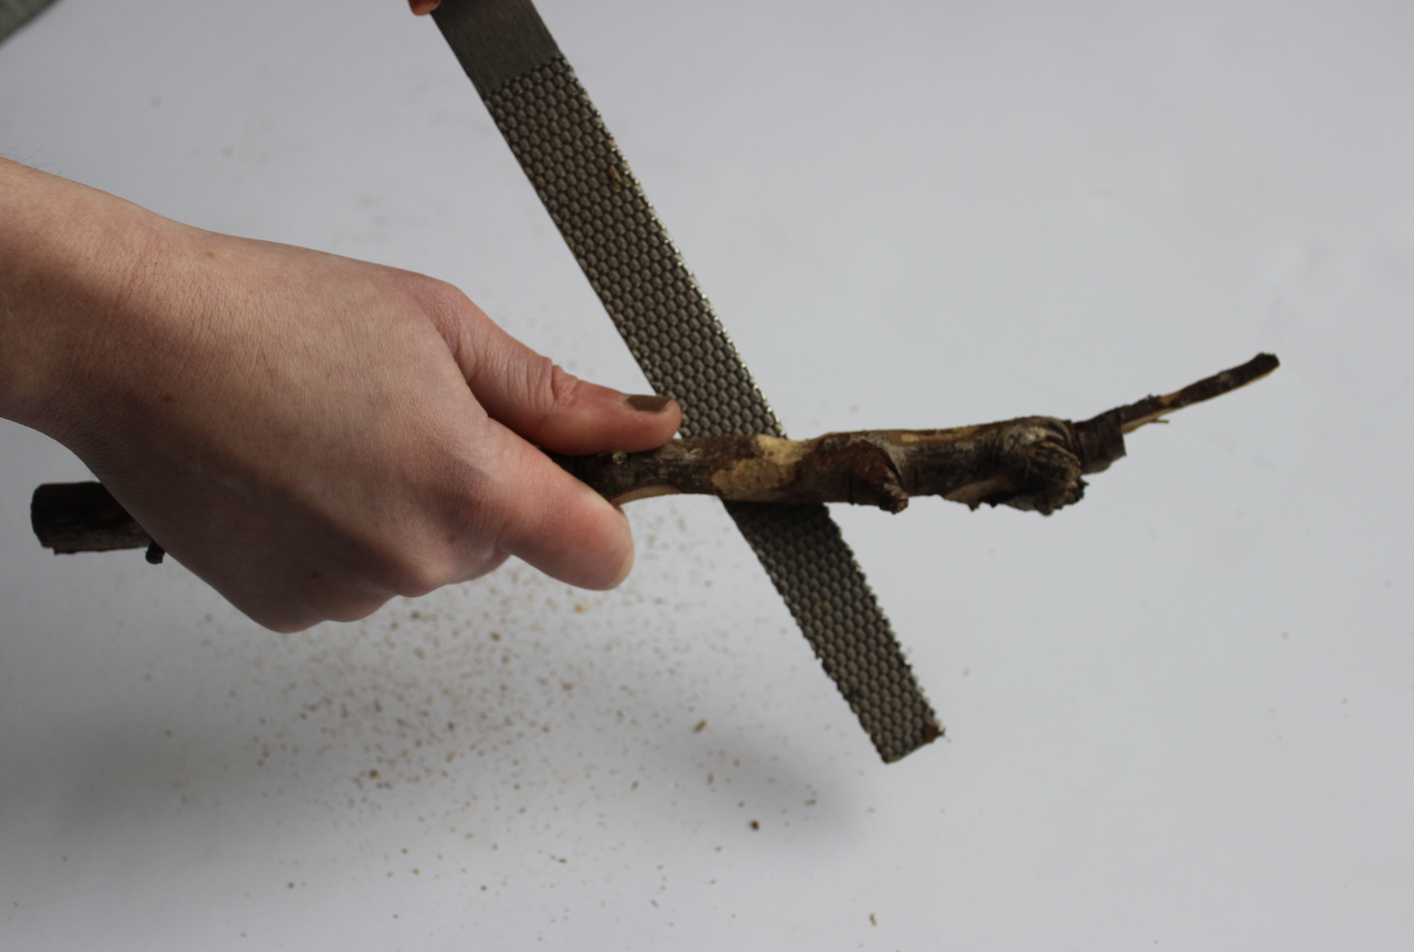
01 Creating Sawdust from the wood thinnings

01 Collecting the timber industry waste

02 Grinding it down furthur
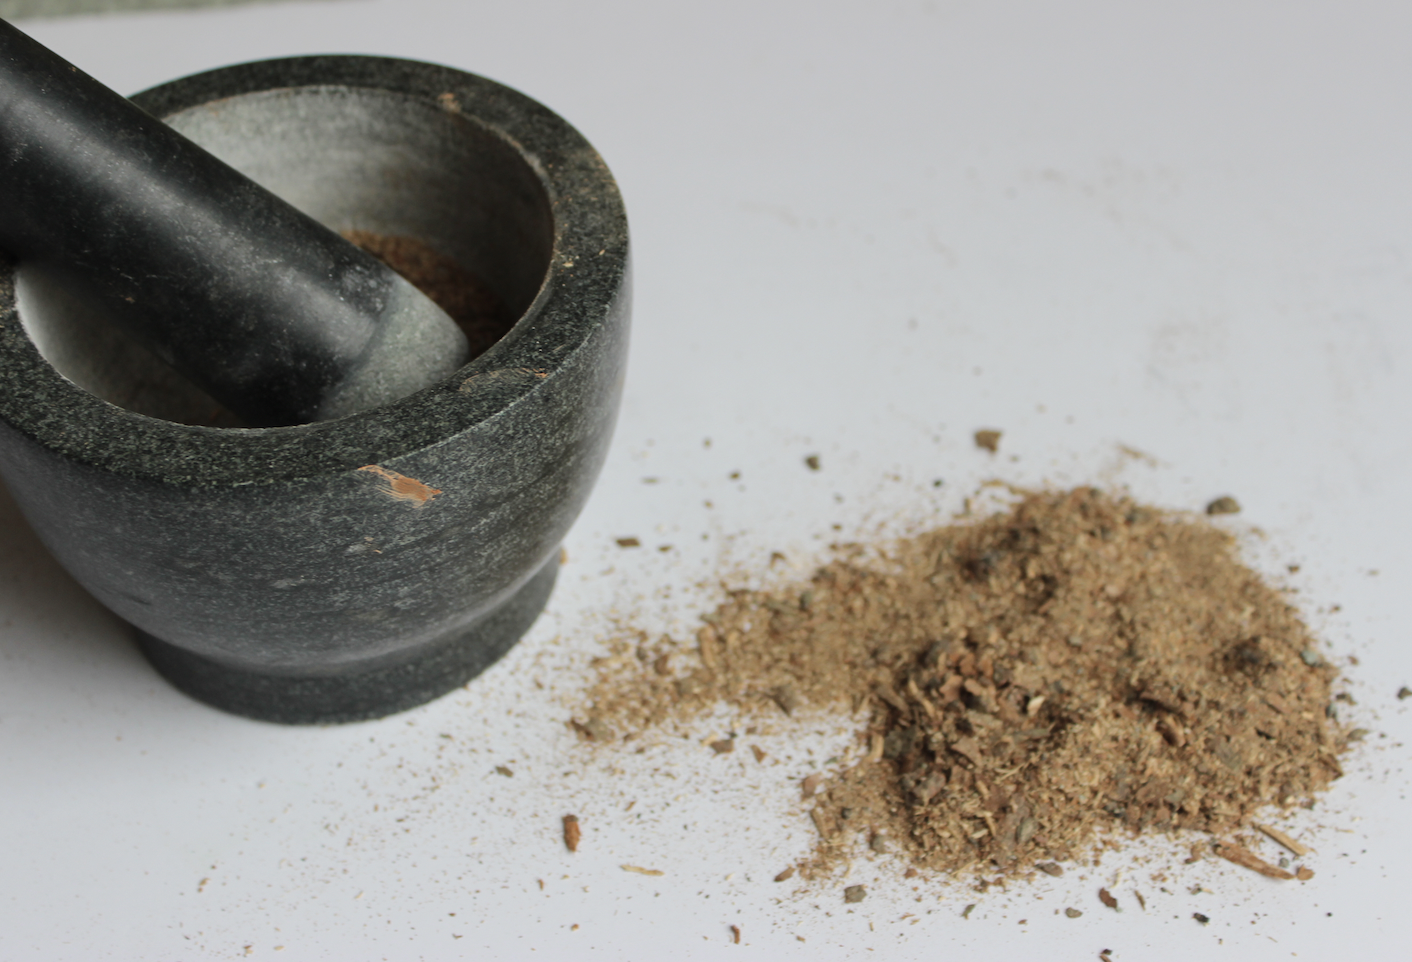
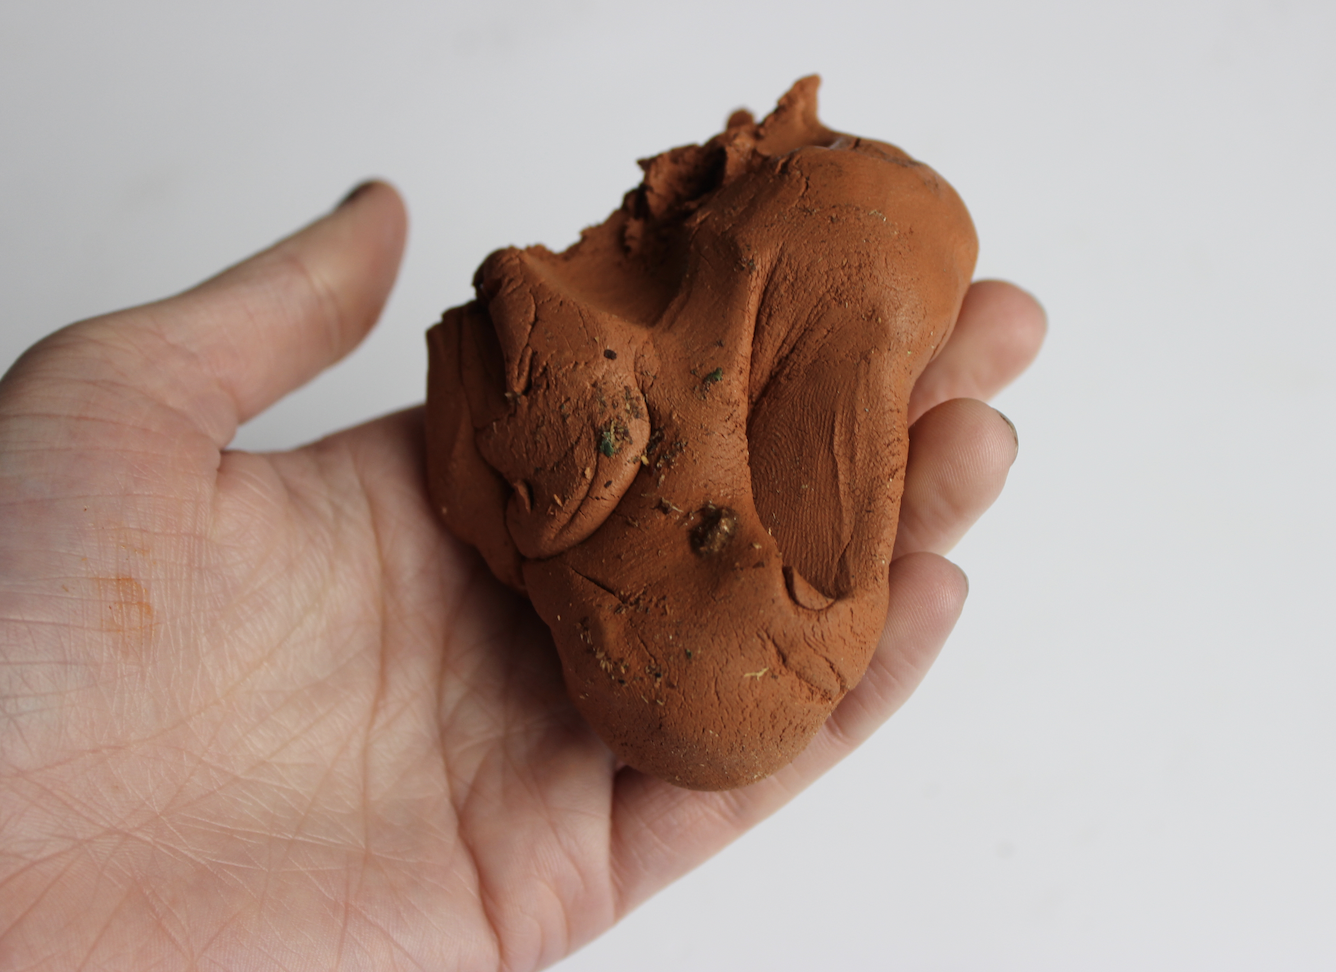
03 Obtain the natural clay from filtering stream bed (separate process)

04 Mix wood + clay
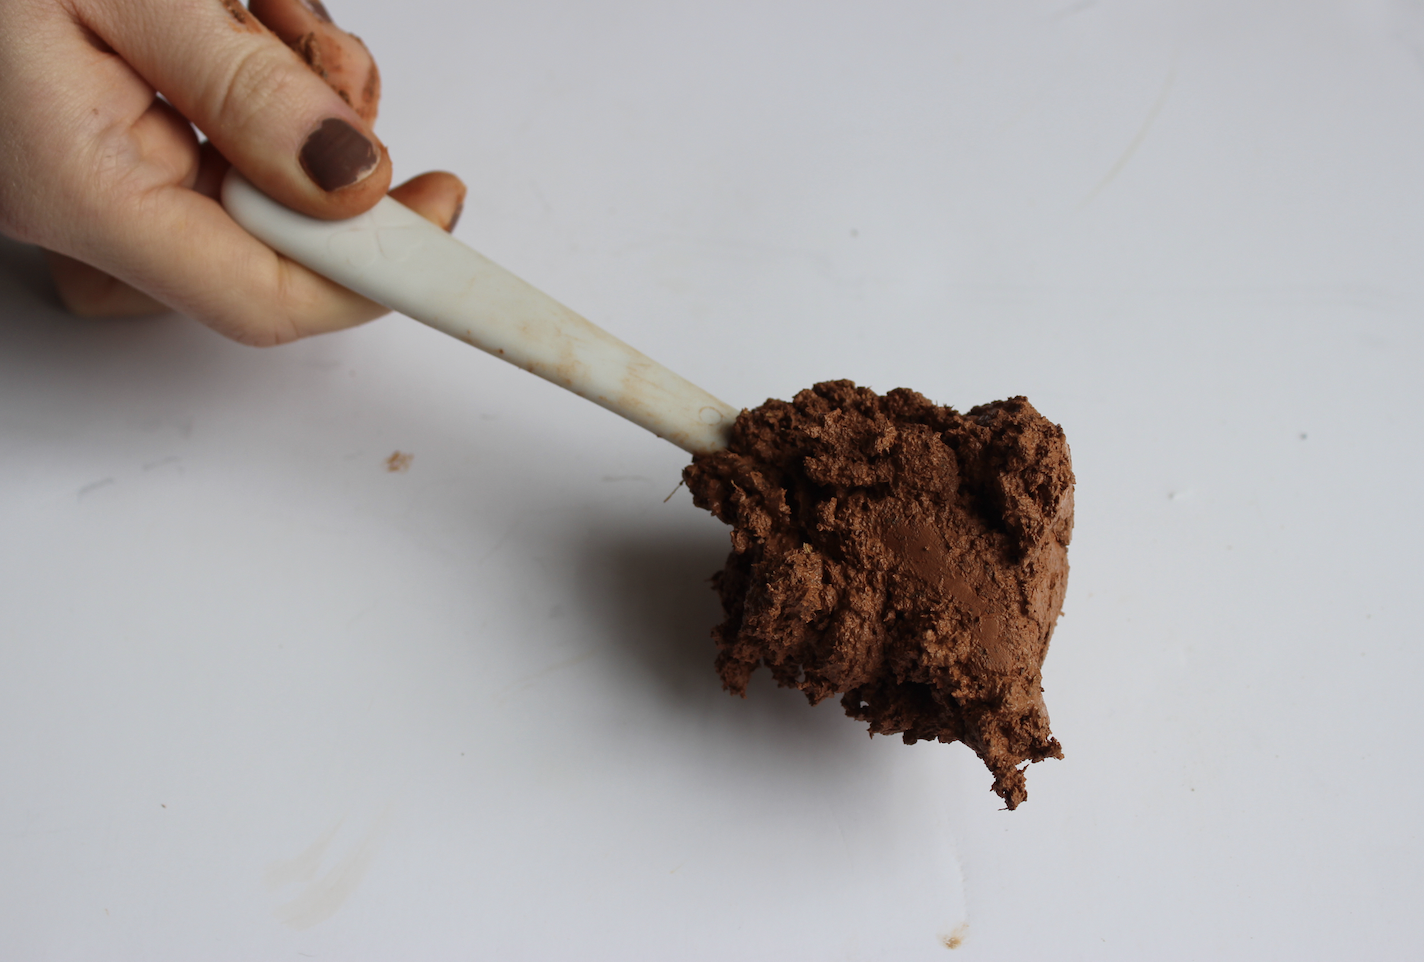
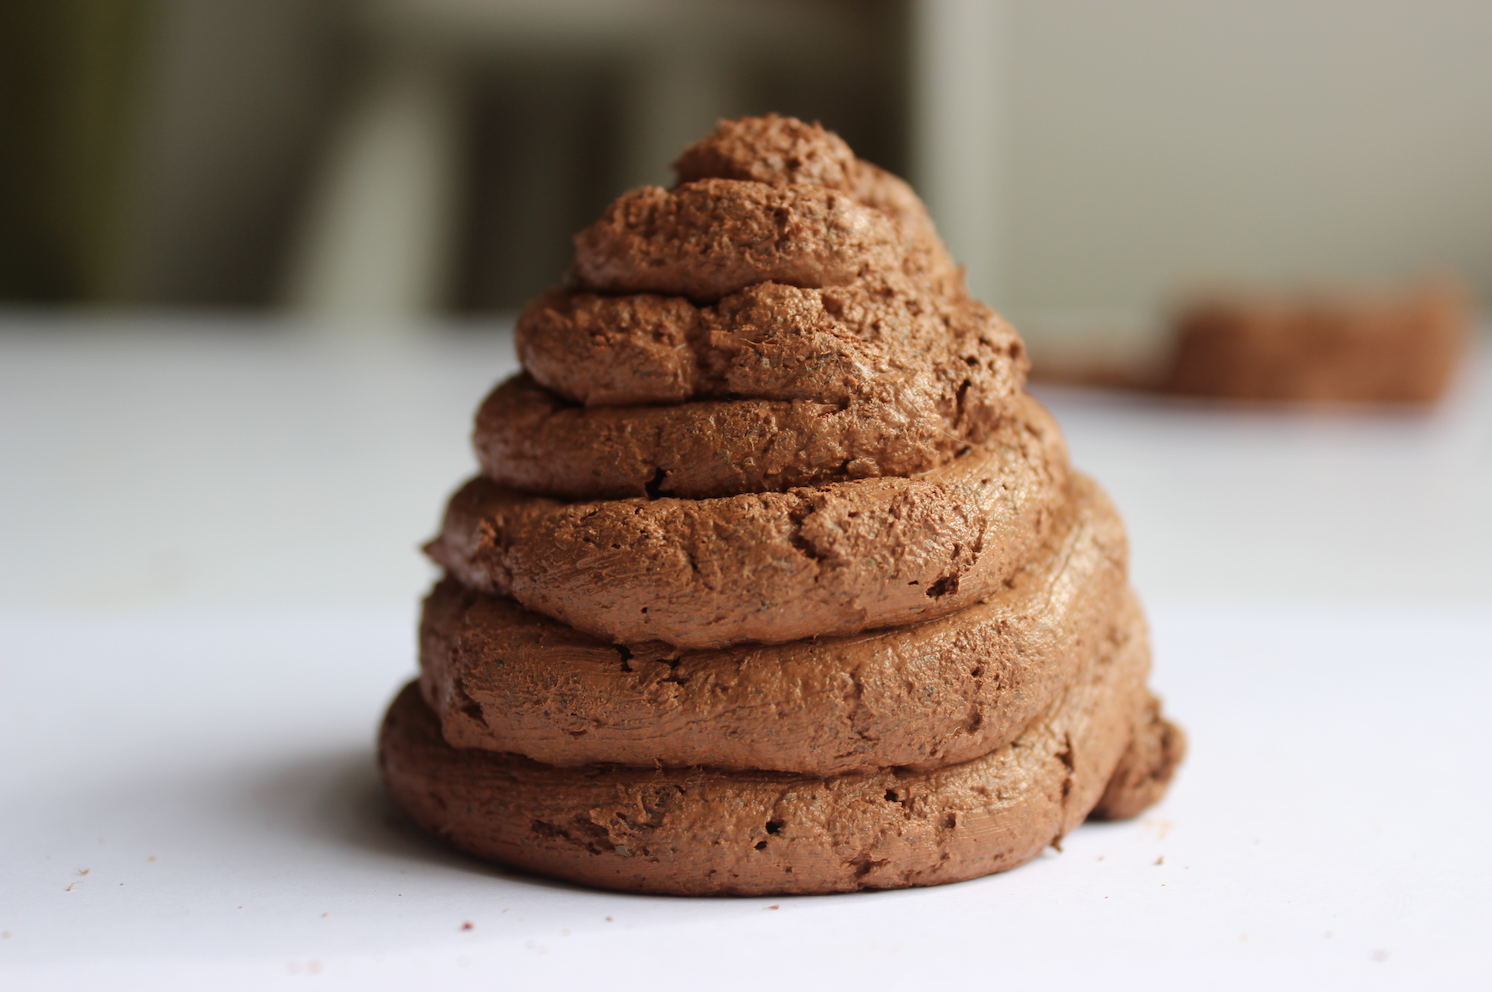

05 Fill gun with mixture and extrude

06 Let dry for a day
Prototyping process
Creating the pod design


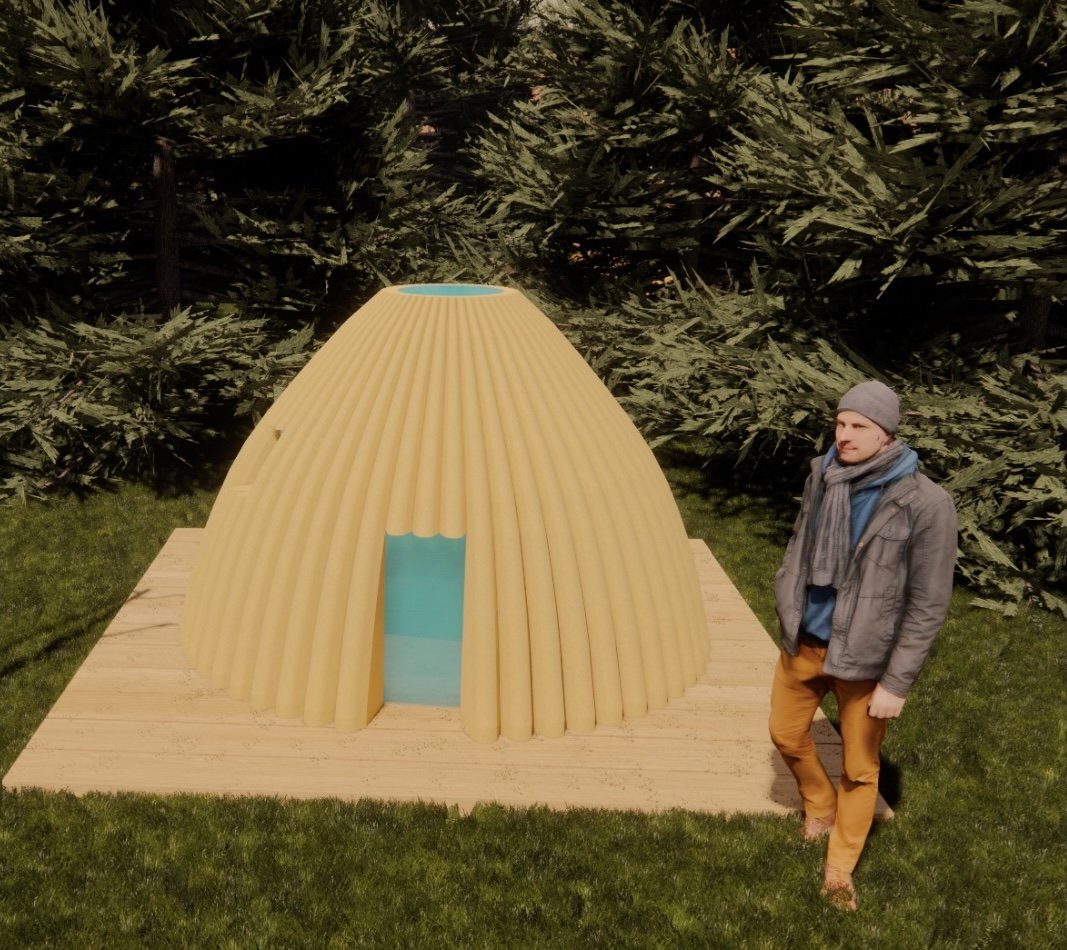
SketchUp models of pods
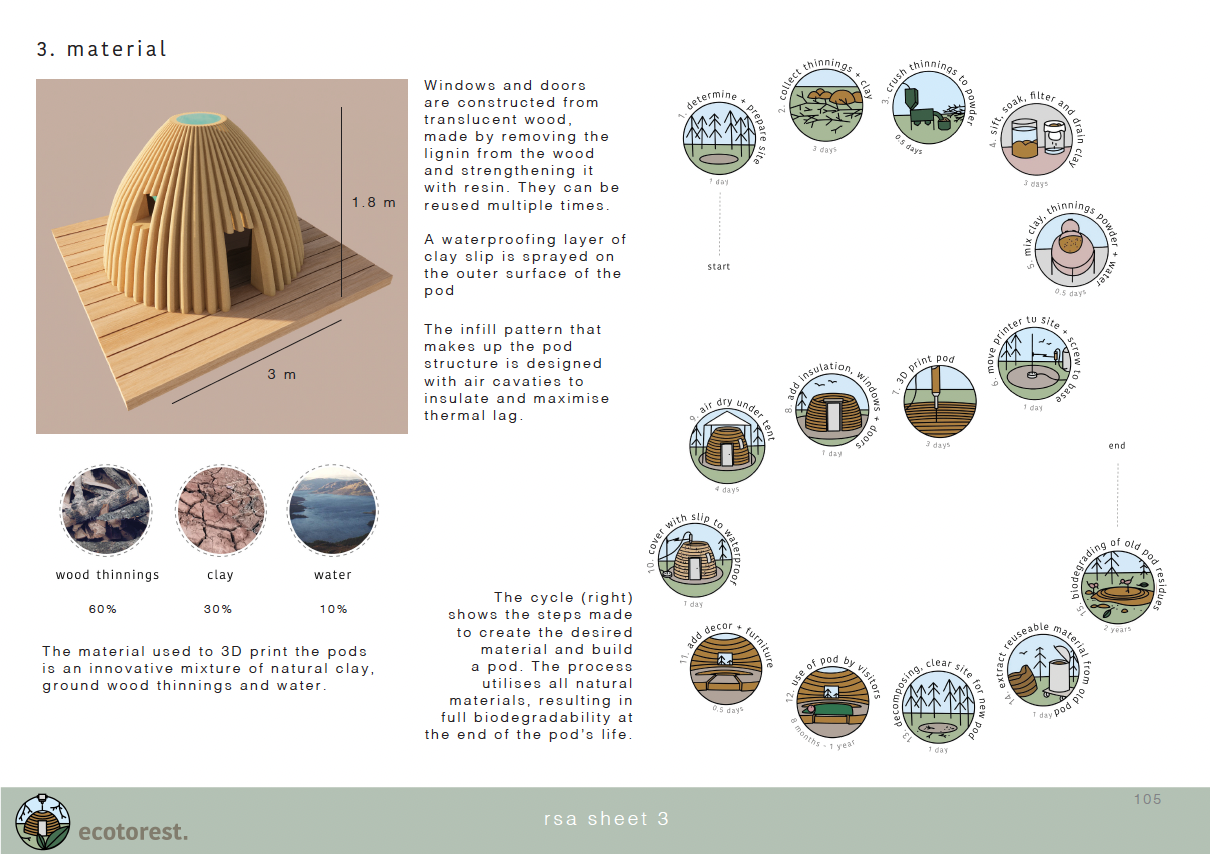
The render of the pod design in SketchUp. Translucent wood is used for the skylight, door and window to allow light in. It is made by taking the lignin out of the wood and replacing it with a polymer. It takes a lot less energy and expense than glass to make and is much lighter. They can be reused once the pod has degraded.


Pod user cycle


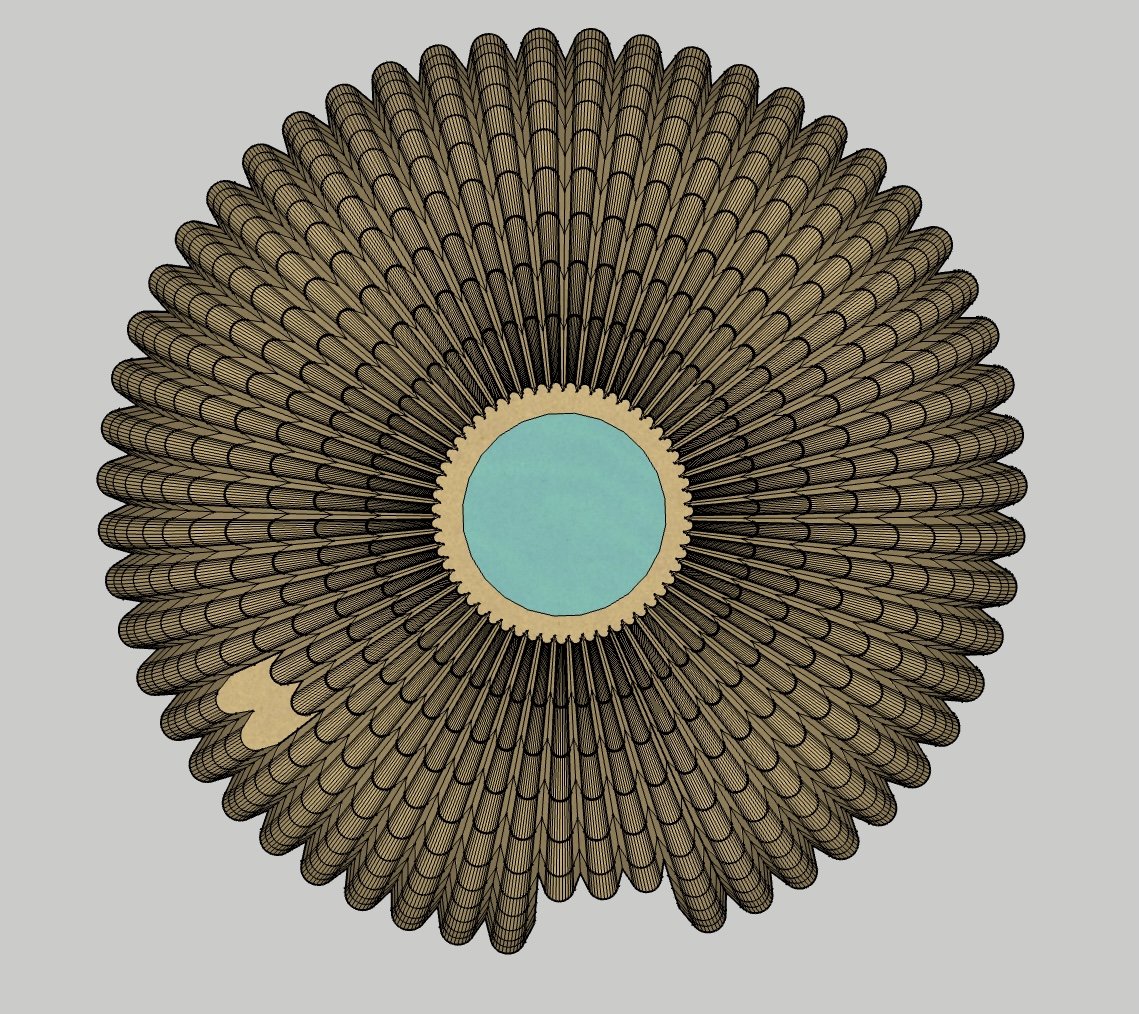
The infill pattern design was important for the sturdiness and insulation of the pod. We decided on a petal-like pattern to increase thermal insulation in the winter and be self-shading in the summer. This pattern had been used on a similar project and was able to be printed easily by a robotic arm 3D printer.


To design the camping pods we used paper to visualise different pod arrangements and how they’d fit in the pods.

Printer scale-up
In order the create the pods on site, we would need to adapt the 3D printer to create a large structure. We took inspiration from the SCARA (robotic arm) 3D printer, that was used for similar projects.


Business case


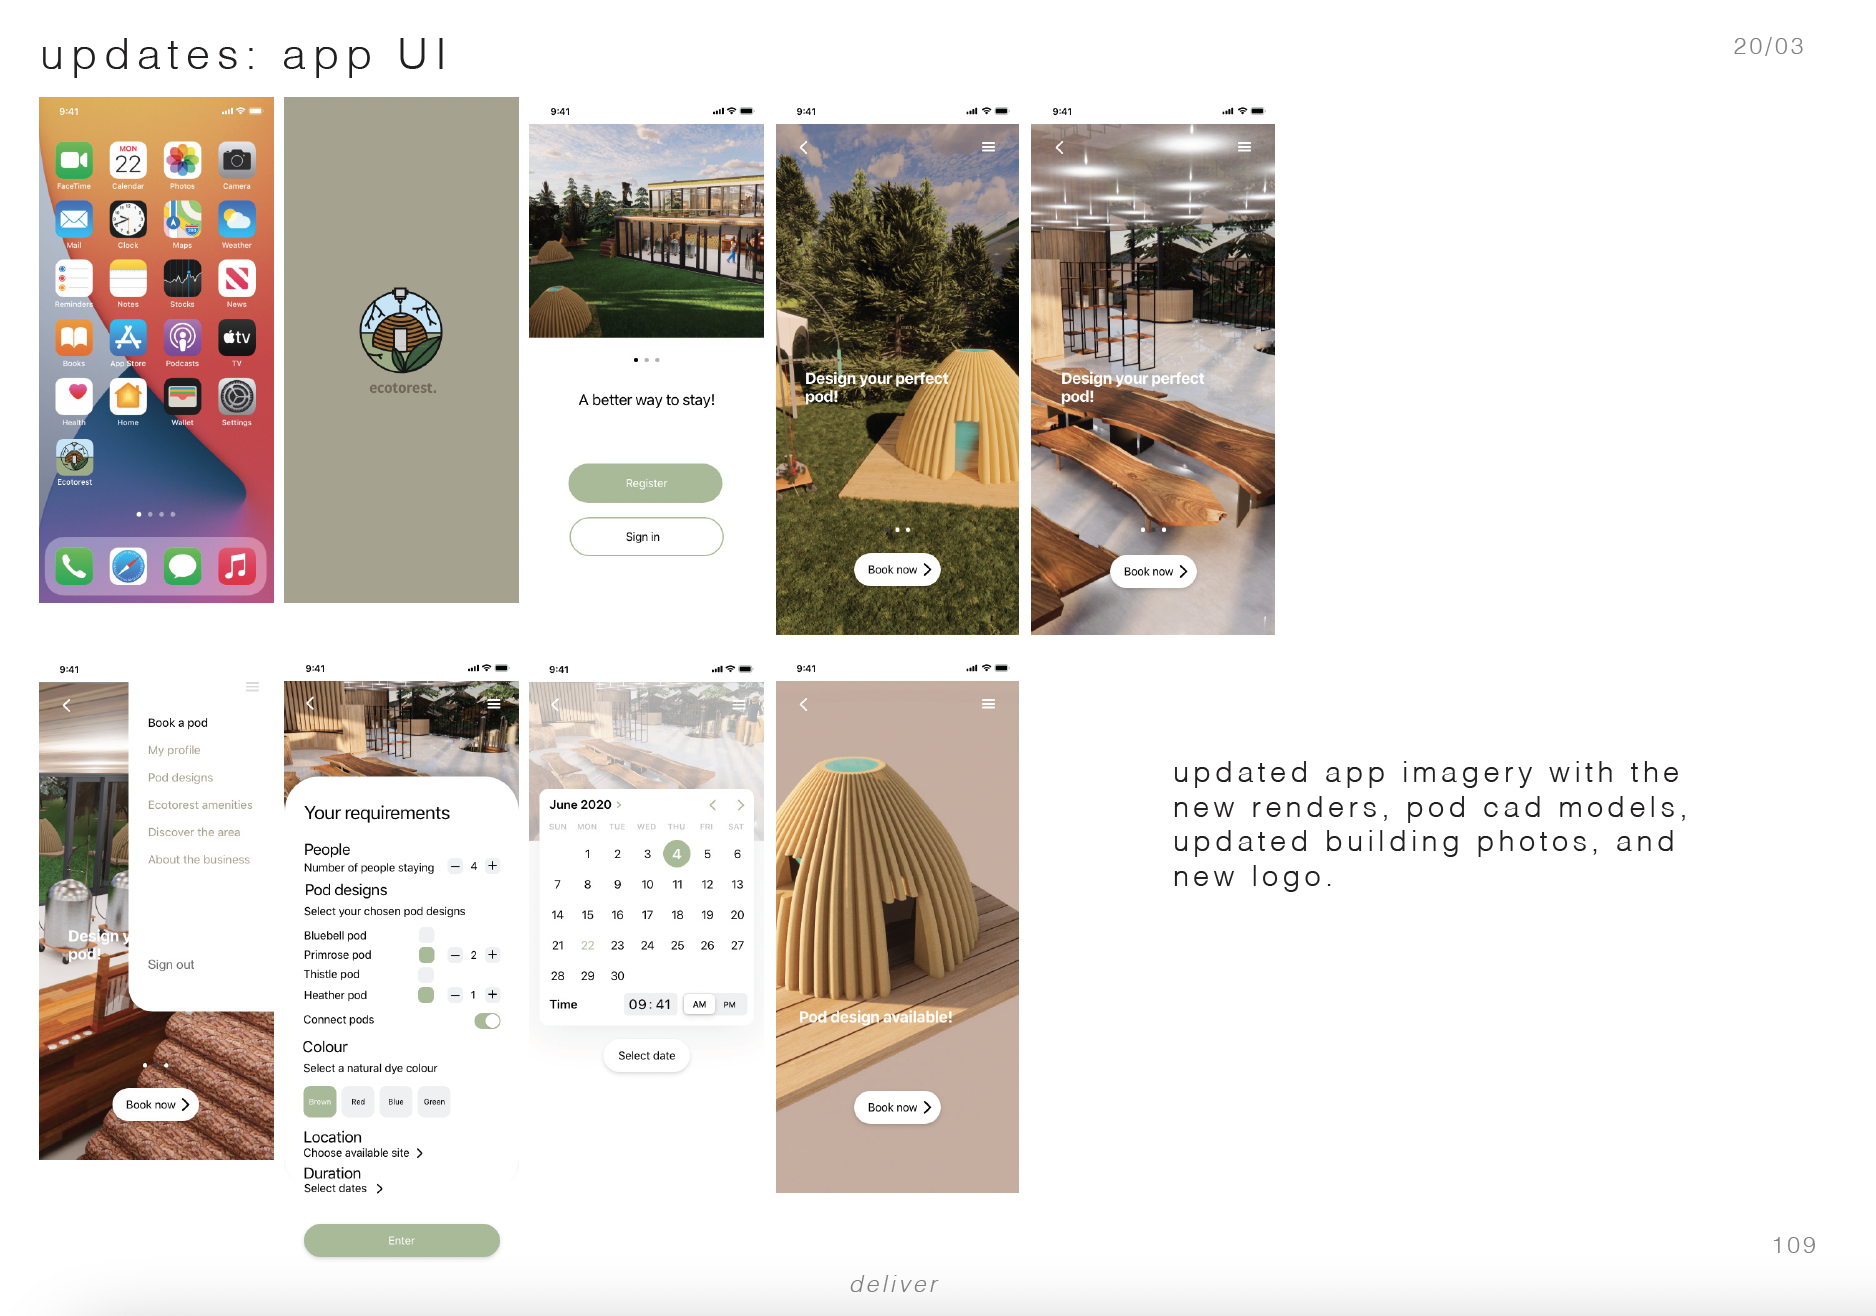
A large part of our business proposal is the ability for visitors to customise their own pod topologies. This, in turn, allows the guests to become more engaged in the pod production process and the wood 3d printing technology. There is a choice between four main pods designs. Further decisions like colour, pod connections (for larger visiting group sizes) and site location can be made. The design of the pods can be done on the app before arrival.
Obviously there was only a finite amount of pods that could be constructed so guests could stay in an existing pod for a cheaper price. The pods could be designed at the beginning of the season after the old ones had degraded.

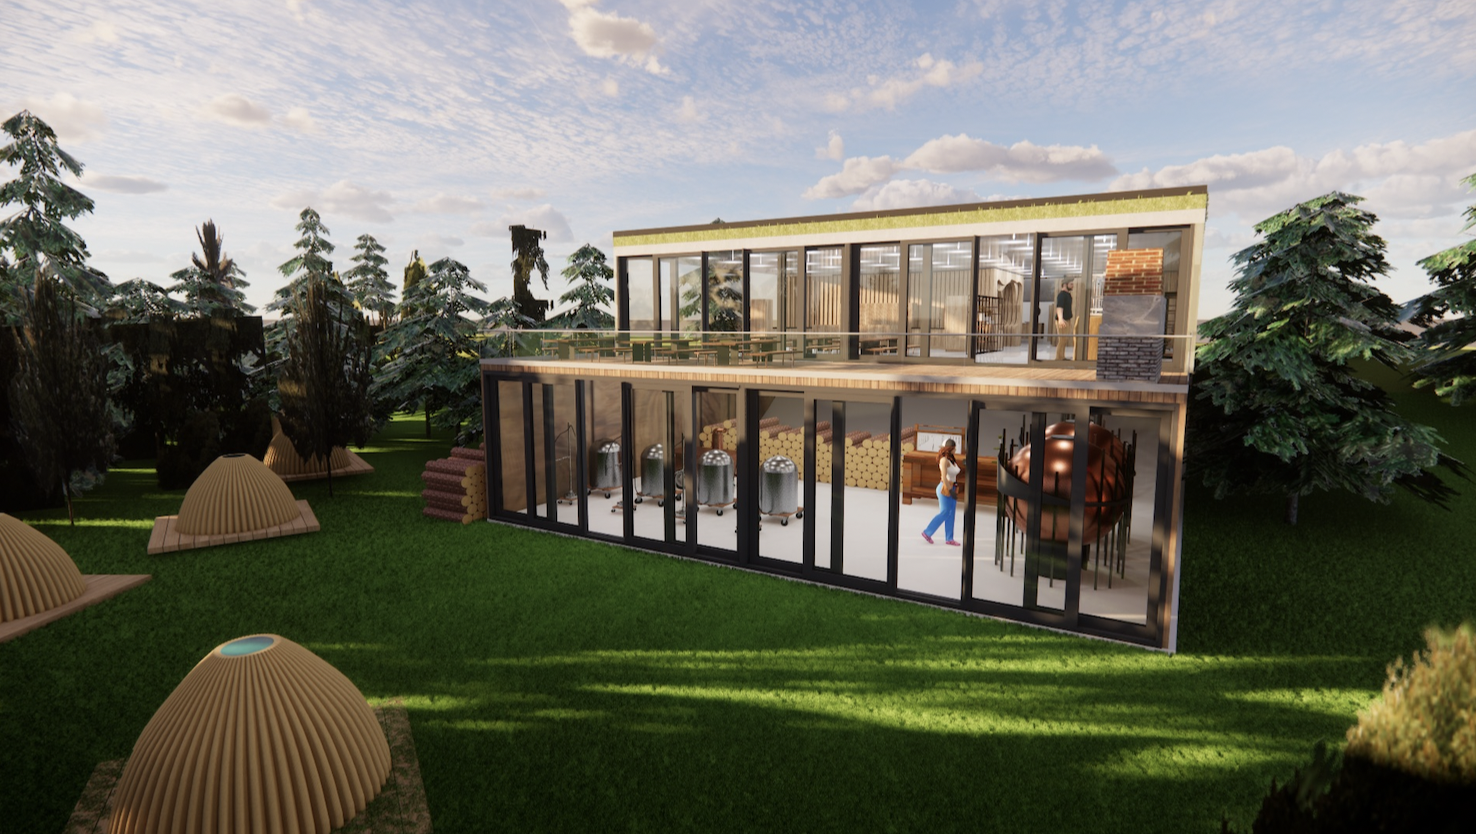
Site design


It was important to consider the topographies of the area and the natural features to make the project viable. We needed a central building to create the material, educate the guests on the forest and have cooking and washing facilities. as well as having ample space to make the pods.
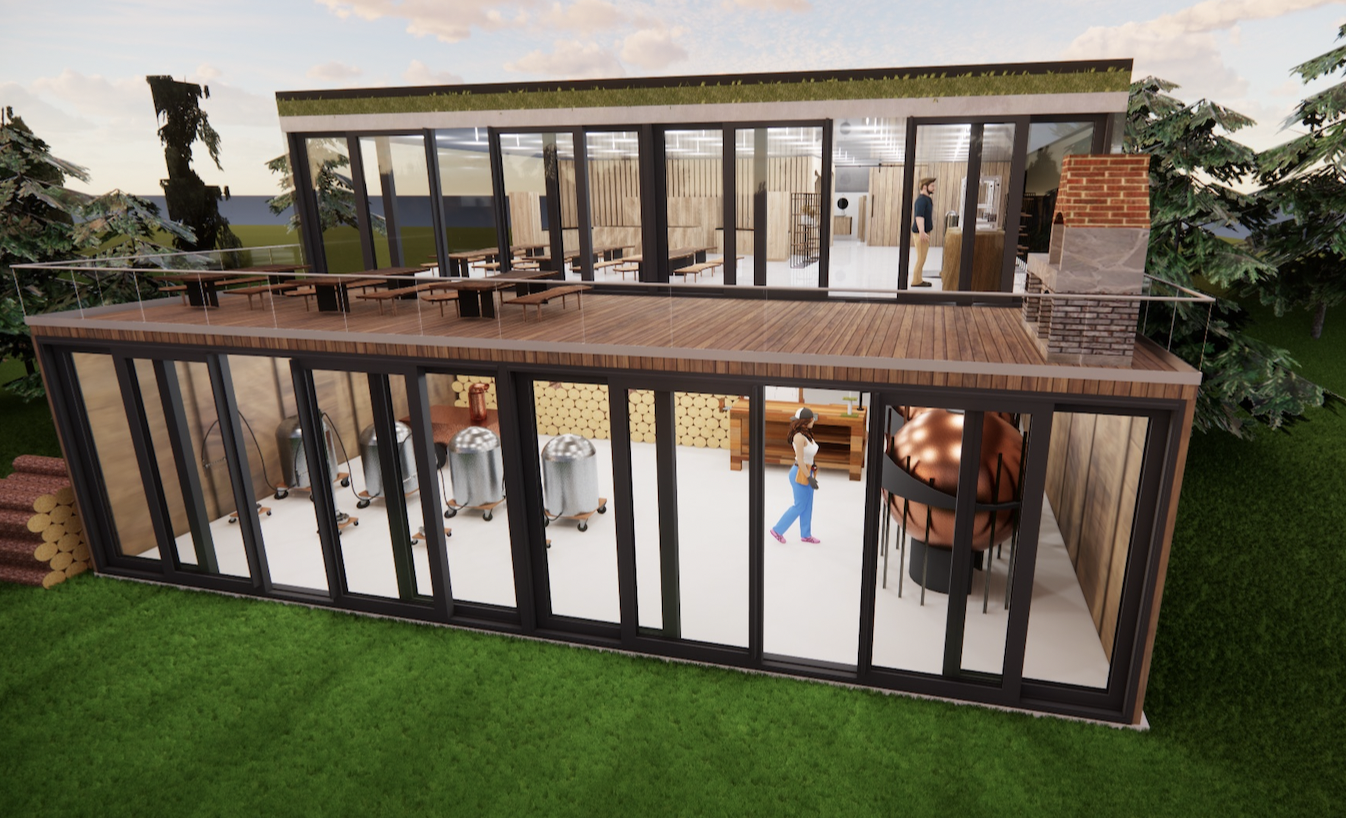
Central building design
Created on SketchUp and rendered on Enscape.


Reception
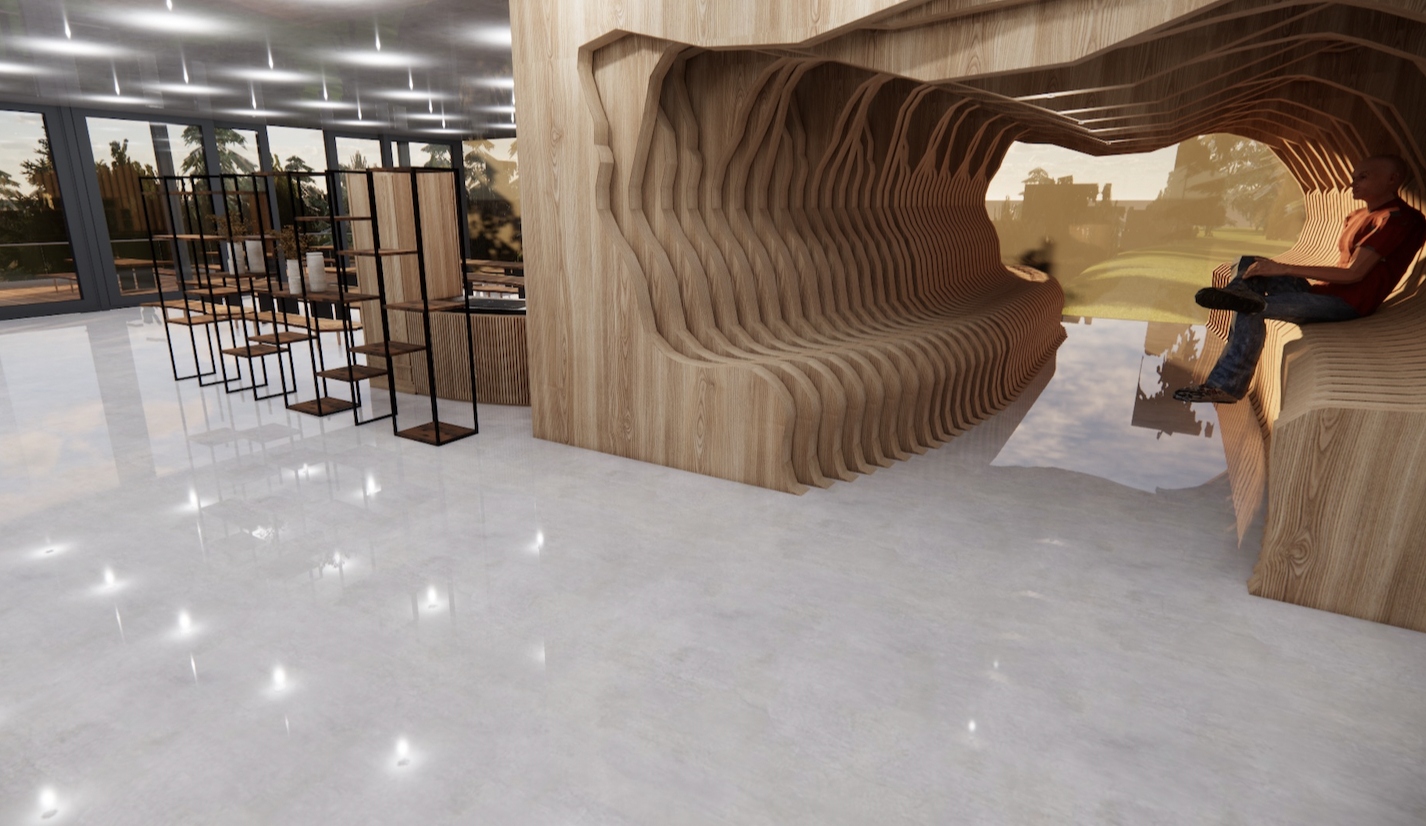
Relaxing tunnel
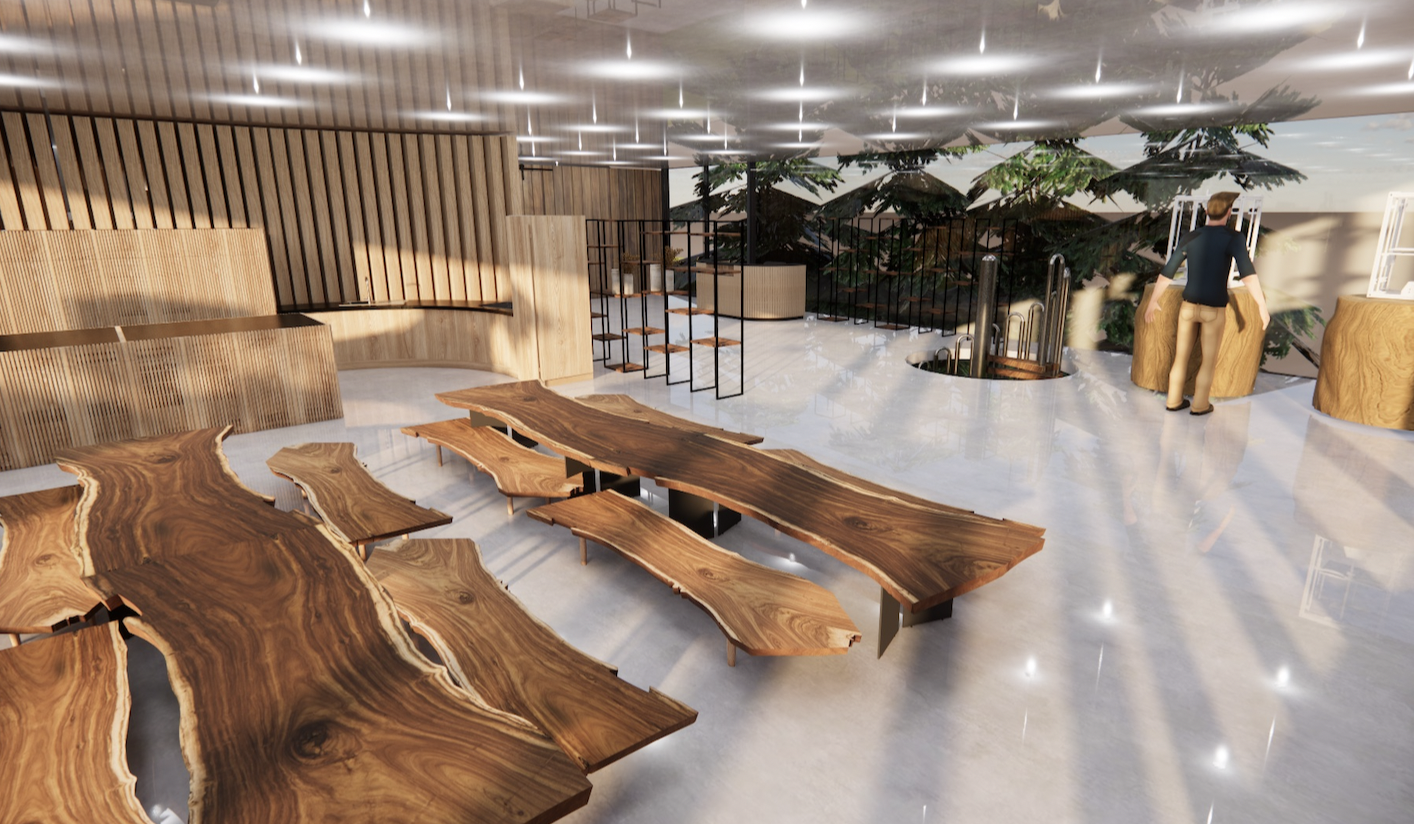
Kitchen + dining + education areas
Outdoor view
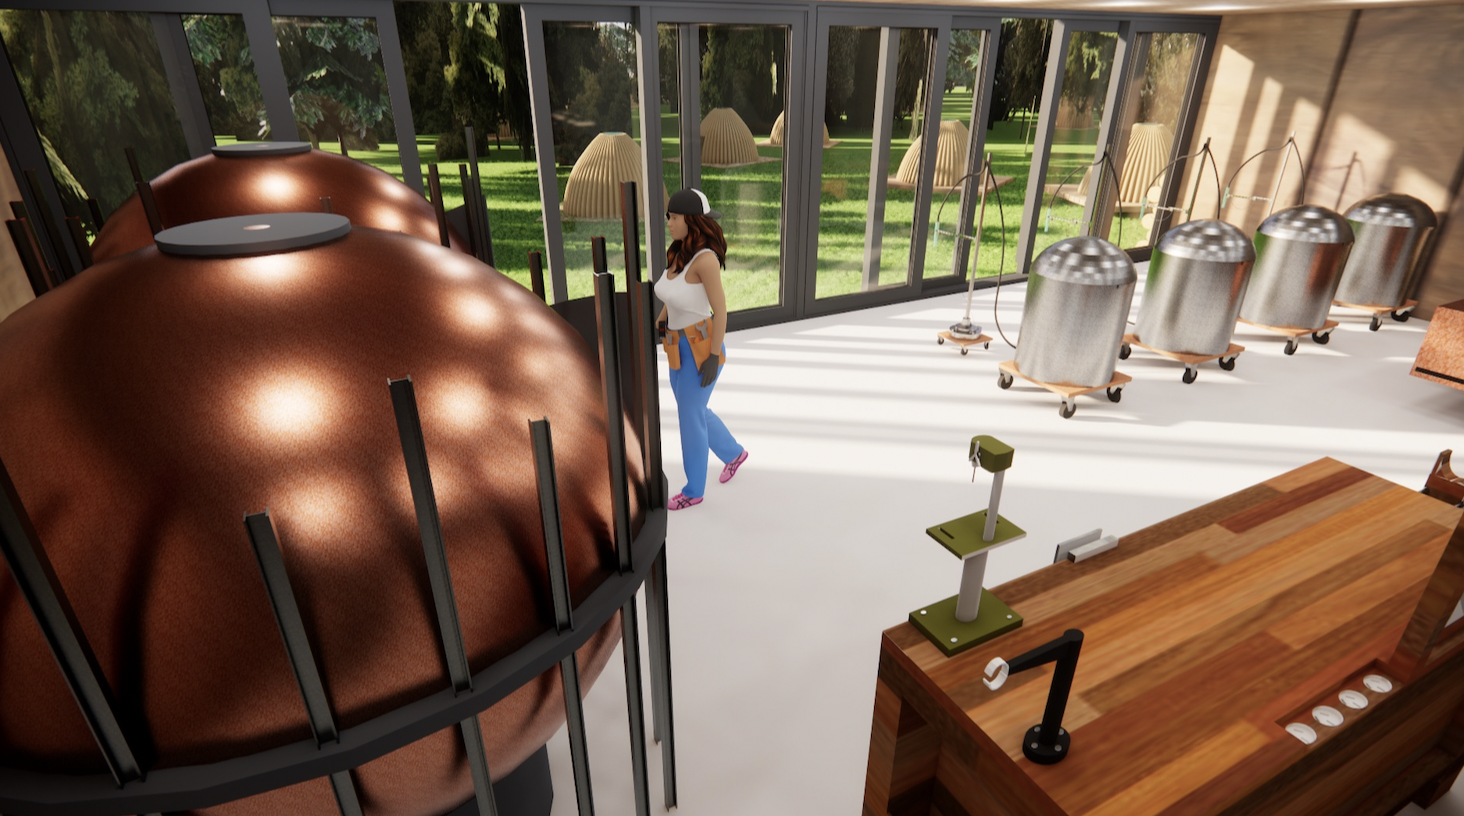
Workshop
App UI/UX + Branding


For the users to design their own pods at the beginning of the season we designed the aesthetics of an app to give them pod options and to book their stay.